Blog

  • Interior Design in North Shore Chicago: Planning a Home That Fits Its Setting

    Interior Design in North Shore Chicago: Planning a Home That Fits Its Setting

    When you own a home in Winnetka, Evanston, or Lake Forest, the design questions start before any furniture is chosen. A 1920s Colonial with a paneled library, a mid-century house with original cedar ceilings, or a newer build on a deep wooded lot each comes with rules the rooms should follow. Pieces that look right in a showroom can feel wrong once they sit beside original trim, a long view to the lake, or a grandparent’s sideboard.

    Interior design in North Shore Chicago works best when you plan the whole house around its architecture, its lot, and the pieces you intend to keep, with one partner responsible from first drawing to final install. Housing varies a great deal from town to town, but many homes here have more rooms, more original detail, or a closer tie to their landscape than a typical city condo. That gives your designer more to coordinate: more rooms, more custom work, and more trades.

    Read on to see how the style of your house should guide new work and where space planning should begin. Later sections cover when custom millwork earns its cost, how a full-service project stays on schedule, and how to compare firms on what they will deliver and who answers for it.

    How Do North Shore Homes Shape the Design Brief?

    Your house shapes the design brief more than any trend does. The age, style, and setting of the home set the limits and the openings for every room. A good brief records those facts first, then layers your goals on top.

    What Makes Interior Design in North Shore Chicago Different?

    Scale is often the first difference. Many North Shore homes, though far from all, have more rooms, taller ceilings, and longer sight lines than a city two-flat or condo. A sofa that fills a Lincoln Park living room can look lost in a Kenilworth great room. Furniture, rugs, and lighting all need to be sized to the room, not to a catalog photo.

    Age is the second. Many towns here grew in waves, so one street can hold a Tudor, a Colonial, and a 1960s ranch. Many of Lake Forest’s early twentieth-century country houses, for example, were planned around household staff. Those plans often include back halls, butler’s pantries, and service wings that now need new jobs.

    Good residential interior design here starts with what the house already does well. Then it fixes what no longer fits how you live. A former maid’s room might become a mudroom; a formal parlor might become a library with built-in shelving.

    How Should Prairie, Colonial, and Mid-Century Details Guide New Work?

    Each style gives you a different set of rules. Follow them, and new work looks like it belongs. Ignore them, and even expensive finishes look added on.

    • Prairie homes stress long horizontal lines, wood detailing, built-ins, and art glass. New cabinetry should carry those horizontal bands and keep trim heights aligned across a room.
    • Colonial and Georgian homes rely on symmetry and classical trim. Centered openings, paired sconces, and paneled doors keep new rooms in step with the original plan.
    • Mid-century homes use open plans, warm wood, and big glass. Clean slab fronts and low built-ins suit them, and light fixtures should avoid crowding original ceilings.

    The Willits House in Highland Park shows how deep this goes. Frank Lloyd Wright designed its furniture along with its built-in cabinetry and seating. In a Prairie-influenced home, the millwork is part of the architecture. That is why trim profiles, wood species, and stain colors should be decided together, early.

    How Do Estate Lots and Waterfront Homes Connect Interiors to the Outdoors?

    Big lots and waterfront homes ask you to design for the view and for the light it brings. A wall of windows facing the lake changes where you can place art, screens, and dark wood. Morning glare off the water can wash out a television or fade upholstery over time.

    Plan furniture around the view first, then add window treatments that control light without blocking the scene. Material choices follow from this. Floors near terrace doors take wet shoes and sand, so durable stone or tile may serve better than soft wood in that zone.

    This link between inside and outside is a matter of interior architecture. Sight lines through a house, the height of window sills, and where a hallway opens to a garden all affect the feel of each room. Work them out with your architect or landscape designer before finishes are locked.

    Planning Across a Larger Home

    A larger home needs a whole-house plan before any single room is designed. When rooms are planned one at a time, colors drift, trim changes, and furniture ends up in the wrong place. Full-service planning keeps every room tied to one set of decisions, an idea this guide to whole-home design explores in more depth.

    Where Should Space Planning Begin?

    Start with how you move through the house each day. Trace the path from garage to kitchen, from bedrooms to laundry, and from front door to the rooms guests use. Those routes tell you where storage, seating, and lighting should go.

    Next, map which rooms do which jobs. Older homes in particular can have formal rooms that sit empty and service areas that are too small. A space plan shows where to borrow square footage, such as turning a little-used dining room into a family office.

    Plan the kitchen early too, since it touches so many other rooms. A kitchen remodel often moves walls, plumbing, and doorways, and each of those moves shifts the plan for the rooms around it.

    How Can New Rooms Accommodate Heirlooms Without Feeling Staged?

    Measure and photograph your heirlooms before the design starts. A long walnut sideboard, a grand piano, or a set of family portraits needs a planned wall, not a leftover corner. When the plan includes them from day one, they look chosen.

    Mix eras on purpose. Pair an antique dresser with a simple modern lamp, or set a traditional rug under clean-lined chairs. This contrast keeps a room from looking like a period set.

    Think about care, too. Fine old wood needs distance from heat vents and direct sun. That can change where a sofa sits or which wall gets the art.

    Which Decisions Need Space Plans, Elevations, and an Itemized Budget?

    Some choices are too costly to make by eye. These are the moments to ask for drawings and numbers:

    • Space plans for furniture layout, traffic paths, and any wall changes
    • Elevations for built-ins, fireplace walls, kitchen runs, and paneled rooms, showing heights and trim lines
    • An itemized budget for each room, so you can see where money goes and trade one line for another
    • Material selections gathered in one place, so stone, wood, and fabric are judged together

    Elevations matter most where millwork meets windows, outlets, or vents. A drawing catches the clash before a cabinet is built six inches too wide. An itemized budget also lets you phase the work, such as finishing main rooms now and bedrooms next year.

    When Does Custom Millwork Matter?

    Custom millwork earns its cost when your rooms have odd sizes, strong period details, or storage needs stock cabinets cannot meet. Older North Shore houses often have all three: walls that are rarely straight, ceilings that vary, and trim profiles unique to the house.

    Cabinetry That Fits the Architecture and the Way Rooms Are Used

    Custom cabinetry can match an original crown molding, follow a curved wall, or fill a ceiling to the inch. Stock boxes come in set widths, so they leave filler strips and dead gaps. In a paneled library or a Prairie dining room, those gaps stand out.

    Fit also means use. A family that cooks daily needs deep drawers near the range and a hidden spot for small appliances. A mudroom needs lockers sized for boots, sports gear, and wet coats. Many of these pieces are custom built-ins drawn around one family’s routine.

    Style follows the house. A Colonial may call for inset doors and a classic painted kitchen, while a mid-century home suits flat walnut fronts. Choosing profiles that respect the original architecture is a design decision, not a catalog one.

    Why Fabrication Details Should Be Resolved Before Construction

    Millwork details affect walls, wiring, and plumbing, so they must be set before those trades finish. Where does the outlet go inside the coffee station? How deep is the wall for a recessed bookcase? Is there blocking behind the drywall to hold heavy upper cabinets?

    When these answers come late, crews open finished walls or move outlets twice. Fabrication drawings settle them first. They list exact sizes, hardware, finishes, and how each piece meets the floor and ceiling.

    A designer who also builds the custom millwork shortens the distance between drawing and shop. The same people who drew the cabinet answer the installer’s questions about it.

    How Does a Full-Service Project Stay Coordinated?

    A full-service project stays coordinated when one team owns the schedule, the orders, and the site from start to finish. That team keeps designers, vendors, and trades working from the same plan. You make decisions; they handle the hand-offs.

    From Design Approvals to Procurement and Scheduling

    Ordering starts once you approve the drawings and selections. Custom sofas, stone slabs, lighting, and cabinetry each have their own lead times. A full-service team orders in the right sequence so long-lead items arrive when the site is ready.

    The schedule ties these orders to the trades. Electricians need fixture specs before rough-in. Stone fabricators need cabinets installed before they template. One late decision can hold up three crews, so your designer should flag those dates early. Ask any firm to show you a sample project schedule and who updates it.

    What Happens During Installation and Final Coordination?

    Installation is where many pieces arrive at once and small problems surface. A cabinet may meet an uneven floor, or a chandelier may need a stronger mount. The design team resolves these on site so the work keeps moving.

    Final coordination covers the last layer: hardware, window treatments, art hanging, and rug placement. It also includes a walk-through to catch touch-ups. In a large home, this stage alone can involve dozens of deliveries and several trades.

    The goal is a house that feels finished on move-in day. That only happens when someone tracks every open item to the end.

    How Should You Compare Design Partners?

    Compare design partners by what they will deliver and who answers when something goes wrong. Style portfolios help, but scope and accountability decide how a large project goes. Ask each firm to describe its full process, not only its look. If you have never hired a designer, it helps to understand what working with an interior designer asks of you before the first interview.

    Decorator, Interior Designer, or Design-and-Fabrication Partner?

    Each type fits a different job:

    • A decorator focuses on furniture, fabrics, color, and accessories. This suits a refresh with no walls, cabinets, or trades involved.
    • An interior designer plans space, details finishes, and works with contractors. This suits remodels that change layouts or need code-aware planning.
    • A design-and-fabrication partner does the design work and also builds custom millwork in-house. This suits homes that need built-ins, kitchens, or paneled rooms made to fit.

    The difference shows up in custom work. A decorator usually relies on outside shops to interpret the drawings. A design-and-fabrication partner draws, builds, and installs, so a mistake has one owner.

    Credentials are worth asking about, with the right expectations. Illinois’s Registered Interior Designers Act protects the title “registered interior designer.” It does not license the practice of interior design itself, and it does not require a registered designer for work on a single-family home. A registration tells you about training and examination; it does not tell you who will build your cabinets.

    Questions to Ask About Scope, Budget, and Accountability

    Bring these questions to each interview:

    1. Which phases do you handle: design, ordering, scheduling, and installation?
    2. Will I get space plans, elevations, an itemized budget, and material selections?
    3. How do you charge, and what does the fee cover?
    4. Who builds the custom millwork, and who fixes it if it does not fit?
    5. Who runs the site day to day, and how often will I get updates?
    6. Can I see finished work similar in scale to my home?

    Fee setups vary widely. Designers may charge a flat fee, an hourly rate, or cost plus a set markup, and many ask for a retainer up front. Know which model each firm uses before you compare totals.

    A North Shore House Tells You What It Needs

    North Shore homes reward a plan that starts with the house itself: its style, its lot, and the pieces you mean to keep. The hardest problems show up where design meets building, such as a cabinet that must match 1920s trim or a window wall that rearranges your layout. Those details belong in drawings long before anyone orders material.

    Full drawings, a clear budget, and early fabrication decisions slow the first months. In exchange, every trade works from one plan, and that is what keeps a large house on track when dozens of deliveries start arriving.

    If you are weighing a project of that size, Threshold Design Lab, a full-service design studio, would be glad to hear how you live in the house now, which rooms work, and which pieces are staying, before anyone draws a line.

    Frequently Asked Questions

    How much does an interior designer cost for a North Shore home?

    Cost depends on scope, the fee model, and how much custom work the home needs. Designers commonly charge a flat fee, an hourly rate, or cost plus a markup on goods, and antiques or custom pieces raise the total. An itemized budget makes it possible to compare firms line by line.

    Should you hire a designer before starting a renovation or new build?

    Yes, bring a designer in before construction drawings are final. Early input lets cabinetry, lighting, and outlets be planned into the walls instead of added later, and lets the plumbing and appliance layout be shaped before rough-in.

    Can an interior designer work with your existing architect and builder?

    Yes, a good designer works alongside the architect and builder from a shared set of drawings. The designer handles interior plans, millwork, finishes, and furnishings while the architect handles structure. Clear roles and one schedule keep the team from working at cross purposes.

    What is the difference between an interior decorator and a full-service designer?

    A decorator styles rooms with furniture, fabric, and accessories, while a full-service designer also plans space, manages orders, and oversees installation. Full-service firms with in-house fabrication can also build the custom millwork. That scope matters most in large homes with built-ins and remodels.

    How do you compare proposals from North Shore interior designers?

    Compare what each proposal includes, not only its price. Check for space plans, elevations, an itemized budget, ordering, scheduling, and installation oversight, and ask who builds and installs any custom pieces.
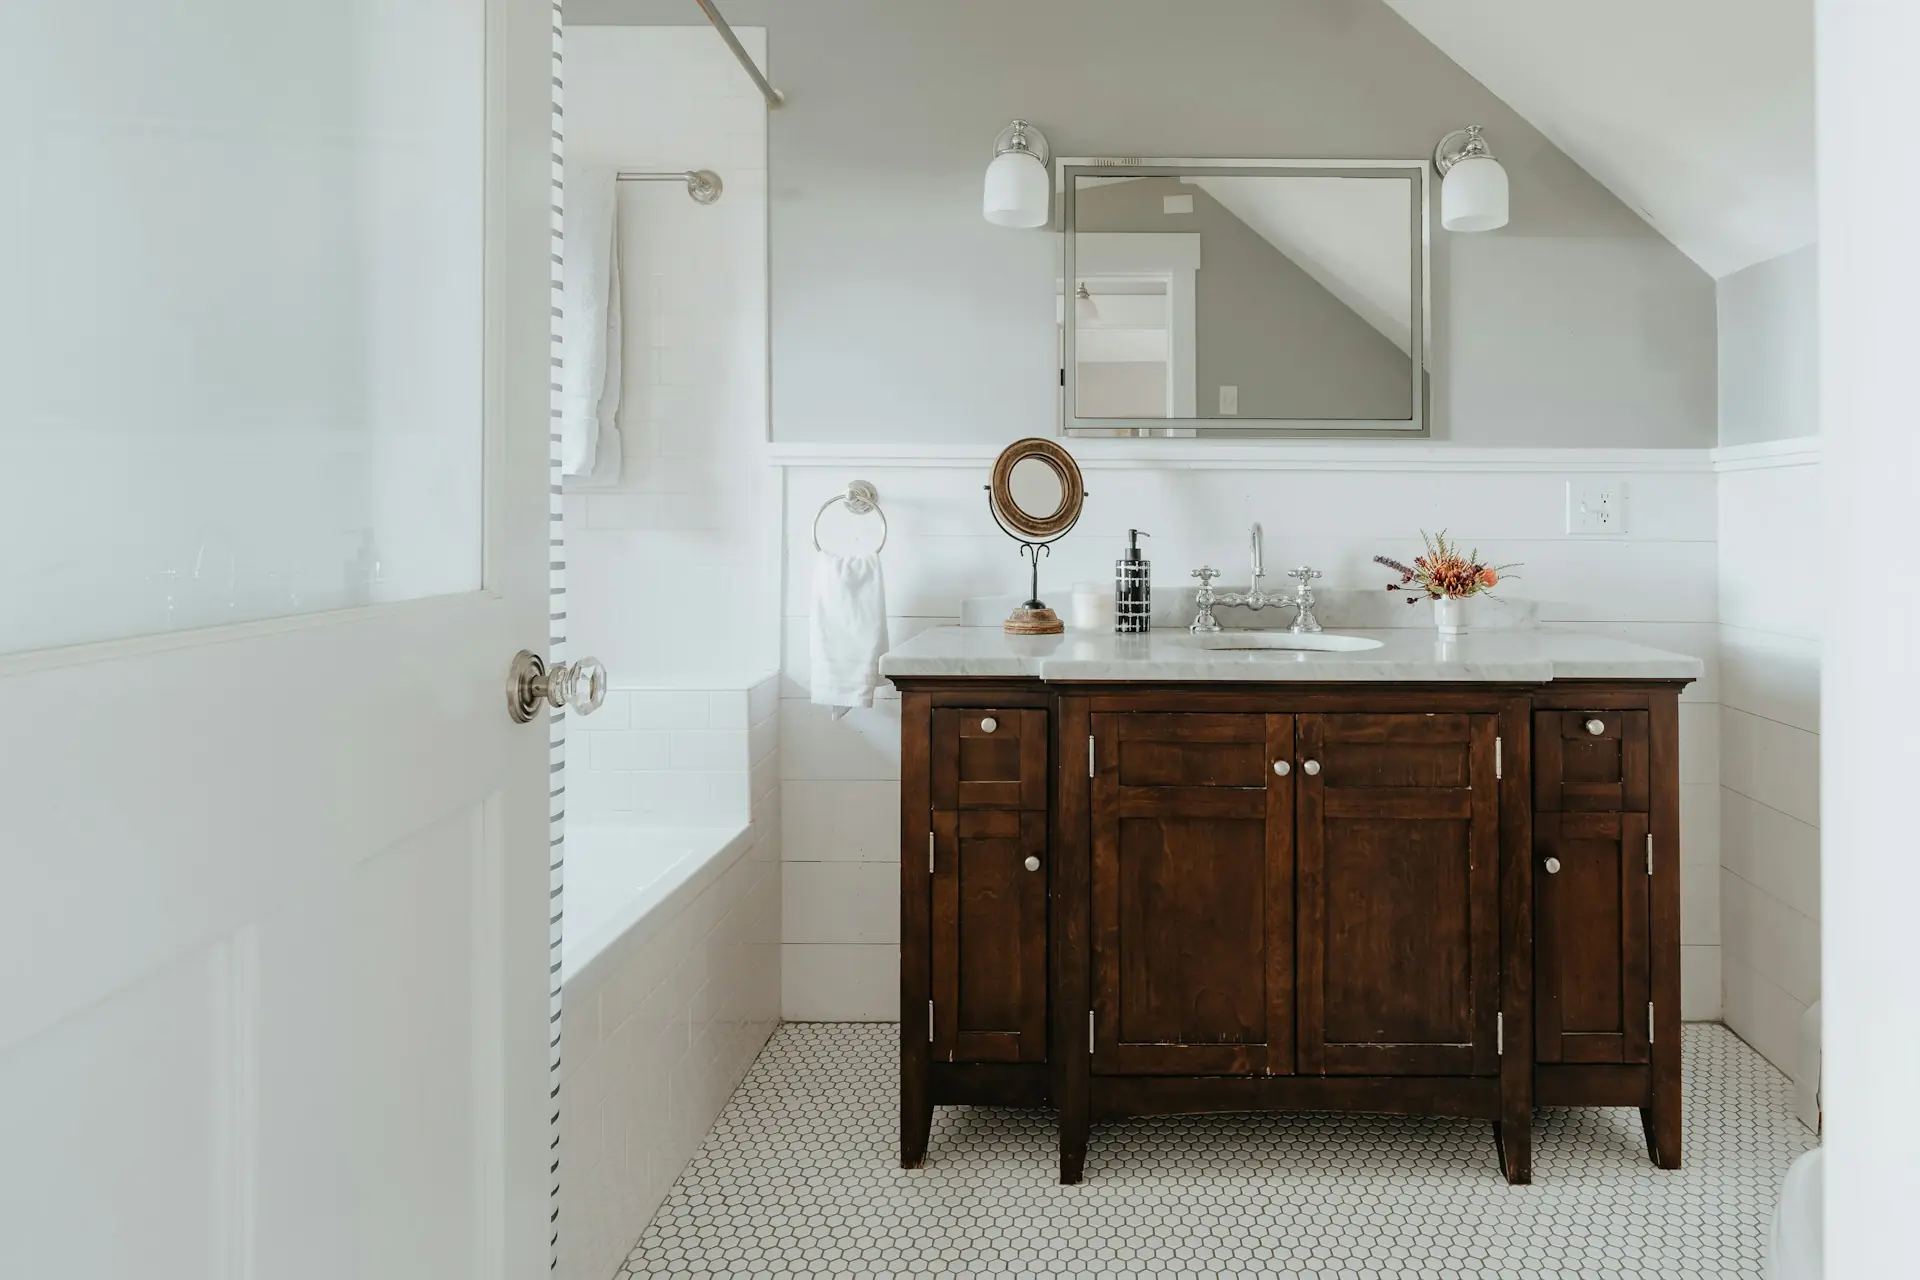
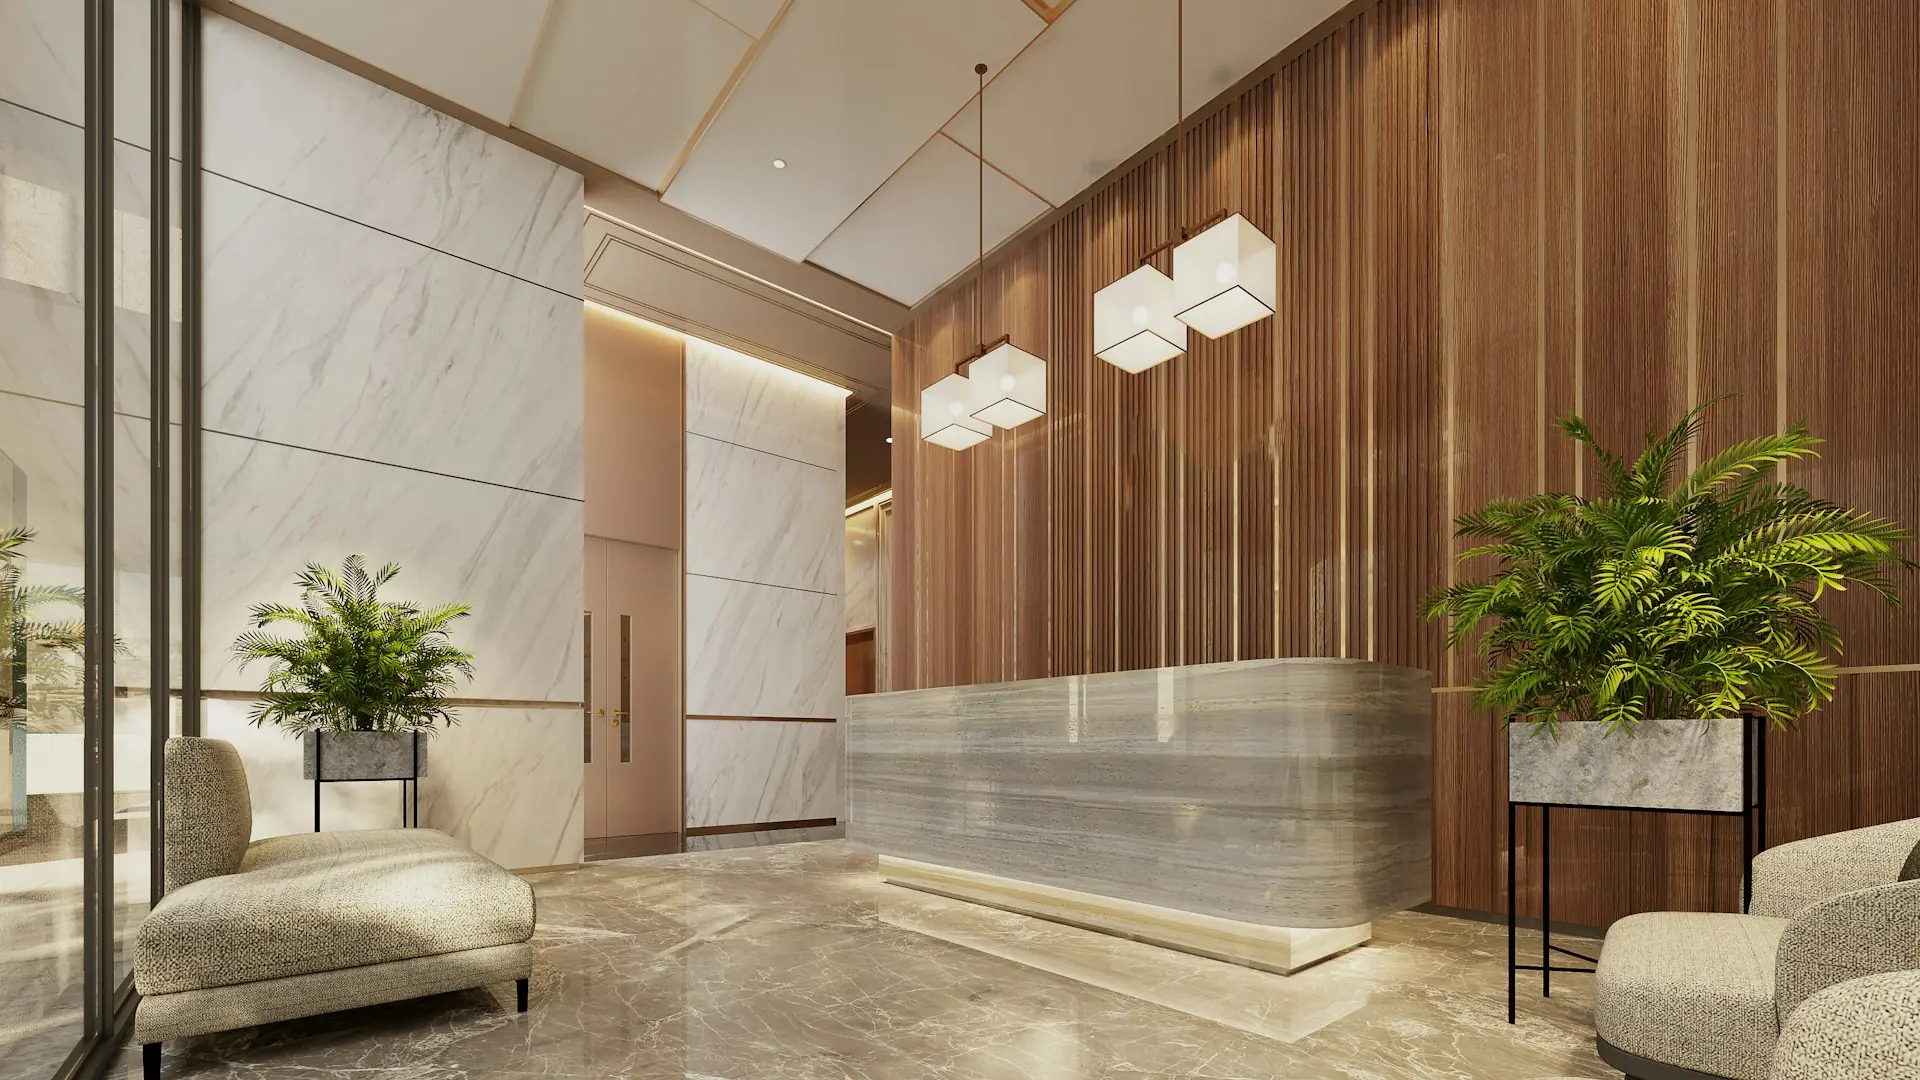
  • Custom Bathroom Vanities in Chicago: Fit, Storage, and Fabrication Choices

    Custom Bathroom Vanities in Chicago: Fit, Storage, and Fabrication Choices

    When you plan a bathroom remodel, the vanity is where small dimensions decide big outcomes. A drain stub sits two inches off center. A window frame cuts into the wall where the mirror should hang. A door swing clips the drawer you assumed would open freely. Stock cabinets ask your room to adjust to them, and older Chicago bathrooms rarely cooperate.

    If your bathroom is irregular, your storage needs are specific, or you have a material you will not compromise on, a vanity built to measured drawings is often worth the cost. Custom bathroom vanities in Chicago solve fit problems that stock and semi-custom lines cannot, because the cabinet is drawn around your plumbing, walls, and daily routine. Threshold Design Lab designs these pieces through a listening-first process, and its fabrication arm, TDL Custom, builds them under the same roof.

    This guide walks through where custom earns its cost, which bathroom limits shape the design, and how a vanity moves from the first conversation to the final hinge adjustment. It also covers what drives price beyond the cabinet’s width, so you can weigh custom against semi-custom with clear eyes.

    What Makes a Vanity Truly Custom?

    A vanity is custom when every dimension, material, and interior is decided for your room and your habits before anything is cut. A catalog piece starts with a box size. A custom vanity starts with a measured wall, a plumbing location, and a conversation about how you use the space each morning.

    Custom vs. Stock and Semi-Custom: Where the Differences Show

    Stock vanities come in fixed widths, depths, and finishes. You pick the closest size and fill gaps with filler strips. Semi-custom lines add choices, such as door styles, a few extra widths, and modified depths, but they still build from a standard box.

    The differences show in four places you notice every day:

    • The edges. Custom cabinets scribe tight to out-of-plumb walls. Stock units leave gaps that need caulk or trim.
    • The interior. Custom drawers wrap around the trap. Stock sink bases often waste the lower half of the cabinet.
    • The finish match. Custom work can match trim, doors, or built-in cabinets elsewhere in your home.
    • The materials. You choose the species, the cabinet core, and the finish, without a catalog limiting the list.

    Proportions, Materials, and Storage Built Around Daily Use

    Proportion is the part most people never think to ask about. Counter height, toe kick depth, and the ratio of drawers to doors all change how a vanity feels. A taller person may want a counter higher than standard. A narrow powder room may need a shallower cabinet so the path to the toilet stays open.

    Materials should follow the room’s use. A family bath with two sinks needs durable finishes and sturdy drawer slides. A guest bath can carry a more delicate veneer or a painted finish with fine detailing.

    Storage works best when you plan it around real objects. Tell your designer what lives on your counter today: hair tools, a water flosser, daily medications. Then drawers get sized for those items, with outlets or dividers placed where they help. That level of planning sits at the center of residential interior design done well.

    How Should the Vanity Fit the Whole Bathroom?

    The vanity should be designed as part of the room’s systems: plumbing, clearances, storage, moisture, and light. When you treat it as a standalone purchase, the conflicts show up during installation, when changes cost the most.

    Plumbing Rough-Ins, Clearances, and Sink Placement

    Your plumbing rough-in sets the starting point. The supply lines and drain locations decide where sinks can sit without opening the wall. A custom vanity can shift drawers and partitions to work around existing pipes. Moving the drain itself is a plumbing decision, and it affects cost and schedule.

    Clearance comes next, and two different kinds of numbers apply. The National Kitchen & Bath Association (NKBA) recommends 30 inches of clear floor space in front of each fixture in its bath planning guidelines. The same guidelines note a much smaller code minimum of 21 inches in front of a lavatory. The minimum your project must meet depends on the code that governs your building, so confirm the minimum that applies to you and plan toward 30 inches wherever the room allows.

    Door and drawer swings matter as well. A drawer that hits the toilet, or a cabinet door that blocks the entry door, is a common late discovery. Measured drawings catch these conflicts on paper.

    If you plan to age in place, the NKBA’s access recommendations call for a knee space of about 36 inches wide and 27 inches high at the sink, so a seated person can roll up to it. A vanity built that way is one piece of an accessible bathroom, not the whole answer. Reach, controls, grab bars, and floor space all have to work together, and a project that must meet a specific accessibility standard needs that standard checked on its own.

    Medicine Cabinets, Linen Towers, and Cabinetry as One Storage System

    Plan the medicine cabinet, linen tower, and vanity together, and your bathroom stores more with less visual clutter. Each piece should hold a different kind of item. Daily items go in the medicine cabinet at eye level. Towels and bulk supplies go in the tower. Grooming tools and cleaning products go in vanity drawers.

    When these are designed as one set of custom bathroom cabinets, the lines align. Door heights match, finishes match, and the medicine cabinet can be recessed between studs so it sits flush. A recessed cabinet needs the wall checked for pipes, vents, and wiring first. That check belongs in the design phase, before you order a mirror.

    Humidity, Countertops, and Lighting Details to Resolve Early

    Bathrooms test cabinetry with steam every day. Ask about the cabinet core, edge sealing, and finish system before you choose a color. Strong ventilation protects the investment as much as the materials do.

    Countertop choice affects maintenance for years. Marble looks beautiful but is porous, and acids from toiletries can etch it, so plan on sealing and caring for marble as part of owning it. If you prefer low upkeep, engineered stone is easier to live with.

    Lighting placement must be fixed early too. Sconces beside the mirror light your face more evenly than a single fixture overhead. Their junction boxes need to land where the mirror and medicine cabinet allow, so the electrician needs final cabinet drawings before rough-in.

    How Does a Custom Vanity Go from Plan to Installation?

    A custom vanity moves through three stages: design and planning, procurement and fabrication, then installation. Each stage produces something you can review, so decisions are settled before they become expensive.

    Planning Custom Bathroom Vanities in Chicago with Measured Drawings

    Planning starts with listening. Your designer should ask how many people share the bath, what feels wrong now, and how you want it to look. That conversation becomes the brief everyone works from.

    Next comes field measurement. In older Chicago two-flats and bungalows, walls are rarely square and floors often slope. Precise measurements let the shop build scribe allowances into the cabinet. You then review space plans and elevations that show the vanity, mirror, lighting, and storage together.

    Permit questions depend on your project’s scope. The Chicago Construction Codes govern alterations, so moving plumbing or electrical may need review. Your design team should flag these during planning, not after demolition. The wider renovation around the vanity is covered in this guide to bathroom design in Chicago.

    Selecting Materials, Finishes, and Hardware

    Material selection turns the drawing into something you can touch. You choose wood species or paint, door profile, countertop, and sink style. Seeing samples together under your bathroom’s light helps avoid surprises.

    Hardware deserves more attention than it gets. Soft-close slides, hinge quality, and pull size affect how the vanity feels every day. Pulls should suit your hands and line up with nearby fixtures. Faucet finish and hardware finish should be decided together.

    An itemized budget ties these selections to cost. You see how a stone upgrade or a drawer insert changes the total, and you can adjust before ordering.

    Coordinating Fabrication, Trades, and Installation

    Fabrication begins once drawings and selections are approved. When design and custom millwork happen in one shop, the people who drew the vanity can walk over to the people cutting it. A question about a drawer box gets answered in minutes, not by email a week later.

    Coordination keeps trades in order. The plumber sets rough-ins to match the drawings. The cabinet installs next, and the countertop fabricator templates from the installed cabinet. Then the plumber returns for final connections and the electrician sets fixtures. Lead times for stone, sinks, and faucets must be managed so nothing stalls the sequence.

    Installation ends with adjustments: leveling, door alignment, and hardware tuning. A finished vanity should close evenly and sit tight to every wall.

    How Much Should You Budget for a Custom Vanity?

    Your budget for a custom vanity depends far more on materials, interior complexity, and coordination than on cabinet width. Two vanities of the same size can differ widely in cost based on those choices.

    What Changes the Price Beyond Cabinet Size?

    Several factors move the price:

    • Wood species and finish. Rift-cut white oak with a hand-applied finish costs more than a painted maple door.
    • Construction. Inset doors take more precision than full-overlay doors.
    • Drawer count. Drawers cost more than doors because each one needs slides, a box, and fitting.
    • Interior fittings. U-shaped drawers around plumbing, dividers, and built-in outlets add labor.
    • Countertop and sink. Natural stone, integrated sinks, and thick edges raise cost.
    • Connected pieces. A matching linen tower or recessed medicine cabinet expands the scope.
    • Site conditions. Moving plumbing or fixing walls behind the old vanity adds trade work.

    When Does Custom Offer More Value Than Semi-Custom?

    Custom offers more value when standard sizes leave you with wasted space or filler strips. It also wins when your bathroom has odd angles, a sloped ceiling, or a window in the way. If you want the vanity to match trim or cabinetry elsewhere in the house, custom makes that possible.

    Semi-custom works fine in a square room with standard plumbing and simple storage needs. If a catalog size fits your wall within an inch and you like the finishes offered, the savings can go toward tile or lighting. For a closer look at that middle option, see this guide to semi-custom cabinets.

    A good test is to list what you would give up with semi-custom. If the list includes storage you need or a fit you would notice daily, custom is worth the cost. If the list is short, semi-custom is the honest answer.

    A Vanity That Fits More Than the Wall

    The right vanity fits your plumbing, your room’s limits, and your daily routine at once. Width is the easy part. The harder work is locking in drain location, clearances, storage, moisture, and lighting before fabrication starts, because each decision affects the next.

    Most of that work happens on paper. Measured drawings and early material choices take a few extra weeks at the start, and they spare you the morning a drawer meets a pipe it was never drawn around.

    If you would like a second set of eyes on your bathroom, Threshold Design Lab, a Chicago design and fabrication studio, takes a vanity from first measurement to final hinge adjustment, with TDL Custom building it in-house. Bring your measurements and your list of what lives on the counter, and the conversation can start there.

    Frequently Asked Questions

    How much does a custom bathroom vanity cost in Chicago?

    The cost depends on materials, drawer count, countertop, and any plumbing changes more than on width. An itemized budget during design shows how each choice affects the total, so trade-offs can be made before anything is ordered.

    Can a custom vanity work with existing bathroom plumbing?

    Yes, custom vanities can be designed around existing supply and drain lines. Drawers and partitions are shaped to clear pipes, which often avoids opening the wall. Moving a drain is possible but adds plumbing work.

    Is a floating vanity practical for a small bathroom?

    A floating vanity suits many small bathrooms because the open floor below makes the room feel larger and easier to clean. It needs solid wall blocking installed before drywall. Storage is a bit smaller, so a matching medicine cabinet helps balance it.

    Should a medicine cabinet be designed with the vanity?

    Yes, designing them together aligns finishes, heights, and lighting. A recessed medicine cabinet requires checking the wall for pipes and wiring first. Planning both at once also lets sconces land in the right spots.

    What should be ready before discussing a custom vanity?

    Photos of the current bathroom, rough measurements, and a list of what is stored there daily make a strong start. Inspiration images help too, especially when they show the door style, wood tone, or countertop that caught your eye.

  • Luxury Hotel Interior Design for Lobbies, Lounges, and Bars That Perform

    Luxury Hotel Interior Design for Lobbies, Lounges, and Bars That Perform

    Picture a guest walking into your hotel at 6 p.m. with a rolling bag. She has to find the desk and read the room. She has to decide whether the bar is worth a drink before dinner. In those first minutes, your public spaces either make a case for the hotel or blend into every other lobby she has passed through.

    Strong luxury hotel interior design treats lobbies, lounges, and bars as working rooms: lighting, materials, layout, millwork, and sound planned around how guests arrive, wait, linger, and return. A beautiful rendering is the start. The spend makes sense when the room handles a busy check-in, a quiet afternoon, and a crowded Friday night without losing its character.

    If you own, develop, or run a boutique hotel, you have to defend this spend to partners or lenders. The guide that follows shows where public-space money tends to work hardest, what to ask a design partner, and which drawings and budgets make the case before anything gets built.

    How Do Public Spaces Earn Their Place in the Budget?

    Public spaces do work no guest room can: they introduce the hotel to people who are not staying the night. A lobby bar can draw locals and meeting guests. A lounge gives a short stay somewhere to unfold. These rooms carry your brand in most of the photos guests take.

    That makes them worth the same scrutiny you give a kitchen line or a mechanical system. Treat the design as a set of decisions you can explain to a lender, not a mood you hope pays off.

    How Does Luxury Hotel Interior Design Shape the Guest Experience?

    It shapes the experience by controlling what guests notice, and in what order. Ceiling height, light level, and the first surface a guest touches all send signals before anyone speaks. A guest reads a dim, warm lobby with a stone desk very differently from a bright one with laminate.

    The Ritz Paris shows how far a few moves can go. During its four-year renovation, the designer raised the entrance ceiling and opened mezzanine windows to bring in light from the square. A glass-covered courtyard with a retractable roof now runs alongside two of its restaurants and bars, so the space works year-round, and the Salon Proust became a setting for afternoon tea. None of these moves changed what the hotel was. Each changed how guests use a room.

    For a boutique property, the lesson scales down well. You rarely need a new plan. You need the one or two moves that change how the room reads: a raised ceiling, a reworked desk, a corner given a purpose.

    Which Guest Activities Should the Design Serve?

    The activities that matter most happen after the first look, and outside the guest rooms, which follow their own hotel room design logic. Plan for these:

    • Waiting. Guests wait for rooms, rides, and friends. Where they sit and what they can see while waiting shapes their mood.
    • Working. Laptop guests need outlets, a stable surface, and light they can read by.
    • Meeting. Small groups want seats that face each other, with enough sound control to talk.
    • Lingering. A guest who orders a second drink is telling you the room works.
    • Coming back. Locals who return weekly give the space a life that guests notice.

    Each activity points to a design decision. Waiting guests need sightlines to the door. Laptop guests need power at the seat, which affects floor coring and millwork early on. Plan these from the start, and the room serves real people instead of a photo.

    Designing the Arrival Sequence and Lobby

    The arrival sequence is the path from the curb to the guest’s first rest, and it should feel like one story. Every decision in the lobby either clarifies that path or clutters it.

    What Should Guests Understand When They Walk In?

    Within a few steps, a guest should know three things: where to check in, where to wait, and what kind of place this is. If any of those takes effort, the lobby is asking the guest to work.

    Clarity comes from hierarchy. The desk should be the strongest visual anchor, through material, light, or height. Seating should sit off the main path so waiting guests are not in the way. The mood should come from one or two confident gestures, such as a feature wall or a statement fixture, rather than a dozen small accents competing for attention.

    Boutique owners often want the lobby to feel like a living room. That works, but only when the desk still reads clearly. A desk tucked behind a bookcase looks charming in a rendering and confusing at 11 p.m.

    How Do Layout and Lighting Support Check-In and Circulation?

    Layout should keep three flows apart: arriving guests with bags, departing guests, and people heading to the bar or elevators. When these cross at one pinch point, the lobby feels crowded even when it is half empty.

    Lighting does more of this work than most owners expect. Brighter, focused light at the desk draws guests forward. Lower, warmer light in seating areas tells them they can slow down. A lighting plan with separate circuits and dimming lets staff tune the room from morning coffee to evening drinks.

    These choices affect other trades. Fixture locations drive ceiling framing and electrical rough-in. A pendant over the desk has to align with the desk itself, so the millwork drawings and lighting plan must agree before anything is installed.

    How Can Interiors Connect to the Property’s Setting?

    Interiors connect to the setting when materials, views, and plantings carry the outside in. A hotel on a tree-lined street can frame that view from the lounge. A downtown property can echo the brick, steel, or stone of its block.

    The covered courtyard at the Ritz is a useful idea for a city like Chicago, with its long winters. A glassed-in transition space gives you usable square footage in months when an open patio sits empty, and it gives arriving guests a view of something growing in January.

    Inside, you can repeat an outdoor material at the entry, such as the same stone at the threshold and the desk. That small choice makes the building feel like one place from the sidewalk inward.

    Making Lounges and Bars Comfortable to Use

    Lounges and bars succeed when guests stay longer than they planned. That depends on comfort you can feel: the right seat, the right light, and a sound level that lets people talk.

    How Do Seating and Lighting Serve Different Guest Activities?

    Match seating to what guests come to do, and give them several zones to choose from:

    • A quick drink: bar stools with footrests, a counter at the right height, and a standing ledge along a wall.
    • Working: a table at dining height, a chair with a back, and power within reach.
    • Meeting a friend or a client: banquettes and paired chairs around small tables for two to four people.
    • A long conversation: lounge chairs and sofas grouped in corners, with side tables and lamps.

    Lighting follows the same logic. Bars want light on the counter and the back bar, with faces softly lit. Lounges want lamps and wall lights at eye level, which feel more personal than ceiling downlights. Guests notice good light even when they cannot name it.

    The bar itself works much like a hardworking kitchen. Glass racks, ice wells, under-counter refrigeration, and staff paths all have to fit. Every drawer and clearance is set by how staff move during a rush, so the bartenders’ input belongs in the drawings.

    Where Does Acoustics Change the Experience?

    Acoustics change the experience most in rooms with hard surfaces and full crowds. Stone floors, glass walls, and tall ceilings look luxurious, but they bounce sound. On a busy night, guests raise their voices, the noise climbs, and people leave sooner.

    You can manage this without losing the look:

    • Upholstered banquettes and drapery absorb sound where people sit.
    • Wood slat ceilings or panels with acoustic backing soften a tall room.
    • Rugs in lounge zones break up a hard floor.
    • Bookshelves and textured millwork scatter sound instead of reflecting it.

    Plan acoustics during design, not after opening. Once the ceiling is closed and the stone is down, your options shrink to add-on panels, which rarely match the room’s materials.

    Choosing Materials and Millwork That Last

    Durable materials and well-built millwork protect the investment, because public spaces take more wear than any room in a home. The test for every surface is how it looks after years of service, not just on opening day.

    Which Finishes Balance Character with Heavy Use?

    The best finishes age with grace and repair easily. Look for materials that hide small marks and gain character over time.

    • Natural stone with a honed finish shows fewer scratches than polished stone. Darker or veined stone hides rings and wear.
    • Solid wood can be sanded and refinished. Thin veneers over particleboard cannot be refinished as many times.
    • Leather and performance fabrics hold up on seating that sees daily use.
    • Unlacquered brass develops a patina that hides fingerprints. Polished finishes show every touch.

    Maintenance is the other half of the decision. Marble on a bar top looks rich but stains from citrus and wine unless it is sealed and cared for. Quartz resists stains but lacks the depth of stone. Decide based on how your staff will care for it, not just how it looks in a sample.

    Where Does Custom Millwork Improve Function?

    Custom millwork improves function wherever a standard piece leaves a gap. A front desk built to your check-in process can hide cables and printers and hold key card systems. A back bar can be sized to your bottle count, glassware, and lighting. Banquettes can fit an odd wall exactly and use every inch.

    Stock furniture rarely fits a historic or irregular room. Custom pieces solve that and give the space a look guests cannot find elsewhere. This guide to commercial millwork covers desks, bars, and built-ins at that scale. When the designer and the custom hospitality millwork shop work as one team, the desk that gets built is the desk that was drawn, down to the cable grommet.

    How Are Design Details Resolved Before Fabrication?

    Details are resolved through shop drawings, samples, and mockups that everyone reviews before cutting begins. This is where most problems surface, and where they are cheapest to fix.

    A good process looks like this:

    1. Design drawings show the look, dimensions, and materials.
    2. Shop drawings show how each piece is built, joined, and installed.
    3. Coordination review checks millwork against electrical, plumbing, and lighting plans.
    4. Samples and mockups confirm finish, color, and feel in the actual light of the room.
    5. Final sign-off locks the details before fabrication starts.

    Skipping step three causes the most trouble. A bar outlet that lands behind a refrigerator, or a pendant that misses the desk by a few inches, turns up on install day, when every fix threatens the opening date.

    Choosing a Design Partner and Defining the Scope

    The right design partner listens first, then shows they can carry a vision through to built work. Your brief and scope set the terms for everything that follows.

    What Should a Hospitality Design Brief Include?

    A strong brief tells your designer who the guest is and what the space must do. It should cover:

    • Guest profile: business travelers, couples, locals, extended-stay guests.
    • Operations: staffing, hours, food and drink service, check-in method.
    • Brand story: the feeling you want guests to leave with.
    • Constraints: budget range, schedule, existing conditions, and anything that cannot move.
    • Success measures: what you will track, such as bar covers or repeat stays.

    The more honest your brief, the better the design. A listening-first designer will push back on vague goals and ask how your staff work. That is a good sign.

    Which Drawings, Budgets, and Schedules Help Justify the Investment?

    The documents that justify the spend show exactly what you are buying and when. Expect these deliverables:

    • Space plans showing layout, seating counts, and circulation.
    • Elevations showing walls, millwork, and finishes in detail.
    • An itemized budget listing every piece, finish, and labor line.
    • Material selections with samples you can see and touch.
    • A project schedule that tracks lead times for custom pieces and ordered goods.

    An itemized budget is your best tool with partners or lenders. It shows where the money goes and lets you make trade-offs line by line. Lead times deserve the same attention: custom furniture, stone, and lighting often take longer than owners expect, and a schedule that tracks them protects your opening.

    How Can Owners Evaluate Relevant Work and Execution?

    Evaluate a partner by built work, not renderings. Ask to see finished spaces, and ask how the firm handled problems along the way. For a boutique hotel, you want a partner sized to your project, present on site, and accountable for the details.

    Ask these questions:

    • Who will manage the project day to day?
    • Who builds the custom pieces, and how do they coordinate with the designer?
    • How do you handle a detail that cannot be built as drawn?
    • Can I speak with past commercial clients?

    Invest in the Spaces Guests Remember and Use

    Your lobby, lounge, and bar are where guests form their first opinion of the hotel. The spend is easiest to defend when every choice serves real behavior: clear arrival, comfortable seating, light that shifts through the day, sound that lets people talk, and materials that hold up. The detail most owners miss is coordination, because a beautiful design falls apart when millwork, lighting, and power were never checked against each other.

    That is why the drawings and the itemized budget matter as much as the look. They let you defend the investment and catch problems while they are still lines on a page.

    Threshold Design Lab, a Chicago design and build firm, brings hospitality experience to this kind of work, including the Walton Residences, an extended-stay hotel redesign, and the Double Cross Lounge, a VIP guest lounge at the Kinzie Hotel. If your public spaces are due for a rethink, its commercial interior design team can start with a walk through the lobby at the hour it gets busiest.

    Frequently Asked Questions

    What Should a Boutique Hotel Prioritize in a Lobby Renovation?

    A clear arrival comes first: guests should find the desk, a place to wait, and the mood of the hotel within a few steps. After that, lighting and the front desk deserve investment, since they shape first impressions most. Seating and finishes come next.

    How Can a Small Hotel Make Its Public Spaces Feel Luxurious?

    A few strong moves do more than many small ones: layered lighting, one standout material, and custom millwork that fits the room. Small spaces feel luxurious when every piece has a purpose and the details are well made. Comfort and good acoustics count as much as looks.

    Which Materials Hold Up Best in Hotel Lounges and Bars?

    Honed natural stone, solid wood, leather, and performance fabrics hold up well under heavy use. Solid wood can be refinished, and darker or veined stone hides wear. Each choice should match how the staff will clean and maintain it.

    How Do You Evaluate a Designer’s Hospitality Experience?

    Look at finished hospitality spaces, not just renderings, and ask how the firm solved problems during construction. Ask who manages the project daily and whether custom pieces are built in-house or sent out. Conversations with past commercial clients show how the firm performs under pressure.

    What Should Be Included in a Hotel Public-Space Design Budget?

    A complete budget includes design fees, furniture, custom millwork, lighting, finishes, art, installation, and a contingency for surprises. An itemized budget lists each line separately, so the owner can trade one line against another. Lead times belong alongside costs, since late custom pieces can delay an opening.

  • Luxury Home Interior Design for Cohesive Renovations and New Builds

    Luxury Home Interior Design for Cohesive Renovations and New Builds

    You have the floor plan open, the kitchen cabinets picked, and a tile sample for the primary bath on the counter. Then a question comes up that nobody planned for: will the oak in the hall clash with the walnut in the kitchen when you see both from the front door? Most full-home projects run into this kind of problem, because each room is chosen alone and the house never comes together.

    Luxury home interior design works when the whole house is planned as one system: a shared space plan, a consistent material language, custom fabrication where stock pieces fall short, and phased decisions made before construction starts. Expensive furniture added at the end cannot fix a layout that fights how you live. A generous finish budget cannot hide trim lines that miss each other by an inch.

    These decisions arrive in a predictable order. First comes how routines and light shape the plan, then the materials and details that carry from room to room. Last come the places where built-in millwork earns its cost, and how to sequence budgets, lead times, and fabrication checks so install day holds no surprises.

    How Does Luxury Home Interior Design Begin with Space Planning?

    It begins with the connections between rooms, mapped before any finish is chosen. A space plan sets where walls, openings, and fixed pieces go, and every later choice depends on those lines, from cabinet runs to light fixture locations.

    Decide Which Rooms Should Touch and Which Need a Buffer

    Some rooms belong side by side. Others work better with something between them. A mudroom that opens straight into the kitchen saves steps. It also puts boots and backpacks in view of guests at the island. A short hall with a closet between them solves both problems, but it takes floor area from somewhere else. That is the kind of trade-off a whole-house plan settles early.

    Once a connection like that is fixed, other decisions follow. If the pantry must sit between the garage entry and the range, the cabinet layout, outlet locations, and even the HVAC (heating, ventilation, and air conditioning) runs start to fall into place around it.

    Use Space Plans to Resolve Flow, Scale, and Sightlines

    A space plan is a scaled drawing that shows furniture, built-ins, and clearances together. It lets you test whether a sofa blocks the path to the patio door, or whether two people can pass behind dining chairs.

    Scale shows up here too. A 12-foot island looks right in a large kitchen on paper. In person, it can push the dining table into the walkway. Drawing both at true size exposes the conflict while it is still cheap to change.

    Sightlines deserve their own pass. Stand at the front door on the plan and trace what you see: the stair, a hallway end wall, a slice of the kitchen. Each of those views needs a finish worth seeing, such as a niche, a window, or a piece of millwork. In a whole home, the plan tells you where to spend.

    Plan Natural Light and Views Across the Home

    Natural light changes the way every finish reads, so map it before you choose colors. Note which rooms get morning sun and which get the hard western light in late afternoon. Then place activities to match.

    A breakfast nook works best on an east wall. A home office with screens may need north light or good shades on the west side. In a new build, you can shift windows to frame a tree or block a neighbor’s wall. In a renovation, you often work with fixed openings and pull light deeper into the house through transoms, glass doors, or wider cased openings.

    Light also affects material picks. A pale stone that glows in a south room can turn flat and gray in a dim hall. Testing samples in each room at different hours prevents that mismatch.

    Which Materials and Details Create Continuity?

    A small, repeated set of materials, paired with aligned trim and planned lighting, makes a house feel like one place. Variety stays welcome. The key is that each new material relates to the ones around it in tone, grain, or finish.

    Build a Material Palette That Can Change from Room to Room

    Pick a base of three or four materials that appear throughout the house. A common start is one wood species, one stone family, one metal finish, and one wall color range. Each room then adds one or two of its own.

    Here is how that plays out:

    • Wood: White oak floors run through the main level. The study adds paneling in a darker tone from the same grain family.
    • Stone: Honed marble in the kitchen repeats as a thinner slab on the powder room vanity. The primary bath uses a warmer stone with similar veining.
    • Textiles: Cotton and linen cover the everyday seating. Velvet or silk appear on a few pieces where hands touch less often, such as dining chairs or drapery.
    • Leather: It shows up on cabinet pulls, a bench, or a desk top, tying the study to the entry.

    Natural materials age, and that belongs in the plan. Marble etches, leather darkens, and oak ambers in sun. Choose finishes you will enjoy at year ten, and tell your fabricator which surfaces need a sealed or oiled finish.

    Use Elevations to Align Architectural Details

    Elevations draw each wall straight on, showing where door heads, window tops, cabinet crowns, and crown molding fall. When these line up from room to room, the house reads as calm. When they miss by an inch or two, you feel it even if you cannot name why.

    A common trouble spot is a kitchen with tall cabinets next to a living room with crown molding. If the cabinet top sits two inches below the crown line, the eye catches the step. Elevations let you raise the cabinets, add a filler, or drop the crown so both meet at one line.

    Elevations also give the trades one shared reference. The carpenter, the electrician placing sconces, and the tile setter all work from the same heights, which cuts down on field guessing and the patchwork it leaves behind.

    Keep Lighting Consistent from Room to Room

    Each room needs general, task, and accent light on separate controls, so you can cook under bright light at 6 p.m. and dim the room for dinner at 8. In a whole house, the harder question is consistency.

    Keep the color of light the same across rooms. Cool bulbs in the hall and warm bulbs in the living room break the continuity your materials worked to build, and the mismatch is obvious through every open doorway. Choose one color temperature range for the house and hold every fixture to it.

    Plan the fixtures alongside the elevations. Under-cabinet strips need a channel built into the cabinet. Picture lights need a box set before drywall. A sconce beside a bed must clear the headboard and land where a hand reaches the switch.

    Where Does Custom Fabrication Make the Biggest Difference?

    Custom fabrication pays off most where storage meets the architecture: living room built-ins, kitchen cabinetry, and bedroom closets. In these spots, stock sizes leave gaps, fillers, and awkward reveals that pull the eye. Built pieces fit the wall, the ceiling, and the way you use them.

    Connect Living Spaces with Built-In Millwork

    Built-in millwork can do the job of a wall while holding storage. A bookcase with a cased opening can divide the living room from the dining room and keep the sightline. A bench under a window can hide toys or blankets inside.

    The value comes from fitting the piece to fixed conditions. Older Chicago homes rarely have square walls or level floors. A fabricated piece is scribed to those surfaces so it looks original, while a stock unit sits in front of them and shows the gap.

    Plan the millwork with the electrician and the AV (audio-visual) installer at the same table. Outlets inside cabinets, wire chases for a television, and vents for equipment all need space inside the box. Adding them after fabrication means cutting into finished work, which is why custom millwork drawn and built by one team saves more than it costs.

    Design Kitchen Cabinetry Around Use and Proportion

    Kitchen cabinetry should start with what you store and where you stand when you need it. Measure your largest platters, your stand mixer, and your trash and recycling bins. Then size drawers and pull-outs to fit them. The full list of elements of kitchen design is worth settling before cabinet drawings start.

    Proportion is where custom cabinetry separates itself. Stock lines typically come in 3-inch steps, so a run often ends with a filler strip. Custom boxes can split a wall into equal doors, match a window’s center line, or extend to the ceiling with a single top rail that meets the living room crown.

    Hidden storage belongs here too: an appliance garage, a pantry behind panel doors, or a pull-out for oils by the range.

    Integrate Bedroom Storage Without Interrupting the Architecture

    Bedroom storage works best when it looks built into the walls. Wardrobes built floor to ceiling, with doors flush to the trim, make a room feel larger than freestanding dressers do. A headboard wall with built-in side tables, reading lights, and hidden outlets reads as one piece.

    Walk-in closets benefit from the same thinking. Measure what you own in linear feet of hanging space, plus shelves for folded items and shoe cubbies. Then lay out the closet so the most-used items sit at eye level near the door, and plan its lighting before drywall goes up.

    How Do You Plan a Full-Home Renovation or New Build?

    You plan it in phases, with design locked before ordering, and orders locked before construction. Each phase produces drawings and lists that the next phase depends on, and skipping ahead is where most budget and schedule problems start.

    Set Priorities with Space Plans, Elevations, and Material Selections

    The design phase should end with four deliverables: space plans, elevations, an itemized budget, and material selections. Together they describe the whole house in enough detail for anyone to price and build it. Knowing how to work with an interior designer makes this phase easier to navigate.

    Use these drawings to rank what matters most. If the kitchen and primary suite carry the most weight in your daily life, they get first claim on budget and custom work. Guest rooms might use the shared palette with fewer custom pieces. Ranking the house as a whole, instead of room by room, is what keeps the budget from running out before the rooms you use most are done.

    Coordinate Budgets, Lead Times, and Construction Decisions

    Procurement is the phase where orders go out and schedules get built. Lead times drive the calendar. Custom cabinetry, stone slabs, and specialty lighting each run on their own clock, and the build order has to respect them.

    Some decisions must come before the walls close:

    1. Plumbing fixture models, so valves and drains land in the right spots.
    2. Appliance specs, so cabinet openings and electrical match.
    3. Lighting locations and types, so boxes and blocking go in at rough-in.
    4. Built-in dimensions, so framing and outlets align with the millwork.

    When one team coordinates vendors and subcontractors from one schedule, these items arrive in sequence. When each trade orders on its own, you get a range that does not fit its opening or a sconce box six inches off center.

    Check Fabrication Details Before Installation

    Before any built piece goes in, check it against the field. Shop drawings show the exact sizes, joints, and hardware for each cabinet or panel. Review them against site measurements taken after drywall, since framing often shifts from the plans.

    Look closely at a few points. Do door swings clear the trim and each other? Are hinges and pulls the ones you picked? Does the stone template match the cabinet tops? Does the finish sample match the approved board under your own lighting?

    When designers and fabricators work side by side, a scribe or hinge question gets settled the same day instead of the following week.

    Cohesion Is Worth More Than Decoration

    The most useful choice you can make is to spend on the plan and the built work before the décor. A sofa can be swapped in a weekend. A misaligned crown line, a cabinet run with fillers, or a dark hall needs a contractor to fix. Luxury home interior design holds up over time when the fixed parts are right. For a broader definition of luxury interior design, this explainer is a good companion.

    Locking drawings and selections before demolition feels slow, and it delays the fun of shopping. It also prevents the change orders and mismatched finishes that cost far more later. One shared palette and one set of elevations give every trade the same target.

    For a full renovation or a new build, Threshold Design Lab, a design-build interior studio, can help you draw the whole house before any single room gets ahead of it, with residential interior design and in-house millwork working from one set of plans.

    Frequently Asked Questions

    What Makes a Full-Home Renovation Feel Cohesive?

    A shared material palette, aligned trim heights, and a single lighting color range make a house feel cohesive. Each room can add its own accent, as long as it relates to the base materials. Elevations are the best tool for checking alignment before work starts.

    Which Design Decisions Should Be Made Before Construction Begins?

    The space plan, plumbing fixtures, appliances, lighting locations, and built-in sizes should be locked before demolition. These choices set where pipes, wires, and framing go. Changing them after walls close means opening finished work.

    Can Different Rooms Have Distinct Styles and Still Feel Connected?

    Yes, if they share a few common threads, such as one wood species, one metal finish, or one trim profile. A study can feel darker and richer than the kitchen and still belong to the same house. The shifts work best in tone and texture, with the architecture kept consistent.

    When Is Custom Millwork Worth the Investment?

    Custom millwork earns its cost where pieces meet walls and ceilings, such as kitchens, built-in bookcases, and closets. It fits uneven older walls and avoids filler strips. For loose furniture in rooms with standard dimensions, stock pieces often serve well.

    What Should Homeowners Ask a Designer Before a Luxury Home Renovation?

    Good questions cover which deliverables come with each phase, who manages vendors and lead times, and who builds the custom pieces. It also helps to see finished work and to ask how the team handled field changes on past projects.

  • Luxury Hotel Room Interior Design That Balances Bespoke Detail and Durability

    Luxury Hotel Room Interior Design That Balances Bespoke Detail and Durability

    You can render a guest room in an afternoon. Building it 80 times is harder. Every headboard, luggage niche, and reading light has to survive housekeeping carts, rolling suitcases, and guests who stay three nights or three weeks. Luxury hotel room interior design succeeds when bespoke details, like millwork headboards, built-in storage, and furniture sized to the room, are engineered for daily wear from the first drawing.

    Most guest rooms do not fall short because of the concept. They fall short in translation: a nightstand ends up two inches too deep, an upholstered panel stains by month six, or a lighting plan forgets the guest who wants to read while a partner sleeps. Threshold Design Lab, whose hospitality work includes the Walton Residences extended-stay hotel redesign, starts every guest room project by asking how the room has to perform.

    A guest room asks for its decisions in a set order: the room’s constraints, the guest’s movements, the details that make it distinct, the light and controls, and finally the drawings and fabrication that make every room match. Along the way, you will see which pieces are worth making custom and what to check before you approve them.

    What Must a Guest Room Do Before It Looks Luxurious?

    A guest room has to work for someone who has never seen it before. That guest arrives tired, often at night, and needs to find the bed, the outlets, the closet, and the light switch without thinking. Hotel room design starts with that first-hour experience. Style comes after.

    This is where a guest room parts ways with a residential bedroom. A homeowner learns their room’s quirks. A hotel guest never stays long enough, so the room has to explain itself. The lobby, lounge, and bar have their own rules, covered in this guide to hotel lobby design.

    Accessibility is part of that first layer. For transient lodging, the 2010 ADA Standards set the number of accessible guest rooms in section 224 and the requirements for those rooms in section 806. Which requirements apply depends on the type of facility and the type of room, so the owner’s accessibility consultant or architect should confirm them for each room type before clearances, closet rods, and switch heights are drawn.

    How Does Luxury Hotel Room Interior Design Accommodate Extended Stays?

    Extended stays call for a room that supports routines as well as rest. A guest staying two weeks unpacks fully. They cook light meals, work at the desk every day, and need space for groceries, laundry, and a second pair of shoes.

    That changes the plan in specific ways:

    • Full unpacking storage: drawers and hanging space sized for a full wardrobe, beyond an overnight bag.
    • A real work surface: a desk deep enough for a laptop and papers, with power at the surface.
    • Kitchenette function: a sink, a small fridge, and a cabinet for dishes, planned with the same care as a compact galley.
    • Separation of zones: sleeping, working, and eating each get their own light and their own spot in the room.

    A long-stay room has to feel like a place you live, not a place you pass through. The storage, the desk, and the light are how it earns that.

    Where Do Limited Space and Heavy Use Shape the Plan?

    Limited floor area and constant use shape almost every dimension in the room. A typical urban guest room leaves little margin. Each piece of furniture competes with the clear path from the door to the bed and the window.

    Heavy use adds a second layer. Housekeeping moves furniture daily, vacuums along every base, and wipes every surface. Corners get bumped by luggage, and drawers and doors cycle far more often than they would at home. So you choose radiused edges where carts pass and wall-hung pieces where floors need cleaning. You also pick hardware rated for commercial use, because comfort that lasts past opening day is what a guest actually experiences as luxury.

    Plan the Room Around the Guest’s Daily Movements

    Plan the room by tracing what a guest does, in order: arrival, unpacking, sleep, morning routine, work, departure. Each step tells you where furniture, storage, and power belong.

    Place the Bed, Luggage, and Seating Before Choosing Furniture

    Lock in three positions first: the bed, the luggage spot, and the seat. The bed wall sets the room’s focus and the location of headboard power. The luggage spot needs to sit near the entry and the closet, so a guest can open a suitcase without blocking the path.

    Seating comes third. In rooms with floor-to-ceiling windows, a chair near the glass gives the guest a place to sit with the view. Keep it clear of the drapery track and any heating unit below the window. Once these three points are fixed, furniture sizes follow from the space left over.

    Build Storage for Short Visits and Longer Stays

    Built-in storage works hardest when it serves both a one-night guest and a two-week one. A short-stay guest wants a luggage bench and a few hooks. A long-stay guest wants deep drawers, a full closet, and a place to hide the suitcase once it is empty.

    One millwork wall can handle both. Picture an open luggage shelf at the bottom, a hanging section with a safe and iron, and drawers above. Built-ins also free floor space, since they sit tight to the wall with no gaps for dust.

    For extended-stay rooms with kitchenettes, plan dish storage, a trash pull-out, and a counter run long enough to prep a meal. Those three items decide whether the kitchenette gets used or ignored.

    Size Bespoke Furniture to the Room, Not a Catalog

    Bespoke hotel furniture design lets each piece fit the room’s real dimensions. A catalog nightstand might be 22 inches deep when the room has 18 to spare. That extra depth pinches the walk to the window or the bathroom.

    Built to the room, a desk can span the exact width between a wall and a window return. A headboard can tie in the nightstands so they never shift. A luggage bench can align with the closet face.

    Custom pieces do ask for decisions earlier. They need field dimensions and approved drawings before fabrication starts, so measure the built rooms, which may vary from plan, before releasing production.

    Create a Distinctive Room with Details That Can Be Built

    Make the room memorable through one or two strong built elements, then let materials carry the rest. Statement pieces work best when they also do a job. A beautiful headboard that hides wiring and holds reading lights earns its place.

    Make a Millwork Headboard Both a Focal Point and a Functional Element

    A statement headboard can anchor the room and solve three or four practical problems at once. Built as a full-wall millwork panel, it holds the reading lights, the outlets, and the USB ports. It can hide the cable runs and protect the wall from bed movement.

    The detailing decides whether it holds up. Upholstered inserts should be removable for cleaning or replacement. Wood edges near the bed need durable finishes that resist scuffs from linens and luggage. Electrical cutouts must be coordinated with the electrician before the panel is fabricated, since a wrong box location means remaking a piece.

    In-house fabrication changes the result here. When TDL Custom builds the custom millwork from the same drawings the designers produce, the headboard in room 412 matches the rendering, and it matches the one in room 214. Profile choice shapes the room’s character too: a clean slab face reads modern, while a paneled face suits a historic building. The same discipline applies to commercial millwork in Chicago at a larger scale.

    Choose Tactile Materials That Hold Up to Repeated Use

    Pick materials that feel good to the hand and are rated for contract use. Guests touch the room constantly: drapery, upholstery, desk edges, door pulls. Those surfaces deliver the sense of luxury, so they need to stay that way.

    For fabrics, the contract textile performance guidelines cover flammability, wet and dry crocking, colorfastness to light, physical properties, and abrasion. The right set depends on the fabric’s construction, its use (upholstery, drapery, wallcovering), and whether it sits indoors or outdoors. Ask for that data on every textile you approve.

    For hard surfaces, solid wood and quality veneers can be refinished. Stone tops resist rings and heat. Brushed metal hardware hides fingerprints better than polished finishes, which helps housekeeping keep rooms ready.

    Layer Light and Technology Without Adding Friction

    Light and technology should make the room easier to use. The goal is a room a guest can settle into in two minutes, without a manual.

    Give Guests Separate Light for Reading, Working, and Unwinding

    Give each activity its own light source on its own control. Reading lights at the headboard should aim at the page and stay off the partner’s pillow. Task lighting at the desk needs enough output for paperwork. A softer ambient layer, like a cove or a floor lamp, sets the mood for evening.

    Plan these layers with the millwork. A reading light set into the headboard has to be located during drawing review, along with its switch and its wire path. Desk lighting can be built into a shelf above the work surface. Each fixture tied to millwork becomes part of the fabrication schedule.

    Keep Controls Intuitive and Consider Glare at the Window

    Controls should be few, labeled, and placed where the guest needs them. A master switch by the door and a matching one at the bed solve most problems. Smart controls help when they reduce steps, like one button that turns everything off at night. They add friction when a guest needs an app to dim a lamp.

    Floor-to-ceiling windows bring views and glare. Morning sun can wash out a TV and wake a guest early. Pair a sheer layer for daytime with a blackout layer for sleep. Recess the tracks into the ceiling or a millwork valance so the drapery reads as built in, and place the TV and desk so neither faces the glass head-on.

    Carry the Design from Drawings to Repeatable Installation

    Hotel interior design only pays off when the 50th room matches the first. That depends on drawings that resolve every detail and a process that coordinates fabrication, deliveries, and installers across floors.

    Use Plans, Elevations, and Material Selections to Resolve Details Early

    Plans, elevations, and material selections are where problems get solved cheaply. A space plan confirms clearances and the guest’s path. Elevations show every outlet, light, and hardware location on the headboard and storage walls. Material selections lock in finishes, fabrics, and stone with samples you can approve, and an itemized budget ties each choice to its cost.

    All of it should start from your operating needs, brand, and guest profile, which is why the first meeting is mostly listening. Build a mock-up room before full production when the schedule allows. It shows how the headboard, lights, and storage perform with a real bed and real luggage.

    Coordinate Fabrication, Procurement, and Installation Across Rooms

    Coordination keeps room types consistent from floor to floor. Procurement covers ordering furniture and custom pieces, coordinating vendors and subcontractors, building the schedule, and managing lead times. Installation oversight resolves technical questions in the field.

    For a hotel, that means sequencing millwork deliveries to match the floors ready for install. Electricians rough in before headboards arrive. Each piece gets labeled by room type so installers set the right unit in the right room. The fewer handoffs between drawing and install, the fewer places for an error to creep in.

    Details That Still Work After the First Stay

    Luxury hotel room interior design is judged by the hundredth guest as much as the first. The details that hold up are built to the room, tied into power and light during drawing review, and made from materials with contract performance data. A headboard that hides wiring and takes a removable insert will still look sharp years in.

    Getting there means asking for decisions earlier than most owners expect: field measurements, electrical locations, and approved samples before production. That early effort is what lets every room match and keeps maintenance simple.

    For a guest room program, the design and fabrication team at Threshold Design Lab can start small with you: one room type, one mock-up, and a frank list of what your housekeeping staff fights with today. The rest of the commercial interior design program can grow from there.

    Frequently Asked Questions

    What makes a hotel room feel luxurious rather than simply expensive?

    A room feels luxurious when it is easy to use and pleasant to touch. Clear lighting, storage that fits a full wardrobe, and furniture sized to the room all count. Expensive finishes alone fall flat if the guest cannot find an outlet or a place to unpack.

    How can a small hotel room feel bespoke without losing usable space?

    Built-in millwork can combine several jobs into one piece. A headboard wall can hold lights, power, and nightstands, and a single storage wall can cover luggage, hanging, and drawers. Built-ins sit tight to the wall, which keeps the floor open.

    Which guest room details are worth making custom?

    The headboard, the storage wall, and the desk usually give the most return when made custom. These pieces define the room’s look and handle the most use. Chairs and lamps can come from contract suppliers as long as they meet the property’s durability needs.

    How should a hotel room be designed for extended stays?

    Plan for daily routines: full unpacking storage, a true work surface, and a compact kitchenette. Sleeping, working, and eating each need their own zone and their own light, so the room works as a place to live for a week or more.

    What should an owner review before approving guest room millwork?

    The elevations, for every outlet, light, and hardware location, along with field measurements of the built rooms. Finish samples and fabric performance data should be checked against how the room will be cleaned. A mock-up room is the best final check before full production.

  • Luxury Living Room Interior Design Ideas Rooted in Architectural Detail

    Luxury Living Room Interior Design Ideas Rooted in Architectural Detail

    Most living rooms that feel expensive in photographs feel ordinary in person. The cause is usually the same: the room was finished with furniture and accessories while the ceiling, walls, windows, and fireplace stayed plain. You notice it when a beautiful sofa sits under a flat ceiling with one fixture in the middle, or when new shelving is pushed against a wall and never looks like it belongs.

    The strongest luxury living room interior design ideas start with the architecture: ceiling treatments, framed windows, a fireplace built into the wall, and custom millwork sized to the room, with furniture and finishes layered on top. When the shell of the room carries the character, every later choice has something to answer to. When it does not, you end up buying more objects to fill a gap that only construction can close.

    Keep reading for the ideas worth bringing to a first design meeting, from what a coffered ceiling does to your lighting options to how a sofa, a rug, and a media wall should be sized. Each idea comes with the dimension or decision that has to be fixed before anyone cuts wood.

    Architectural Ideas That Give the Room Its Character

    Architectural features set the mood before any furniture arrives, so decide on them first. A ceiling, a window wall, and a fireplace are fixed points. Everything else in the room will either line up with them or fight them.

    Luxury Living Room Interior Design Ideas That Start at the Ceiling

    A coffered ceiling is the clearest way to make a high ceiling feel intentional. The grid of beams breaks a tall, empty surface into smaller fields, which gives the eye a pattern to follow and makes the room feel finished from every seat.

    The beam layout should come from the room plan. Center the grid on the main seating area or the fireplace wall, and the room reads as orderly. Center it on the room’s walls when the fireplace sits off-center, and the two will compete.

    Coffers also decide your lighting. If you want a chandelier, one field of the grid must sit over the seating group. If you want recessed lights or strip lighting inside the coffers, decide which fields hold them before the framing goes up, and tell the contractor the fixture weight before the ceiling closes.

    In older Chicago homes, a ceiling may hide old plaster, uneven joists, or pipes. Opening it up for new trim can reveal surprises, so plan time for the contractor to check what sits above before beam spacing is final.

    Frame Window Walls Without Losing Natural Light

    Floor-to-ceiling windows deliver the most light when the drapery sits outside the glass. Mount the rod near the ceiling and extend it past the frame on each side. When the panels are open, they rest on the wall and leave the glass clear.

    Drapery hung from the ceiling also makes the wall feel taller. Panels that stop at the sill cut the wall in half. Panels that just touch the floor carry one long line from ceiling to floor.

    Decide on the drapery before the ceiling is finished. A recessed track or a pocket in the ceiling hides the hardware and keeps the line clean, while adding it later means cutting into finished drywall or plaster. Fabric weight matters too: in a north-facing room, a lighter lined fabric keeps the light you have, and heavy velvet suits a room with strong sun.

    Make the Fireplace Part of the Architecture

    A fireplace works best when its surround reaches the ceiling or ties into flanking millwork. A small mantel on a large wall looks like an afterthought. A full-height stone surround becomes the wall itself.

    Natural stone needs early planning. Slabs are heavy, so the wall and floor must carry the weight. Each slab also looks different, so you should see the actual stone before it is cut.

    An electric fireplace opens more options, since it needs no chimney. That makes it useful in condos and newer buildings where a wood-burning unit is not possible. It still comes with limits: the manufacturer’s clearances, the circuit it needs, and what the wall is built of all decide where it can go. Pick the exact model before the surround is drawn, because the opening, the power location, and any trim around the unit all depend on it.

    Seating and Proportion Before Statement Furniture

    Plan the layout around how people sit and move before you choose a single standout piece. For the planning side, from layout to lighting, this guide to luxury living room design goes step by step. A sculptural chair in the wrong spot only blocks a path.

    Plan the Seating Around Conversation and Circulation

    Start with how many people need to sit together on a normal evening. Then group the seats so each person can see the others’ faces without turning their whole body. Pulling seating off the walls toward the center makes this easier.

    Next, trace the paths people take through the room. A walkway should never cut through the conversation area. Leave clear routes from the entry to the windows, the fireplace, and any doors. In an open plan, the back of the sofa often marks the edge of the living area, so it should line up with the kitchen’s walkways and sightlines too.

    Choose a Sofa That Fits the Room’s Scale

    Size the sofa to the wall and the seating plan first, then choose the style. A common rule of thumb puts the sofa at about two-thirds the length of the wall behind it, which leaves room for side tables and lamps.

    A sectional creates one strong seating group in a large room, and a modular one can be rearranged later. Curved sofas soften a room full of straight lines, like a coffered ceiling or paneled walls, and turn people toward each other, though they need more floor space than a straight sofa of the same seat count.

    Check delivery access early. Chicago walk-ups, vintage elevators, and tight stair turns limit what you can carry in, and a modular piece is often the only way a large sofa gets through the door. Measure doors, halls, and turns before ordering.

    Use a Properly Sized Rug to Define the Seating Area

    A rug should be large enough for the front legs of every main seat to rest on it. A small rug floating in the middle makes the furniture look scattered; a larger one pulls the group into one unit. In open plans, it also marks where the living space ends without a wall.

    Order the rug after the furniture plan is final. Custom sizes take time to make, and a rug cut to the wrong size cannot be fixed. Leave an even border of floor showing, especially near built-ins or a hearth.

    Built-In Millwork That Resolves Real Room Needs

    Built-ins earn their place when they solve a storage, display, or media problem that loose furniture cannot. Shelves and cabinets that reach the ceiling read as part of the wall, not as furniture placed against it.

    Design Shelving Around What You Own and Display

    Measure your collection before anyone draws a shelf. Tall art books, records, and ceramics all need different heights and depths, and shelving designed around real items looks full and planned.

    Mix open shelves with closed cabinets. Use the lower section for doors and drawers, and keep the upper shelves open for display, so daily clutter hides where it collects.

    Think about spans as well. Long shelves loaded with books will sag over time. Thicker shelves, hidden supports, or shorter spans prevent it, and each choice changes how the unit looks.

    Flanking a fireplace with built-in shelving frames the hearth and balances the wall. Set the shelf lines to the mantel height or the coffer grid above, so the wall reads as one composition. Custom built-ins like these work best when they are drawn with the room, not added to it.

    Integrate the Television Without Letting It Dominate

    The best media wall places the television at eye level from the main seat and lets it recede when it is off. Panel doors, a recessed niche, or a dark backing all help it blend in.

    Pick the TV model before the millwork is drawn. Screen size, mount depth, and the ventilation the equipment needs set the opening. Guess wrong and the screen will not fit, or the receiver behind it will run hot in a closed cabinet.

    Plan the wiring with the electrician and the cabinetmaker together. Cable boxes, speakers, and routers need cool, ventilated space and a path for wires, and hidden wiring only stays hidden if the conduit is in the wall before drywall.

    Avoid hanging the TV high above a fireplace if you can. It strains the neck and pulls focus from the hearth, and a side wall with built-in cabinetry usually works better.

    Set Millwork Dimensions and Profiles Before Fabrication

    Every key dimension must be fixed in drawings before fabrication starts: shelf heights, door sizes, trim profiles, and how the unit meets the ceiling and floor. Most rooms are not perfectly square, especially in older buildings, so fabricators add scribe strips that let the unit fit tight against a leaning wall or a sloping floor.

    Profiles should match the room. A clean square edge suits a modern interior, while a molded edge fits a pre-war home with original trim. Custom paneling can also line up with outlets, shelves, and window trim in a way stock wall panels cannot.

    Drawn and built by one custom millwork team, the shelf lines you approved are the shelf lines that end up on your wall.

    Materials and Finishes That Reward a Closer Look

    Choose high-quality materials for the surfaces you touch every day, and let a few strong contrasts carry the room. Fewer, better materials feel calmer up close than many competing finishes.

    Balance Natural Stone with Warm Wood

    Natural stone and wood work best as a pair. Stone brings weight and pattern. Wood brings warmth and softens the cool feel of stone.

    A marble coffee table brings veining to the center of the room, but marble stains and etches, so it suits a household that uses coasters. A solid wood table handles daily use better and wears into character. Tie loose pieces to the built finishes: if the fireplace is limestone, walnut shelving and a walnut table connect the room. Bring samples home and look at them in both day and evening light.

    Choose Upholstery and Metal Finishes with the Build in Mind

    Velvet adds depth because it catches light differently as you move, and performance velvets resist wear in homes with kids or pets. Linen, wool, and velvet in one palette feel related rather than collected.

    Metal finishes work best as repeats of one choice. Brushed brass on a lamp, a cabinet pull, and a picture light ties the room together. Since pulls, sconces, and fireplace trim often come from different vendors, order samples from each and check them side by side, because “brushed brass” varies more than you would expect.

    Lighting Decisions That Shape How the Room Feels

    Light the room at several heights. A room lit by one overhead fixture looks flat after dark; light from lamps, walls, and the ceiling together gives it depth.

    Build a Lighting Plan Beyond One Ceiling Fixture

    Use at least three types of light: ambient light to fill the room, task light to read by, and accent light to show off art or texture.

    • Floor lamps suit reading corners and the ends of sofas.
    • Table lamps add warm, low light at seated eye level.
    • Wall sconces light the walls and free up table space.
    • Recessed or cove lighting gives even fill light and can wash a wall of shelves.

    Sconces and floor outlets must be placed early. A sconce needs a junction box in the wall before drywall, and a floor outlet lets a lamp sit beside a floating sofa without a cord crossing the floor.

    Choose a Chandelier for the Ceiling Height and Seating Plan

    Size a chandelier to the room and hang it high enough for clear passage. In a tall room, a larger fixture fills the vertical space; in a standard room, a flatter fixture keeps headroom.

    Center it over the seating group, not the room’s walls, when the two differ. Pick one strong fixture and keep the rest simple, because two bold chandeliers in one room split its focus.

    Build Light into the Millwork

    Strip lighting under shelves or inside coffers turns built-ins into light sources. The cabinetmaker has to cut the channels and plan where the drivers sit, and the electrician has to run power to exactly those points.

    Decide on the control system before the wiring goes in, too. Scenes for reading, hosting, or movies are easy to set up later, but some systems need extra wires or a central panel with room for the equipment, and those have to be in the walls first.

    Choose the Details That Deserve to Be Built In

    The details worth building in are the ones you cannot add later without opening walls or ceilings: coffered beams, wiring for sconces and the TV, fireplace surrounds, and millwork scribed to the room. Sofas, rugs, and objects can change over the years.

    That split is the most useful of all luxury living room interior design ideas. Put effort and budget into the fixed shell first, then furnish in stages, once final dimensions, chosen appliances, and agreed profiles are on the drawings. The same shell-first thinking carries into the bedroom; these luxury bedroom ideas are a natural next read.

    If you have a living room that photographs better than it feels, bring it to the Chicago interior designers at Threshold Design Lab. A conversation about the ceiling, the walls, and the fireplace is often enough to show what the shell is missing, and its residential interior design team can draw it from there.

    Frequently Asked Questions

    What Makes a Living Room Look Luxurious Without Adding More Furniture?

    Architectural detail does more than extra pieces. A coffered ceiling, full-height drapery, wall paneling, and layered lighting give the room depth with no added clutter. Removing anything that does not serve the seating plan helps as much as adding.

    Can a Small Living Room Feel Luxurious?

    Yes, a small living room can feel luxurious when every inch is planned. Built-in shelving replaces bulky cabinets, modular seating fits tight entries, and drapery hung at the ceiling makes walls feel taller. Fewer, better materials keep the room calm.

    How Do You Design a Luxury Living Room Around a TV?

    Set the TV at seated eye level and build it into millwork that hides wires and equipment. The exact model should be chosen first, since its size and ventilation needs set the opening. Panel doors or a dark recess help the screen fade when it is off.

    Which Living Room Upgrades Are Worth Building in Rather Than Buying Later?

    Anything tied to the walls, ceiling, or wiring: ceiling treatments, fireplace surrounds, media walls, sconce boxes, and shelving that reaches the ceiling. These are hard to add after the room is finished, while furniture and accessories can change at any time.

    How Can a Luxury Living Room Be Planned on a Budget?

    Put money into the fixed shell first and furnish in phases. Lighting, a well-sized rug, and drapery hung high often change a room more than a new piece of furniture, and they can be planned now and bought over time.

  • Luxury Office Interior Design That Connects Brand, Millwork, and Execution

    Luxury Office Interior Design That Connects Brand, Millwork, and Execution

    Many offices are planned around cost per square foot first and everything else second. The result is familiar: a reception desk ordered from a catalog, private offices sized by habit, and an open floor that looks fine in the rendering but feels generic on move-in day. If you have watched a polished presentation turn into a space that doesn’t fit your team or your brand, you already know where the gap opens. It opens between the drawing and the people who build from it.

    Luxury office interior design works when your brand, your custom millwork, and your construction plan are worked out together from the first meeting, so the finished office matches what you approved. The finishes signal quality. The space plan, the built-ins, and the coordination behind them decide whether that quality holds up through daily use.

    This guide covers what a strong first meeting should produce, why millwork belongs in the plan before furniture, and where built-ins outperform vendor pieces. It closes with how procurement, scheduling, and installation keep a Chicago office build-out true to the plan.

    What Should the First Design Conversation Establish?

    The first conversation should produce a written brief that ties your brand message to the way your people work and what you can spend. Without that brief, every later choice becomes a matter of taste, and taste is hard to build from. A good designer spends this meeting listening more than presenting. For the wider picture of commercial interior design in Chicago, including code and procurement, see this planning guide.

    Define What the Office Must Communicate

    Start with the impression a visitor should leave with. A financial office needs calm, discretion, and a sense that details are handled. A law office often needs to feel steady and private, with meeting rooms that put clients at ease before a hard conversation. A creative studio may want the opposite: energy, color, and work on display.

    Then put those goals into physical terms. “Trustworthy” might mean solid wood and quiet acoustics in the conference room. “Forward-looking” might mean cleaner lines and more glass. This translation step is where brand stops being a logo on the wall and starts shaping material and layout choices.

    Document Daily Workflows, Privacy Needs, and Budget Priorities

    Next, map how a normal day runs. Who greets guests? How many people take confidential calls at once? Where do files, samples, or equipment live, and who needs them within arm’s reach? These answers set room counts, storage volume, and the line between open and closed space.

    Privacy needs come in levels. Some roles need full acoustic separation. Others need visual screening only. Getting this wrong is costly later, because adding a closed office after walls are framed means change orders and delays.

    Then rank your budget priorities. Name the two or three places where quality must be highest, such as reception and the main conference room, and name where standard products are fine. That ranking guides every trade-off that follows.

    Plan the Space Before Choosing Furniture

    Space planning comes first because furniture should fit the room, not the other way around. Pick chairs and desks before the layout is set, and you lock in sizes that may block circulation or waste a window wall.

    Map Reception, Private Offices, and Open Team Floors

    Each zone has its own job. Reception sets the first impression and handles guest flow, deliveries, and waiting. Private offices need the right size for their use: an executive office that hosts small meetings needs a seating area, while an office used for focused work does not.

    Open team floors need clear neighborhoods. Group people who work together, and keep loud activity away from quiet rooms. Plan where built-in storage, printers, and coffee points land, because those spots draw foot traffic.

    In mixed-use towers, the core (elevators, stairs, restrooms) and the column grid fix much of the layout. Planning around them early keeps private offices from ending up with awkward column bumps inside.

    Resolve Circulation, Daylight, and Glare in Chicago Towers

    Many Chicago towers offer floor-to-ceiling windows, which are a major asset. They also force a choice: give the windows to private offices, or keep them open so daylight reaches the whole team floor. Glass-front offices on the window line are a common middle path.

    Glare matters too. Screens facing east or west windows wash out in morning or late-day sun. Desk orientation, shade selection, and the reflectance of finishes all affect comfort. A glossy lacquer desk that looks striking in a rendering can bounce glare into someone’s eyes all afternoon.

    Circulation has to stay accessible. Where a project falls under the federal 2010 ADA Standards, at least one accessible route must connect accessible entrances with the accessible spaces and elements inside. How that applies to your floor depends on the scope of the work, so confirm it with your architect early, because it affects corridor widths, reception desk design, and where furniture groups can sit.

    Review Space Plans and Elevations Before Committing to a Layout

    Space plans show the layout from above. Elevations show each wall head-on, with heights, outlets, millwork, and finishes drawn in place. You need both. A plan can look perfect while an elevation shows a light switch landing in the middle of a built-in panel.

    Use elevations to check eye lines from the entry, the height of a reception transaction counter, and how storage meets the ceiling. That review is far cheaper than fixing the same issue on site.

    Where Does Custom Millwork Earn Its Place in Luxury Office Interior Design?

    Custom millwork pays off where the space is most visible, most used, or most irregular. In those spots, a built piece fits the room, the brand, and the workflow better than any catalog product. Elsewhere, good vendor furniture is often the smarter spend.

    Compare Built-In Reception Desks and Storage with Vendor Pieces

    A reception desk is the clearest case for custom. It must handle guest check-in, hide cables and equipment, meet accessibility needs, and express the brand in one object. A vendor desk rarely does all four at the exact size your entry allows.

    Storage is the second case. Built-ins can run wall to wall and floor to ceiling, wrap columns, and fill the odd bays that freestanding cabinets leave as dust traps. That is the core value of a custom millwork office build-out.

    Vendor pieces win on task chairs, standard workstations, and anything you may reconfigure. They are faster to replace and easier to move. A sound plan uses both, with the line drawn on purpose. For how built work is handled at this scale, see this guide to commercial millwork.

    Design Materials and Details for Use, Maintenance, and Brand Fit

    Choose materials for how they will be treated. A reception countertop takes bags, keys, and elbows every day, so it needs a hard, repairable surface. Edges at hip height should be durable, because that is where carts and chairs hit.

    Think about cleaning, too. Open-grain wood hides wear well, while high-gloss finishes show fingerprints. Hardware should match the brand and hold up to constant use, with tight reveals and sound joinery that stay true after years of doors opening and closing.

    Choose a Style That Serves the Business, Not Just the Rendering

    Style should follow the brief. Clean planes and minimal hardware suit many tech and financial firms. Paneling, moldings, and richer woods can suit a law practice. Color and texture signal energy for a creative agency.

    Each style changes the build. Paneled walls demand careful layout around outlets and doors. Flush modern panels need perfect substrates, because every flaw shows. An office reads as high-end when the chosen style is built with that level of care, whatever the style is.

    How Do Procurement and Scheduling Protect the Design?

    Procurement and scheduling protect the design by making sure every piece arrives in the right order and matches the approved selection. When ordering is loose, substitutions creep in and trades wait on each other, and the look you approved erodes one small swap at a time.

    Use an Itemized Budget to Make Trade-Offs Early

    An itemized budget lists each element on its own line: millwork, lighting, furniture, finishes, and installation. You see exactly where money goes and can shift funds with care, such as trimming a secondary conference table to protect the reception desk.

    Lump-sum budgets hide these choices until it is too late. By the time an overrun appears, materials may already be ordered. An itemized view lets you make trade-offs while the design can still absorb them, which keeps the money in the places you ranked highest.

    Coordinate Fabrication, Vendors, Subcontractors, and Lead Times

    A build-out involves many hands: fabricators, furniture vendors, electricians, data installers, and finishers. Each depends on the others. Millwork needs final electrical locations. The electrician needs final millwork drawings. Someone has to own that sequence.

    Lead times drive the schedule. Custom pieces and specialty items take longer to produce than stock goods, so they must be ordered first, and the project schedule should show which orders gate which installs. When design and fabrication sit with one team, the shop builds from the drawings you approved, which removes one of the most common points of failure.

    What Keeps the Finished Office True to the Plan?

    Hands-on oversight during installation keeps the finished office true to the plan. Drawings set the intent, but real walls, floors, and ceilings rarely match them exactly, and someone has to catch those gaps before they become permanent.

    Resolve Site Conditions and Technical Questions Before Installation

    Field-measure before fabrication starts. Walls in older and newer buildings alike can be out of plumb, and floors can slope. Built-ins made to drawing dimensions alone may not fit, so scribe strips and adjustable bases allow for the small differences.

    Confirm hidden conditions, too. Check where blocking is needed inside walls for heavy wall-hung pieces, and that outlets and data ports line up with millwork cutouts. Answering these questions early spares you the sight of a crew cutting into a finished panel on site.

    Check Fit, Finish, Lighting, and Function During the Final Walkthrough

    Walk the space with a checklist. Look at gaps and reveals on millwork, and confirm doors and drawers open fully without hitting anything. Check the finish under the actual lights, not just daylight, because color shifts under different fixtures.

    Test function as your team will use it:

    • Sit at the reception desk and check sight lines to the entry.
    • Plug in devices at each workstation and private office.
    • Close a private office door and listen for sound transfer.
    • Check screens for glare at different times of day.
    • Open every storage unit and confirm shelf heights fit what will go inside.

    Record any issues as a punch list with clear owners and dates.

    An Office Built the Way It Was Drawn

    In luxury office interior design, the gap between rendering and finished office closes when the people designing it also think like the people building it. That means a brief rooted in your brand and workflow, millwork planned before furniture, an itemized budget that makes trade-offs visible, and one team owning the schedule from order to install.

    Custom work costs more and takes longer, so spend it where guests and staff touch the space most. Reception, private offices, and built-in storage usually earn it, and standard furniture can carry the rest. When you compare commercial interior design firms in Chicago, ask to see the elevations and the schedule, not just the rendering. This checklist on office interior design in Chicago covers what to vet first.

    Threshold Design Lab, a Chicago interior design firm, brings three decades of design, remodeling, and custom millwork experience to commercial interior design projects. If your next office has to say something about your firm before anyone speaks, that is a good first thing to tell them.

    Frequently Asked Questions

    How Can an Office Look Luxurious Without Compromising Function?

    Put the highest-quality materials and custom work where people use the space most, such as reception and conference rooms. Finishes that resist wear and hide fingerprints, plus storage planned so surfaces stay clear, keep the look intact through daily use.

    Should Custom Millwork Be Planned Before Office Furniture Is Selected?

    Yes, plan millwork first, because built-ins fix wall space, outlet locations, and circulation paths. Furniture then fits the spaces left over, instead of the plan bending around pieces already ordered.

    What Should an Office Interior Design Budget Include?

    An office budget should list millwork, furniture, lighting, finishes, procurement, and installation as separate lines. That itemized view shows where money goes and where it can be adjusted while the design can still absorb changes.

    How Do Designers Handle Natural Light and Glare in a Tower Office?

    Designers orient desks so screens sit at an angle to windows, select shades that cut glare without blocking views, and choose low-sheen finishes. They also decide which zones get window access, often using glass-front offices to share daylight.

    What Should a Business Ask a Commercial Designer About Procurement and Installation?

    Ask who orders materials, who tracks lead times, and who coordinates subcontractors on site. Ask whether fabrication happens in-house, and how site conditions that differ from the drawings get handled.

  • Traditional Kitchen Remodel Decisions for Older Chicago Homes with Character

    Traditional Kitchen Remodel Decisions for Older Chicago Homes with Character

    Your 1920s brick bungalow has a kitchen with a deep window, a plaster soffit over the sink, and oak trim that matches the dining room. It also has one working outlet near the counter and a refrigerator that blocks the back door. Every older Chicago kitchen poses the same question: how do you fix what fails without erasing what makes the house feel like itself?

    A good traditional kitchen remodel in an older Chicago home keeps the original details that define the house, matches new work to those details with care, and replaces only what no longer serves daily life. That approach holds whether you own a greystone two-flat, a brick bungalow, or a unit in a pre-war courtyard building. The style comes from the house itself, so the plan should start there.

    In this guide you’ll discover how to sort your kitchen’s features into three groups: restore, replicate, and replace. You will also see how layout, cabinets, surfaces, and trim fit together, and what must be decided on paper before anyone opens a wall.

    What Should You Restore, Replicate, or Replace?

    Restore what is original and sound, replicate what is missing or too damaged to save, and replace what blocks modern cooking, storage, or safety. That three-part sort is the first real decision in the project, and it moves the budget more than any countertop will.

    Chicago’s preservation guidelines offer a useful model here, even though they only bind designated landmarks and districts. The rehabilitation standards the city’s landmarks commission follows favor repairing rather than replacing historic features, and replacing in kind when repair is not possible. They also warn against adding “conjectural” features borrowed from other buildings. That is sound advice for any kitchen with history, designated or not.

    Which Traditional Kitchen Remodel Details Are Worth Keeping?

    Keep the details that tie the kitchen to the rest of the house. In many pre-war Chicago homes, those include:

    • Window and door casings that match the dining room or hall
    • Transoms over the kitchen or pantry door, which move light and air
    • Plaster soffits and coved ceilings, which set the room’s height and shape
    • Built-in pantries or china cabinets, often with original glass and latches
    • Original hardware, such as glass knobs, bin pulls, or cast hinges

    Test each one before you commit. Old casings may hide failing plaster, and a built-in may sit on a sagging floor. A restored detail costs labor up front, so it should earn its place by being sound and visible.

    Some features look minor but carry the room. A plaster soffit often hides old ductwork or a beam. Removing it may open up cabinet height, but it can also expose a problem that costs more to solve than the soffit ever did.

    When Should New Work Match the Original?

    New work should match the original when it sits beside or across from original work. If new cabinets meet an old door casing, the eye compares them right away, and a stock profile that is close but not exact looks like a mistake. If you are still defining the look itself, this guide to traditional kitchen style covers its visual language.

    Matching means more than color. Your carpenter needs the profile shape, the width, the depth, the wood species, and the way the grain was cut. Quarter-sawn oak in an Arts and Crafts bungalow reads very differently from plain-sawn oak, even under the same stain.

    When an original piece is gone, use evidence. A ghost line on the plaster, a matching casing in the next room, or an old photo gives you a real model. This is where custom millwork earns its keep: a shop can grind knives to match an original profile that no catalog carries.

    New work does not always need to match. A new island, a range hood, or a pantry wall can be its own piece. It should share the house’s scale and materials without pretending to be 100 years old.

    What Needs Replacing for Modern Function?

    Replace the systems and parts that cannot do today’s job. In most older kitchens, that list starts behind the walls: wiring, plumbing, venting, and gas lines sized for a 1920s stove.

    In the room itself, cabinets that are too shallow for modern dishes, too low for small appliances, or too worn to repair are fair to replace. So are counters that cannot take heat or moisture. Floors are a judgment call: old hardwood under linoleum is worth uncovering, while a damaged subfloor is not.

    Landmark review is narrower than many owners assume. It applies only if your home is an individual landmark or sits in a designated district, and then only to permitted work within the commission’s scope, which for most homes centers on the exterior. If yours is designated, check the city’s landmark permit review process early. A new kitchen window or rear door is where that review is most likely to touch a kitchen project.

    How Can the Layout and Cabinets Serve Daily Life?

    The layout and cabinets serve daily life when you plan them around how you cook and store things first, and dress them in period detail second. Older Chicago kitchens were built for iceboxes and small stoves. A modern refrigerator, dishwasher, and range need space those rooms never planned for.

    Plan Storage and Appliance Clearances Before Choosing Finishes

    Start with the floor plan and the appliance list, not the door style. The size of your refrigerator and range sets where everything else can go.

    The National Kitchen and Bath Association (NKBA) puts numbers on this. Its kitchen planning guidelines recommend a work aisle of at least 42 inches for one cook and 48 inches for more than one, and walkways at least 36 inches wide. These are planning recommendations, not code minimums, but they describe a kitchen that works.

    Those numbers are hard to hit in a narrow two-flat kitchen. Testing them early tells you whether to keep a galley layout, shift a doorway, or move the refrigerator into a former pantry. The same guidelines say appliance doors should not hit each other or block an entry door, a common issue in small older rooms.

    Storage planning comes next. Count what you own: pots, small appliances, dry goods, serving pieces. Then give each group a place. Deep drawers for pots, a tall pantry for food, and a spot for the mixer change how the cabinets are sized.

    Choose Cabinet Details That Suit the Home’s Architecture

    Choose cabinets that echo the house’s own woodwork. A Craftsman bungalow suits flat, simple panels and heavier frames. A Victorian greystone can carry more detail, such as raised panels and taller crowns. This comparison of traditional style kitchens shows how door profiles separate traditional from classic.

    Inset cabinetry fits most pre-war homes well. The doors sit flush inside the frame, as they did in old built-ins. Inset work demands precision, since doors need even gaps and old walls are rarely straight, so plan for scribe strips and careful install time.

    Glass-front cabinets echo old china cabinets and break up a long wall of doors. Use them where you will keep tidy things, like glassware. Open shelving works for daily dishes near the sink, but dust and grease will reach it fast near the range.

    Good kitchen cabinet design in Chicago’s older homes often means custom work, because matching a species, a profile, and a door style to existing trim is something stock lines rarely do.

    Decide Whether an Island Fits the Room

    An island fits when it leaves real clearance on all working sides. Measure from counter edge to island edge, not wall to wall. With the NKBA’s 42-inch aisle on each working side, an island needs a wider room than many people expect.

    If the island will have seats, add room behind them. The NKBA recommends at least 36 inches so someone can edge past a seated person, and 44 inches to walk past freely.

    When a full island does not fit, look at a narrow work table or a butcher block island on legs. It reads like furniture, which suits older homes, and gives you a prep surface. Wood tops need oiling and occasional sanding, so plan for that upkeep.

    Which Surfaces and Fixtures Balance Character with Upkeep?

    Surfaces balance character and upkeep when each material is matched to how hard that spot works. Natural stone has the look many traditional kitchens want, but some stones ask more of you than others, and the sink zone shows it first.

    Compare Countertop Materials by Appearance and Maintenance

    Each counter material has its own care routine:

    • Marble: Soft veining and a classic look. Acidic foods and cleaners can etch it, and it needs regular resealing.
    • Granite: Tough and heat-tolerant. It also needs resealing, though usually less often than marble.
    • Soapstone: Dense and stain-resistant. It darkens and develops a patina; mineral oil deepens the color, and fine sandpaper removes scratches.
    • Quartz: Engineered stone that does not need resealing. It handles daily use well, though it lacks the natural aging of stone.

    How often to reseal depends on the specific stone and its finish, so ask the fabricator for that stone’s schedule. Marble shows its history, which some owners love. Soapstone suits Craftsman and pre-war homes, where a darker, matte surface feels at home. You can mix materials too: marble on a baking zone and quartz near the sink puts each where it performs best.

    Choose a Backsplash and Sink That Work with the Cabinets

    Pick the backsplash after the counter, so the two read as a pair. A marble backsplash cut from the same slab as the counter makes a calm, continuous surface. Subway tile suits a simpler, period-friendly look and is easy to repair.

    The sink sets cabinet sizes. A farmhouse or apron-front sink needs a base cabinet built to its exact width and depth, so choose the sink model before cabinets are drawn.

    Fireclay and cast-iron apron sinks are heavy. The cabinet and the floor below must carry that weight, which matters in older homes with uneven framing.

    Build a Palette Beyond All White

    A white kitchen is classic, but it is not your only path. Wood cabinets in medium tones, deep greens, or navy can suit pre-war homes, especially where original oak trim runs through the nearby rooms.

    Pull color from the house. If the dining room has dark stained oak, a painted kitchen in a muted shade can bridge to it. Painted walls with stained cabinets is another option that keeps the woodwork in charge.

    How Do Architectural Details Bring the Design Together?

    Architectural details bring the design together when they repeat the house’s existing language. A kitchen full of generic trim feels added on. A kitchen whose crown, hood, and lighting relate to the rest of the house feels built in.

    Match Millwork Profiles Instead of Adding Generic Trim

    Measure and trace the original profiles before choosing new trim. Your casings, baseboards, and any picture rail give you a ready set of shapes to work from.

    Crown molding on cabinets should relate to the room’s ceiling height and to existing crowns. Many bungalows had no crown at all, and adding a tall, ornate one would look out of place; a simple cap in the house’s style fits better.

    A coffered ceiling belongs only where the house supports it. In a large greystone with tall ceilings, coffers can define the kitchen zone. In a low bungalow kitchen, they press the room down. Shop-built millwork lets the cabinet frames, crown, and window casings share one profile set.

    Give the Cooking Area an Appropriate Focal Point

    The range wall is the natural focal point, so treat the range hood as a design piece. A plaster or wood hood with simple lines suits most pre-war homes, and a metal hood can work if its scale fits.

    The hood must also vent well. Its size, fan, and duct path need to be planned with the range choice. In a two-flat, the duct route may run through a soffit or an exterior wall, which shapes where the range can go.

    Layer Lighting and Hardware Without Overdecorating

    Light the kitchen in layers: ceiling light, task light over counters, and accent light where it helps. Pendant lights over an island or sink add period character, and under-cabinet light handles prep without filling the ceiling with cans.

    For hardware, unlacquered brass darkens with use, which suits older homes. Pick one main finish and repeat it on pulls, faucet, and lights. Mixing too many metals and styles is the fastest way to overdecorate; restraint is what makes a period kitchen look settled.

    What Should Be Settled Before Construction Starts?

    Every design and material decision should be settled before demolition begins. In an older home, surprises behind walls are likely, and you want those to be the only open questions. The process side, from permits to trade scheduling, is covered in this guide on how to remodel a kitchen in Chicago.

    Use Space Plans and Elevations to Test Every Detail

    Space plans map the room from above: walls, doors, appliances, aisles. Elevations give you every wall face to face, with cabinet heights, trim, and outlets. Together they catch conflicts early.

    Elevations matter most in older kitchens. They show where an upper cabinet meets a plaster soffit, how crown meets a sloped ceiling, and whether a window casing leaves room for a cabinet. They also give the cabinetmaker, electrician, and plumber one shared reference before work starts.

    Confirm Material Selections, Budget, and Lead Times

    Lock in counters, tile, sink, faucet, hardware, appliances, and lights before construction. Each one affects something else: the sink sets the base cabinet, the range sets the hood, the counter sets the backsplash.

    An itemized budget puts a number next to each choice. It shows where restoration work, custom millwork, and new systems fall, so trade-offs are clear. Lead times matter too, since custom cabinets and special-order sinks take longer than stock items.

    Coordinate Fabrication and Installation Around Existing Conditions

    Field-measure after demolition, before final fabrication. Old walls lean, floors slope, and corners are rarely square, so cabinets built to drawings alone may not fit.

    Plan the order of work. Rough plumbing and wiring come first, then plaster repair, then cabinets, then counters, which are templated after the cabinets are set. With design and fabrication under one roof, that sequence stays tight and the field measurements go straight to the shop.

    Keep the Character, Improve the Kitchen

    The strongest classic kitchen renovations treat the old house as the design brief. Your casings, soffits, and hardware already tell you which profiles, woods, and scale belong. The hard part is deciding where to spend: restoring a built-in, matching trim, or upgrading the systems you will never see.

    Elevations make those choices visible. They show which original details survive the new layout and where new millwork must step in, and once those calls are made, the build can follow the plan.

    Threshold Design Lab, a Chicago millwork and design studio, approaches older kitchens by listening first, and TDL Custom, its in-house millwork shop, can cut trim and cabinetry to match what the house already has. If your kitchen has a casing, a soffit, or a built-in you would hate to lose, start there, and let the residential interior design plan grow around it.

    Frequently Asked Questions

    How do you update an old kitchen without making it look out of place?

    Use the house’s own trim, wood species, and scale as the guide for new work. Keep sound original details and upgrade the systems behind the walls. New pieces can be their own design, as long as they share the house’s scale and materials.

    Can new cabinets match the original trim in a Chicago bungalow?

    Yes, custom cabinets can match original trim when a shop cuts profiles to the existing casings. The species and the grain cut must match too. Stock lines rarely carry exact period profiles.

    Is a kitchen island practical in a narrow older kitchen?

    An island works only when it leaves about 42 inches of aisle on each working side, the NKBA’s recommendation for one cook. In many narrow kitchens, a slim work table or a peninsula is the better fit. Measure counter edge to island edge before deciding.

    Which countertop is easiest to maintain in a traditional kitchen?

    Quartz is the easiest, since it does not need resealing. Soapstone is a strong natural choice: it resists stains, and scratches can be sanded out. Marble asks the most care.

    Is $30,000 enough for a traditional kitchen remodel?

    It depends on scope. The 2025 Cost vs Value report puts a national-average midrange minor kitchen remodel, which keeps the layout and cabinet boxes, at about $28,500, and a midrange major remodel at about $82,800. Moving walls, replacing old wiring, restoring original details, or matching rare trim pushes a project well past the lower figure, and costs in Chicago can differ from national averages.

  • Classic Kitchen Cabinets: Decisions That Stay Beautiful for Decades

    Classic Kitchen Cabinets: Decisions That Stay Beautiful for Decades

    Will this still look right in twenty years? It is the correct question to ask about kitchen cabinets, and almost nothing in a showroom is built to help you answer it. Cabinet selection carries most of the weight: door style, reveal dimensions, finish chemistry, and proportion decisions all get locked in early, and they are the hardest and most expensive things to change later.

    That is why classic kitchen cabinets reward a slower planning process. The choices that hold up are rarely the loudest ones. They come from matching cabinetry to the architecture of the house, specifying construction that can be adjusted and refinished, and setting dimensions that respond to the actual volume of your room instead of a standard catalog page.

    What follows is how designers actually evaluate door construction, painted and stained finishes, reveal tolerances, and vertical proportion. Read it, and a cabinet proposal stops being a price and starts being a set of specific questions: frame construction, hinge type, finish schedule, and who is accountable when the drawings reach the shop floor.

    What Gives Cabinetry a Lasting, Classic Character?

    Lasting character comes from three things: cabinetry that agrees with the home’s architecture, detail that serves daily use, and materials that can be repaired instead of replaced. Style names matter far less than those conditions.

    A classic kitchen reads as calm because its parts share a logic. Door proportions relate to the room’s trim. Stone countertops and stainless steel appliances sit inside a palette that was planned as a whole, not assembled selection by selection.

    Match the Cabinet Style to the Home’s Architecture

    Doors and millwork details define a cabinet style and the period it belongs to. Colonial cabinetry, for instance, gets its authority from restraint rather than ornament: simple profiles, careful workmanship, and paint, which protects the wood better than any clear finish and is far easier to touch up a decade later.

    Chicago housing stock gives you clear direction. A 1920s greystone with deep casings and picture-rail trim supports inset doors and taller upper cabinets. A Craftsman foursquare asks for flat panels, visible grain, and simpler crown treatment.

    Balance Traditional Detail With Everyday Function

    Traditional kitchen cabinets fail when ornament blocks use. Applied moldings that catch grease, corner details that trap crumbs, and door swings that collide with appliance handles all show up within the first month of cooking.

    The fix happens in elevation drawings. Every door swing, drawer pull clearance, and appliance door arc gets tested on paper before anything is ordered.

    Choose Materials That Can Be Renewed

    Solid wood face frames, doors, and drawer fronts accept sanding and refinishing. Plywood boxes with dadoed joinery hold square through decades of humidity swings. Both can be serviced.

    Thermofoil and melamine-wrapped doors cannot be refinished once the surface delaminates. That single difference decides whether your cabinetry is a fifteen-year purchase or a forty-year one, which is exactly where door construction enters the conversation.

    Choose Door Construction for Style, Durability, and Scale

    Door construction drives cost, precision, and perceived quality more than any other cabinet decision. Overlay doors sit on top of the face frame. Inset doors sit inside it, flush with the frame face.

    That distinction changes fabrication tolerances, hinge selection, and the number of hours a shop spends on fitting. It also changes how the kitchen reads from across the room.

    When Are Inset Cabinet Doors Worth the Investment?

    Inset cabinet doors are worth it when the house already carries fine trim detail and you want cabinetry that reads as built-in furniture. They require tighter tolerances, so each door is fitted individually to its opening.

    The trade-off is usable interior space and cost. Inset construction reduces drawer box width slightly and adds labor, since a door that is a sixteenth of an inch out of square is visible immediately.

    How Raised Panel Doors Shape a Traditional Kitchen

    Raised panel cabinet doors add depth through a profiled center panel that catches light along its edges. In a traditional kitchen with nine-foot ceilings and substantial casing, that shadow line keeps large door faces from looking flat.

    Scale the profile to the door. A heavy ogee on a 12-inch-wide door looks compressed; a shallow bevel on a 24-inch pantry door disappears. Cabinet doors need profile depth proportional to their surface area.

    Why Shaker Cabinets Remain a Flexible Choice

    Shaker-style cabinets survive because the flat recessed panel and square stile edges belong to no single decade. White shaker cabinets work under painted or stained treatments and pair with glass-front cabinets or beadboard cabinets without visual conflict.

    Stile and rail width is where shaker cabinets go wrong. A 2 1/4-inch stile reads correctly in many kitchens, while 1 3/4 inches looks thin on tall doors.

    How Much Reveal Should Cabinet Doors Have?

    Reveal is the visible gap between the door and frame, and consistency matters more than the number you choose. Typical specifications, though every shop and cabinet line sets its own:

    • Inset doors: 1/16 to 3/32 inch reveal on all four sides
    • Full overlay: 1/8 inch between adjacent doors
    • Partial overlay: 1/2 inch of face frame exposed

    Getting a 1/16-inch reveal to hold across twelve doors depends on the shop, not the drawing. That is why proportion and fabrication capability have to be evaluated together.

    Set Classic Kitchen Cabinet Proportions That Fit the Room

    Proportion is the difference between cabinetry that feels built for the room and cabinetry that feels installed in it. The controlling dimensions are ceiling height, island length, and the vertical rhythm between base cabinets, counter, and uppers.

    Standard base cabinets run 34 1/2 inches high, giving a 36-inch finished counter. Everything above that is a design decision, and it should be driven by the actual ceiling.

    Size Upper Cabinets and Crown Molding to Ceiling Height

    At eight feet, run uppers to 42 inches tall and finish with a single crown molding profile of 2 to 3 inches. At nine or ten feet, either stack a second tier of glass-front cabinets or hold the uppers at 42 inches and build a soffit.

    The one option worth resisting is the twelve inches of dust shelf above a 36-inch run. In a small kitchen especially, carrying the cabinetry all the way up buys real storage and settles the proportion at the same time.

    Use Base Cabinets and Islands to Support Better Workflow

    Island scale follows clearance, not ambition. The NKBA planning guidelines put working aisles at 42 to 48 inches, and that number governs the island before its dimensions do. Where two people cook at once, the wider end of that range is the one that holds up.

    Depth deserves the same attention. A 27-inch island with a 12-inch overhang seats people comfortably; a 48-inch island becomes storage you cannot reach across.

    Add Furniture-Like Details Without Overcrowding

    Pick two furniture gestures per kitchen. Decorative corbels under a counter overhang, a paneled sink base, or a section of open shelving between wall runs. Three or more competing details flatten the effect.

    Those details are where fabrication precision shows, and where finish selection either supports the work or undermines it.

    Select Finishes and Hardware That Age Gracefully

    Finishes age well when they were chosen for durability first and color second. A conversion varnish or catalyzed lacquer over properly sealed poplar or maple resists the moisture and cleaning cycles a kitchen delivers daily.

    Color trends move faster than finish systems fail. Plan on the coating outlasting your color preference, and specify a finish that can be scuff-sanded and recoated.

    Painted Cabinet Finishes That Resist a Dated Look

    Warm whites, soft greens, and muted blue-grays hold up because they read as architectural color. Saturated primaries and high-gloss sheens tie a kitchen to a specific year.

    Specify sheen carefully. A satin or low-sheen finish at 20 to 35 units hides fingerprints and touch-up better than semi-gloss on large door faces.

    When Natural Wood Stain Is the Better Long-Term Choice

    Natural wood stain wins on islands, pantries, and any surface taking heavy contact. Rift-sawn white oak and walnut move less seasonally and show wear as patina.

    Wood species behavior matters here. Maple blotches under dark stain; cherry darkens noticeably with light exposure over the first two years.

    Use Distressed Finish Details With Restraint

    A distressed finish works when it follows where wear happens naturally: drawer edges, door pulls, toe kicks. Uniform distressing across every surface reads as manufactured. Ask for a sample door before committing. Distressing is a judgment call the shop makes by hand.

    Coordinate Brass Hardware, Cup Pulls, and Bar Pulls

    Assign hardware by function, then unify the finish:

    • Cup pulls on drawers under 24 inches
    • Bar pulls at 5 to 8 inches on wide drawers and pantry doors
    • Knobs on upper doors and small openings
    • Unlacquered brass hardware where you want a living patina

    Hardware is the last selection that reaches into how the kitchen functions every day.

    Make Traditional Details Work for Modern Living

    Traditional cabinetry supports modern use when storage is planned around appliances and routines instead of cabinet dimensions. That planning happens during space planning, well before anything is ordered.

    Start by mapping where things land. Groceries, dishes coming out of the dishwasher, coffee in the morning, cleanup at night.

    Plan Storage Around Appliances and Daily Routines

    Assigning drawers to named contents, rather than to generic volume, is what turns storage from adequate into invisible. The island drawer that holds the utensils you reach for while standing at the island is worth more than two cabinets of unallocated space.

    Standard moves that earn their space: a 15-inch tray divider beside the range, full-extension drawers instead of doors on all base cabinets, and a 24-inch pull-out beside the sink for cleaning supplies.

    Layer Under-Cabinet Lighting for Task Illumination

    Under-cabinet lighting belongs in the electrical plan, not the punch list. Linear LED at 2700K to 3000K, mounted toward the front edge of the cabinet, puts light on the counter without glare in the backsplash.

    Dimming and switching should separate task light from ceiling light. That gives you a working kitchen at 6 a.m. and a calm one at 9 p.m.

    Use Display and Open Storage Intentionally

    Glass-front cabinets and open shelving work in limited, framed locations: flanking a window, above a coffee station, at the end of a run. Interior finish then becomes visible, which means painted interiors or a stained back panel get specified.

    Coordinating lighting, glass, and interior finish across cabinetry is where design drawings have to survive fabrication intact.

    Turning a Timeless Cabinet Plan Into a Built Kitchen

    A timeless cabinet plan holds up only if the shop that builds it works from the same drawings the designer produced. That handoff is where most kitchen renovation disappointment originates: a 1/16-inch inset reveal specified in an elevation becomes 1/8 inch on site, and the furniture quality you paid for disappears.

    Threshold Design Lab controls that handoff. Space plans, elevations, itemized budget, and material selections are produced in-house, then fabricated through TDL Custom, our own custom millwork arm, and installed under the same project management. Nobody in that sequence is reading someone else’s drawing for the first time.

    Cabinet decisions are worth talking through before anyone quotes them, because the questions above are easier to answer out loud than on a spec sheet. If you are weighing inset against overlay, or a painted finish against stained white oak, start a conversation or call (773) 433-0042. You can also email paul@thresholddesignlab.com, or read further on traditional kitchen style first.

    Frequently Asked Questions

    What Is the Most Classic Kitchen Cabinet Style?

    Inset shaker doors with a flat recessed panel are among the most durable classic choices, since the profile predates and outlasts style cycles. Raised panel doors are equally traditional and read better in homes with heavy original trim.

    Are Inset Cabinet Doors More Durable Than Overlay Doors?

    Inset cabinet doors are not inherently more durable, but they are usually built to tighter standards on solid wood face frames. Their tolerances mean seasonal wood movement is more visible, so climate-controlled installation matters.

    What Cabinet Colors Will Look Timeless in a Kitchen?

    Warm whites, greige, soft sage, and deep blue-gray tend to hold up longest because they behave as architectural color under changing light. Natural stained oak and walnut are equally reliable and do not face a repaint down the line.

    How Should Cabinet Height Relate to Ceiling Height?

    At eight-foot ceilings, run uppers to 42 inches and finish with 2 to 3 inches of crown. Above nine feet, either extend cabinetry to the ceiling or add a stacked glass tier so no dead space sits above the run.

    Is $30,000 Enough for a Kitchen Remodel?

    No single figure holds, because the answer moves with square footage, how much of the existing layout survives, and what cabinetry and countertops cost at the time you order. As a general shape: a budget at that level tends toward stock or semi-custom cabinetry, mid-range countertops, and a layout that stays roughly where it is, while fully custom cabinetry, inset construction, and any move of plumbing or electrical push past it. Price the room you have rather than the average kitchen.

    Can a Traditional Kitchen Include Modern Appliances?

    Yes. Stainless steel appliances integrate into a traditional kitchen when panel-ready fronts, matching trim kits, or a framed appliance surround are planned during elevation drawings rather than added afterward.

  • Residential Architectural Millwork: What Makes It Work

    Residential Architectural Millwork: What Makes It Work

    You are three weeks into planning a renovation, and a contractor’s estimate lists a line item you have to look up. The term is architectural millwork, and it sits next to a number large enough to make you pause. Before you approve it or cut it, you need to know what it buys you.

    That question has a clear answer. Architectural millwork covers the fixed wood elements built into the structure of a home: cabinetry, paneling, ceilings, shelving, and trim that cannot be picked up and moved. It shapes storage, circulation, and proportion in ways furniture never will.

    This guide covers what residential architectural millwork includes, where it earns its keep, and how a drawing becomes an installed piece. The practical payoff is being able to read a millwork proposal and tell the difference between a plan that has resolved its details and one that has left them to the job site.

    What Architectural Millwork Includes in a Home

    Architectural millwork is any custom wood element permanently integrated into a building. In a house, that means built-in cabinetry, wall paneling, coffered ceilings, stair parts, and the moldings that frame every opening.

    The defining trait is integration. A millwork piece is scribed to your walls, fastened to framing, and finished in place, so it reads as part of the house instead of an object placed inside it.

    Built-In Cabinetry, Shelving, and Storage Systems

    Built-ins are millwork designed around a specific opening and a specific set of contents. A shelving run sized for oversized art books uses different depths and spans than one built for paperbacks.

    Span matters structurally. A 3/4-inch shelf in solid maple sags over long runs, so a designer either shortens the bay, thickens the shelf, or adds a hidden steel flitch plate. Those choices happen during drawing, not during installation.

    Wall Paneling, Wainscoting, and Coffered Ceilings

    Paneling treats a wall as a composed surface. Wainscoting, the traditional millwork technique of paneling the lower wall, sits at a height that changes how a room reads. The working convention is roughly a third of the wall height, which on a standard ceiling lands somewhere near 32 to 36 inches, and keeping the band low is what leaves the wall above it reading tall. Height is worth testing against the room rather than the rule, as any survey of wainscoting ideas will show.

    Coffered ceilings follow the same logic overhead. Beam layout has to line up with joist direction, light fixtures, and the room’s true dimensions, which are rarely square in an older Chicago two-flat.

    Crown Molding, Casing, and Other Fixed Trim

    Trim resolves the joints a building cannot hide. Casing covers the shim gap between wall framing and a door or window jamb; baseboard closes the wall-to-floor joint; crown handles the wall-to-ceiling transition.

    Execution decides whether it looks custom. Carpenters cope inside corners instead of mitering them because a coped joint stays tight when the wood shrinks, while a mitered one opens into a visible crack by the second winter.

    How Millwork Differs From Furniture, Casework, and Finish Carpentry

    Three terms get used interchangeably on job sites, and the distinctions affect your budget:

    • Casework: boxes built to standard modular sizes, assembled in a shop and set in place
    • Millwork: components made to custom profiles and dimensions for one specific location
    • Finish carpentry: the on-site installation trade that cuts, fits, and fastens those components
    • Furniture: freestanding, movable, and never scribed to your walls

    Knowing which category each line item belongs to lets you ask a sharper question: where in the house does custom work pay off?

    Where Architectural Millwork Serves Residential Life

    Millwork earns its cost in the rooms you use hardest. Kitchens, libraries, mudrooms, and dressing areas all have storage problems that stock cabinetry mostly solves, and custom fabrication solves outright.

    The value comes from fit. A quarter-inch of dead space repeated across twelve cabinet runs is a lost drawer, and in a vintage building with out-of-plumb walls, that gap is closer to an inch.

    Kitchens That Balance Workflow and Integrated Storage

    Kitchen millwork starts with clearances, then adds storage. The National Kitchen & Bath Association’s kitchen planning guidelines set the clearance and fixture-location recommendations that govern walkway widths and landing areas before a single cabinet elevation gets drawn.

    Inside those limits, custom work handles what stock sizes cannot: a 26-inch appliance garage, drawer banks sized to your actual cookware, or a panel that hides a refrigerator flush with adjacent doors. Each requires a filler strategy worked out on paper.

    Libraries and Living Rooms With Purposeful Built-Ins

    A library wall is a structural exercise disguised as a design one. Loaded shelving carries real weight, so fabricators anchor cases to studs and account for deflection across every bay.

    Living room built-ins face a different constraint: media, outlets, and ventilation. Cable routing, a vented compartment for a receiver, and a shelf depth that clears a television bracket all get resolved in drawings.

    Mudrooms Designed for Daily Arrival and Departure

    Mudrooms fail when they are designed for tidy assumptions. Bench height around 18 inches, hooks at two heights for adults and children, and a wet-boot zone with a removable tray handle the way the room is used in February.

    Material selection changes here too. Painted poplar or maple holds up better than softwood against repeated impact, and a durable catalyzed finish resists road salt and moisture.

    Bedrooms, Dressing Rooms, and Other Private Spaces

    Closet millwork is measured in linear feet of hanging rod, shelf, and drawer. An honest inventory of what you own drives the layout, splitting long-hang from double-hang and assigning drawer depths to real contents.

    Bedroom paneling and headboard walls introduce a quieter set of problems: outlet placement, reading light integration, and how a panel returns at a window jamb. Those details all land in the same place, the drawing set.

    How Design Becomes a Fabricated Installation

    Millwork becomes real through a documented sequence: space plans, elevations, shop drawings, engineering, fabrication, finishing, and installation. Skipping a step pushes the decision to the job site, where it costs more.

    Every stage narrows uncertainty. By the time material is cut, the questions should already be answered.

    Why Space Plans and Elevations Must Precede Shop Drawings

    Space plans establish where things go and how you move between them. Elevations set the vertical story: cabinet heights, reveal lines, where crown meets ceiling.

    Shop drawings translate that intent into parts. A fabricator working without approved elevations is guessing at proportions the designer already decided.

    How CAD and Engineering Resolve Details Before Fabrication

    Computer-aided design (CAD) turns a concept into dimensioned geometry. Field measurements get imported, out-of-square conditions get modeled, and scribe allowances get built into the parts list.

    Engineering answers the load and joinery questions: shelf spans, drawer slide capacity, how a 10-foot panel is broken into transportable sections with joints that fall on a design line.

    Material Selection, Wood Movement, and Finish Expectations

    Wood expands and contracts across the grain with humidity, and Chicago swings hard between seasons. Frame-and-panel construction accommodates that movement; a wide glued slab in a fixed opening does not.

    Finish decisions follow. Spray-finishing in a controlled shop produces a more even film than brushing on site, and stain samples should be approved on the actual species being used.

    Why Separating Design From Fabrication Introduces Errors

    Most millwork problems are communication problems. When the designer and the fabricator are separate companies, every ambiguity in a drawing becomes an assumption, and assumptions surface after the piece is built.

    Keeping custom millwork fabrication in-house closes that gap. The person who drew the reveal is available to the person cutting it, so questions get resolved in hours rather than change orders.

    Coordinating Architects, Designers, and Contractors

    Millwork touches nearly every trade. Electrical rough-in, plumbing, HVAC registers, and flooring all interact with built-in work, and each has its own sequence.

    A complete millwork package documents those intersections: blocking locations, outlet heights, appliance specs, and delivery timing. That coordination sits at the center of full-service interior design and drives what the work finally costs.

    What Determines the Cost and Quality of Custom Woodwork

    Four variables set the price: scope, material, detail complexity, and installation conditions. Cabinet pricing is quoted per linear foot or per project, and custom work sits above semi-custom, which sits above stock.

    Quality tracks the same variables. Dovetailed drawer boxes, full-extension hardware, and a catalyzed finish cost more upfront and behave differently in year twelve.

    Scope, Scale, and the Complexity of the Details

    Scale raises the total; complexity raises the rate. Twenty feet of flat-panel cabinetry and twenty feet of inset cabinetry with beaded face frames are different jobs at the same length.

    Inset doors demand tighter tolerances because the reveal is visible on all four sides. That precision shows up as shop hours.

    Choosing Oak, Maple, Mahogany, or MDF for the Application

    Species selection is a match between grain, finish, and use:

    • White oak: open grain, strong, handles wire-brushing and light stains well
    • Maple: tight and even, ideal under paint or a clear finish, dents less than softwoods
    • Mahogany: stable, fine grain, traditional choice for stained libraries and paneling
    • Medium-density fiberboard (MDF): smooth and free of defects, excellent for painted panels, unsuitable where it will get wet

    MDF is the right answer more often than people expect. It stays flat, takes paint cleanly, and its edges finish like solid stock.

    When Custom Profiles and Moldings Are Worth the Investment

    Custom knives are worth cutting when the house has a profile worth matching. Restoring a 1920s bungalow means duplicating an original casing that no commercial molding catalog carries.

    For new work with a clean profile, stock or lightly modified moldings do the job. Spend the custom budget where the eye lands: a mantel, a stair, a paneled entry.

    How Shop Fabrication and Installation Affect the Budget

    Shop time buys accuracy in a climate-controlled space with stationary machinery. Site conditions determine how much of that accuracy survives: stair access, elevator dimensions, and wall flatness all add labor.

    Field measurement after framing and drywall, then a scribed installation, is what makes a built-in look built-in. Getting there depends on how early you bring the millwork conversation into the project.

    A Coordinated Path From Vision to Lasting Woodwork

    Architectural millwork works when the design decisions and the fabrication decisions are made together. Shelf spans, wood species, reveal dimensions, and blocking locations all belong in the drawing set before anyone orders material.

    Bring millwork into your planning early, alongside space plans and elevations, so the built-ins support how you use each room. That sequencing is what separates cabinetry that fits from cabinetry that almost fits.

    Threshold Design Lab has been drawing and building this work in Chicago for thirty years, with TDL Custom fabricating in-house. If you have a room with a storage problem and no obvious answer, that is a good place to begin a conversation about residential interior design. Get in touch, call (773) 433-0042, or email paul@thresholddesignlab.com.

    Frequently Asked Questions

    What Is Considered Architectural Millwork in a Residence?

    Architectural millwork includes built-in cabinetry, wall paneling, wainscoting, coffered ceilings, custom shelving, stair parts, and fixed trim such as crown, casing, and baseboard. The common thread is permanent integration into the structure. Freestanding furniture and applied decorative objects fall outside the category.

    How Much Does Residential Architectural Millwork Cost?

    Cost depends on scope, species, detail complexity, and site conditions, and it is quoted per project or per linear foot after drawings are complete. Inset doors, custom profiles, and hardwoods like mahogany raise the rate above painted MDF panels. Any firm quoting a firm number before measurements is estimating, not pricing.

    What Is the Difference Between Architectural Casework and Millwork?

    Casework refers to standardized boxes built in modular sizes, while millwork is fabricated to custom dimensions and profiles for one specific location. Many kitchens use both: casework carcasses with millwork fronts, panels, and trim. The distinction affects lead times and pricing.

    Is Millwork the Same as Finish Carpentry?

    No. Millwork is the fabricated product, and finish carpentry is the on-site trade that cuts, fits, scribes, and fastens it. A finish carpenter can install millwork made elsewhere, and a millwork shop can produce parts it never installs.

    When Should Millwork Design Begin During a Home Renovation?

    Millwork design should begin during space planning, before electrical and plumbing rough-in. Blocking, outlet heights, appliance specifications, and HVAC registers all need to be coordinated with built-in locations. Adding millwork after drywall means opening walls or accepting compromises.

    Why Does In-House Millwork Fabrication Matter for a Residential Project?

    It changes who carries the risk of an ambiguous drawing. Send a package to an outside shop, and every unclear dimension becomes their best guess, discovered at installation when the piece is already built. Kept in-house, the guess never has to be made, which is why the work tends to run shorter and generate fewer change orders.