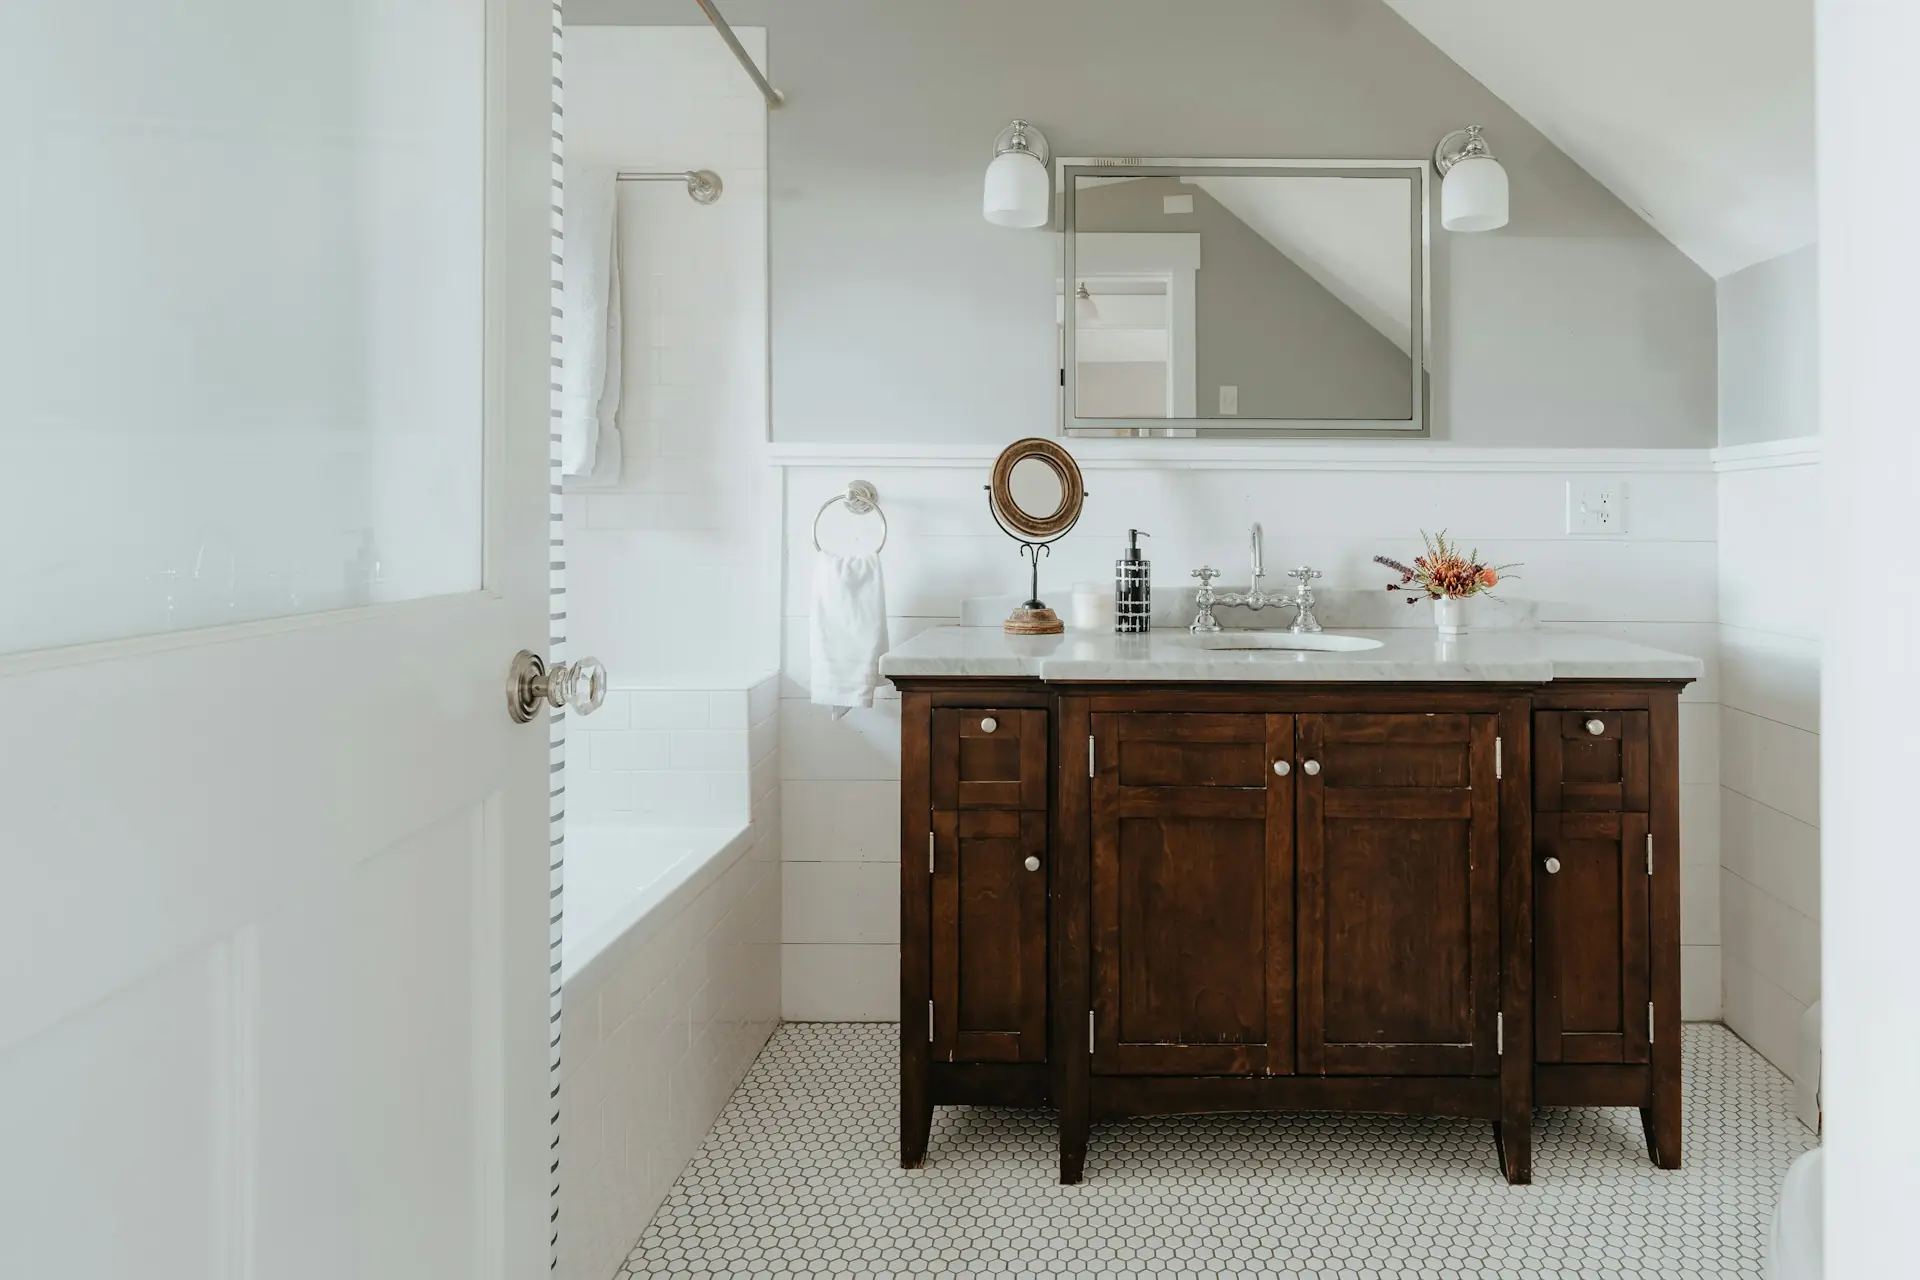
Tag: Chicago interiors

  • Custom Bathroom Vanities in Chicago: Fit, Storage, and Fabrication Choices

    Custom Bathroom Vanities in Chicago: Fit, Storage, and Fabrication Choices

    When you plan a bathroom remodel, the vanity is where small dimensions decide big outcomes. A drain stub sits two inches off center. A window frame cuts into the wall where the mirror should hang. A door swing clips the drawer you assumed would open freely. Stock cabinets ask your room to adjust to them, and older Chicago bathrooms rarely cooperate.

    If your bathroom is irregular, your storage needs are specific, or you have a material you will not compromise on, a vanity built to measured drawings is often worth the cost. Custom bathroom vanities in Chicago solve fit problems that stock and semi-custom lines cannot, because the cabinet is drawn around your plumbing, walls, and daily routine. Threshold Design Lab designs these pieces through a listening-first process, and its fabrication arm, TDL Custom, builds them under the same roof.

    This guide walks through where custom earns its cost, which bathroom limits shape the design, and how a vanity moves from the first conversation to the final hinge adjustment. It also covers what drives price beyond the cabinet’s width, so you can weigh custom against semi-custom with clear eyes.

    What Makes a Vanity Truly Custom?

    A vanity is custom when every dimension, material, and interior is decided for your room and your habits before anything is cut. A catalog piece starts with a box size. A custom vanity starts with a measured wall, a plumbing location, and a conversation about how you use the space each morning.

    Custom vs. Stock and Semi-Custom: Where the Differences Show

    Stock vanities come in fixed widths, depths, and finishes. You pick the closest size and fill gaps with filler strips. Semi-custom lines add choices, such as door styles, a few extra widths, and modified depths, but they still build from a standard box.

    The differences show in four places you notice every day:

    • The edges. Custom cabinets scribe tight to out-of-plumb walls. Stock units leave gaps that need caulk or trim.
    • The interior. Custom drawers wrap around the trap. Stock sink bases often waste the lower half of the cabinet.
    • The finish match. Custom work can match trim, doors, or built-in cabinets elsewhere in your home.
    • The materials. You choose the species, the cabinet core, and the finish, without a catalog limiting the list.

    Proportions, Materials, and Storage Built Around Daily Use

    Proportion is the part most people never think to ask about. Counter height, toe kick depth, and the ratio of drawers to doors all change how a vanity feels. A taller person may want a counter higher than standard. A narrow powder room may need a shallower cabinet so the path to the toilet stays open.

    Materials should follow the room’s use. A family bath with two sinks needs durable finishes and sturdy drawer slides. A guest bath can carry a more delicate veneer or a painted finish with fine detailing.

    Storage works best when you plan it around real objects. Tell your designer what lives on your counter today: hair tools, a water flosser, daily medications. Then drawers get sized for those items, with outlets or dividers placed where they help. That level of planning sits at the center of residential interior design done well.

    How Should the Vanity Fit the Whole Bathroom?

    The vanity should be designed as part of the room’s systems: plumbing, clearances, storage, moisture, and light. When you treat it as a standalone purchase, the conflicts show up during installation, when changes cost the most.

    Plumbing Rough-Ins, Clearances, and Sink Placement

    Your plumbing rough-in sets the starting point. The supply lines and drain locations decide where sinks can sit without opening the wall. A custom vanity can shift drawers and partitions to work around existing pipes. Moving the drain itself is a plumbing decision, and it affects cost and schedule.

    Clearance comes next, and two different kinds of numbers apply. The National Kitchen & Bath Association (NKBA) recommends 30 inches of clear floor space in front of each fixture in its bath planning guidelines. The same guidelines note a much smaller code minimum of 21 inches in front of a lavatory. The minimum your project must meet depends on the code that governs your building, so confirm the minimum that applies to you and plan toward 30 inches wherever the room allows.

    Door and drawer swings matter as well. A drawer that hits the toilet, or a cabinet door that blocks the entry door, is a common late discovery. Measured drawings catch these conflicts on paper.

    If you plan to age in place, the NKBA’s access recommendations call for a knee space of about 36 inches wide and 27 inches high at the sink, so a seated person can roll up to it. A vanity built that way is one piece of an accessible bathroom, not the whole answer. Reach, controls, grab bars, and floor space all have to work together, and a project that must meet a specific accessibility standard needs that standard checked on its own.

    Medicine Cabinets, Linen Towers, and Cabinetry as One Storage System

    Plan the medicine cabinet, linen tower, and vanity together, and your bathroom stores more with less visual clutter. Each piece should hold a different kind of item. Daily items go in the medicine cabinet at eye level. Towels and bulk supplies go in the tower. Grooming tools and cleaning products go in vanity drawers.

    When these are designed as one set of custom bathroom cabinets, the lines align. Door heights match, finishes match, and the medicine cabinet can be recessed between studs so it sits flush. A recessed cabinet needs the wall checked for pipes, vents, and wiring first. That check belongs in the design phase, before you order a mirror.

    Humidity, Countertops, and Lighting Details to Resolve Early

    Bathrooms test cabinetry with steam every day. Ask about the cabinet core, edge sealing, and finish system before you choose a color. Strong ventilation protects the investment as much as the materials do.

    Countertop choice affects maintenance for years. Marble looks beautiful but is porous, and acids from toiletries can etch it, so plan on sealing and caring for marble as part of owning it. If you prefer low upkeep, engineered stone is easier to live with.

    Lighting placement must be fixed early too. Sconces beside the mirror light your face more evenly than a single fixture overhead. Their junction boxes need to land where the mirror and medicine cabinet allow, so the electrician needs final cabinet drawings before rough-in.

    How Does a Custom Vanity Go from Plan to Installation?

    A custom vanity moves through three stages: design and planning, procurement and fabrication, then installation. Each stage produces something you can review, so decisions are settled before they become expensive.

    Planning Custom Bathroom Vanities in Chicago with Measured Drawings

    Planning starts with listening. Your designer should ask how many people share the bath, what feels wrong now, and how you want it to look. That conversation becomes the brief everyone works from.

    Next comes field measurement. In older Chicago two-flats and bungalows, walls are rarely square and floors often slope. Precise measurements let the shop build scribe allowances into the cabinet. You then review space plans and elevations that show the vanity, mirror, lighting, and storage together.

    Permit questions depend on your project’s scope. The Chicago Construction Codes govern alterations, so moving plumbing or electrical may need review. Your design team should flag these during planning, not after demolition. The wider renovation around the vanity is covered in this guide to bathroom design in Chicago.

    Selecting Materials, Finishes, and Hardware

    Material selection turns the drawing into something you can touch. You choose wood species or paint, door profile, countertop, and sink style. Seeing samples together under your bathroom’s light helps avoid surprises.

    Hardware deserves more attention than it gets. Soft-close slides, hinge quality, and pull size affect how the vanity feels every day. Pulls should suit your hands and line up with nearby fixtures. Faucet finish and hardware finish should be decided together.

    An itemized budget ties these selections to cost. You see how a stone upgrade or a drawer insert changes the total, and you can adjust before ordering.

    Coordinating Fabrication, Trades, and Installation

    Fabrication begins once drawings and selections are approved. When design and custom millwork happen in one shop, the people who drew the vanity can walk over to the people cutting it. A question about a drawer box gets answered in minutes, not by email a week later.

    Coordination keeps trades in order. The plumber sets rough-ins to match the drawings. The cabinet installs next, and the countertop fabricator templates from the installed cabinet. Then the plumber returns for final connections and the electrician sets fixtures. Lead times for stone, sinks, and faucets must be managed so nothing stalls the sequence.

    Installation ends with adjustments: leveling, door alignment, and hardware tuning. A finished vanity should close evenly and sit tight to every wall.

    How Much Should You Budget for a Custom Vanity?

    Your budget for a custom vanity depends far more on materials, interior complexity, and coordination than on cabinet width. Two vanities of the same size can differ widely in cost based on those choices.

    What Changes the Price Beyond Cabinet Size?

    Several factors move the price:

    • Wood species and finish. Rift-cut white oak with a hand-applied finish costs more than a painted maple door.
    • Construction. Inset doors take more precision than full-overlay doors.
    • Drawer count. Drawers cost more than doors because each one needs slides, a box, and fitting.
    • Interior fittings. U-shaped drawers around plumbing, dividers, and built-in outlets add labor.
    • Countertop and sink. Natural stone, integrated sinks, and thick edges raise cost.
    • Connected pieces. A matching linen tower or recessed medicine cabinet expands the scope.
    • Site conditions. Moving plumbing or fixing walls behind the old vanity adds trade work.

    When Does Custom Offer More Value Than Semi-Custom?

    Custom offers more value when standard sizes leave you with wasted space or filler strips. It also wins when your bathroom has odd angles, a sloped ceiling, or a window in the way. If you want the vanity to match trim or cabinetry elsewhere in the house, custom makes that possible.

    Semi-custom works fine in a square room with standard plumbing and simple storage needs. If a catalog size fits your wall within an inch and you like the finishes offered, the savings can go toward tile or lighting. For a closer look at that middle option, see this guide to semi-custom cabinets.

    A good test is to list what you would give up with semi-custom. If the list includes storage you need or a fit you would notice daily, custom is worth the cost. If the list is short, semi-custom is the honest answer.

    A Vanity That Fits More Than the Wall

    The right vanity fits your plumbing, your room’s limits, and your daily routine at once. Width is the easy part. The harder work is locking in drain location, clearances, storage, moisture, and lighting before fabrication starts, because each decision affects the next.

    Most of that work happens on paper. Measured drawings and early material choices take a few extra weeks at the start, and they spare you the morning a drawer meets a pipe it was never drawn around.

    If you would like a second set of eyes on your bathroom, Threshold Design Lab, a Chicago design and fabrication studio, takes a vanity from first measurement to final hinge adjustment, with TDL Custom building it in-house. Bring your measurements and your list of what lives on the counter, and the conversation can start there.

    Frequently Asked Questions

    How much does a custom bathroom vanity cost in Chicago?

    The cost depends on materials, drawer count, countertop, and any plumbing changes more than on width. An itemized budget during design shows how each choice affects the total, so trade-offs can be made before anything is ordered.

    Can a custom vanity work with existing bathroom plumbing?

    Yes, custom vanities can be designed around existing supply and drain lines. Drawers and partitions are shaped to clear pipes, which often avoids opening the wall. Moving a drain is possible but adds plumbing work.

    Is a floating vanity practical for a small bathroom?

    A floating vanity suits many small bathrooms because the open floor below makes the room feel larger and easier to clean. It needs solid wall blocking installed before drywall. Storage is a bit smaller, so a matching medicine cabinet helps balance it.

    Should a medicine cabinet be designed with the vanity?

    Yes, designing them together aligns finishes, heights, and lighting. A recessed medicine cabinet requires checking the wall for pipes and wiring first. Planning both at once also lets sconces land in the right spots.

    What should be ready before discussing a custom vanity?

    Photos of the current bathroom, rough measurements, and a list of what is stored there daily make a strong start. Inspiration images help too, especially when they show the door style, wood tone, or countertop that caught your eye.

  • Commercial Interior Design in Chicago: What Businesses Need to Plan

    Commercial Interior Design in Chicago: What Businesses Need to Plan

    You are weighing a lease renewal, a build-out allowance, and a team that has outgrown its floor plan. Somewhere in that conversation, someone asks whether you need an architect, a contractor, a designer, or all three. Before you sign anything, it helps to know what a commercial project demands that a home renovation never does.

    Commercial interior design in Chicago sits at the meeting point of code compliance, occupancy math, brand experience, and a schedule that cannot interrupt your revenue. The stakes are different because the space has to serve employees, customers, inspectors, and a landlord at the same time. Once you understand the regulatory, functional, and procurement differences, you can read any design proposal and tell whether the firm has planned for reality or only for renderings.

    The sections below cover where commercial work diverges from residential design, what belongs in a complete design package, and how fabrication and installation get coordinated on a schedule that cannot slip. The useful outcome is a short list of questions that separate a firm that draws well from one that delivers on budget and on time.

    How Commercial Interior Design in Chicago Differs From Residential Work

    Commercial design answers to regulators, staff, and customers, while residential design answers to a household. That single difference reshapes the drawings, the budget, and the review process.

    Residential design starts with how a family lives. Commercial design starts with how a business operates, then works backward into layout, finishes, and lighting. Both disciplines share tools with architecture, and many projects involve architects for structural or permit scope, but the driving constraints are not the same.

    Business Operations Shape Every Design Decision

    Your operating model dictates the plan. A clinic needs clean circulation between intake and treatment rooms. A restaurant needs a kitchen line that supports peak covers without staff crossing paths.

    Designers who ask about headcount growth, shift patterns, and delivery logistics before sketching anything are doing the work correctly. That listening step produces a program document, which becomes the test every later decision has to pass.

    Codes, Accessibility, and Occupancy Require Early Planning

    Occupancy classification, egress width, and accessible route clearances get resolved during schematic design. Retrofitting them after permit review costs weeks. Storefronts, corridors, and historic character are governed separately again along many Chicago business corridors, and the city planning resources collected by the Chicago Architecture Center are a reasonable place to find which rules attach to your address.

    Accessibility deserves attention as design, not compliance paperwork. Wide doorways, clear signage, and unobstructed pathways are the same features that make a space easy for everyone to use.

    Durability, Maintenance, and Brand Experience Carry Equal Weight

    Commercial finishes take abuse a home never sees. Reception desks get scraped by luggage. Corridor corners get hit by carts.

    That pushes specifications toward quartersawn hardwood edges, solid surface tops, commercial-grade wall protection, and flooring rated for heavy foot traffic. Every one of those choices still has to look like your brand, which is where planning the layout itself becomes the next decision.

    Planning a Space That Supports People and Performance

    Space planning is the phase where square footage turns into performance. Get the plan right and finishes become a finishing touch; get it wrong and no material selection rescues the result.

    Good commercial interior designers in Chicago start with measured field conditions, then test two or three layout options against your program before committing.

    Space Planning for Workflow, Capacity, and Future Change

    Plan for the headcount you expect in three years, not the one you have now. Modular workstation grids, demountable partitions, and a spare data drop per zone make later changes cheap.

    The Chicago Architecture Center describes flexible interior spaces that avoid fixed partitions so a floor can absorb new uses over time. That principle still applies to a 6,000 square foot office lease.

    Office Interior Design That Balances Focus and Collaboration

    Office interior design in Chicago now means zoning for two opposite needs in the same footprint. Open collaboration areas need soft surfaces and acoustic ceiling treatment. Focus rooms need door seals and separate lighting control.

    A workable zoning plan usually includes:

    • Quiet zones with individual task lighting and acoustic panels
    • Team areas sized for the largest recurring meeting, not the average one
    • Enclosed call rooms placed away from primary circulation
    • Storage and print zones that keep noise off the main floor

    Retail and Hospitality Environments That Guide the Customer Journey

    Retail and hospitality design map a sequence: entry, decision point, transaction, exit. Sightlines, lighting contrast, and fixture height control how people move through that sequence.

    Hospitality design adds durability under service load, from banquette upholstery to bar millwork that survives daily cleaning chemicals.

    Chicago Building Conditions From River North to Adaptive-Reuse Spaces

    River North lofts bring timber columns and uneven slabs. Downtown high-rises bring core walls, shared risers, and freight elevator windows that limit delivery sizes.

    Adaptive-reuse buildings often reveal surprises once ceilings open, so field verification before fabrication protects your schedule. That verification is the point where a good drawing has to become a buildable set of documents.

    From Design Intent to a Buildable Project

    A buildable project is one where every drawing, specification, and lead time has been reconciled before construction starts. That reconciliation is what separates a design concept from a delivery plan.

    The handoff from design to construction is where most commercial budgets slip. Clear documents and disciplined procurement prevent that.

    What a Commercial Design Package Should Include

    A complete package gives your contractor no room to guess. Ask any commercial interior design firm for these deliverables by name:

    • Dimensioned space plans and reflected ceiling plans
    • Interior elevations for every millwork and feature wall
    • Finish schedules with manufacturer, model, and finish code
    • Furniture and equipment plans with power and data locations
    • An itemized budget tied to each line of the specification

    Budget, Schedule, and Procurement Planning at Scale

    Commercial procurement runs on lead times. Custom seating, glass fronts, and specialty lighting frequently carry longer waits than the construction itself.

    Building the schedule backward from your target opening date, then placing long-lead orders during design development, keeps the critical path intact.

    Vendor Coordination and Project Management During Construction

    Project management means one person owns the answer when the electrician and the millwork installer both need the same wall on Thursday. Weekly site meetings, an open issues log, and written change order approvals keep that from becoming your problem.

    Custom Millwork and Built-Ins Without the Translation Gap

    Commercial millwork in Chicago is where design intent most often gets lost in translation. A reception desk drawn at one radius arrives at another because the shop reinterpreted the elevation.

    Through TDL Custom, the shop drawings are produced by the same people who drew the elevations, so a radius that matters gets questioned before it is cut rather than after. That connection matters most when built-ins carry the brand, which raises the question of how to vet a firm in the first place.

    How to Evaluate Commercial Interior Design Firms in Chicago

    Judge a firm on delivered projects, technical fluency, and who signs for installation. Portfolio images tell you about taste; process answers tell you about outcomes.

    Interior design firms in Chicago vary widely in scope. Some produce concepts and hand off. Others carry the project through the punch list.

    Assess Relevant Project Experience and Technical Fluency

    Ask for two completed projects in your building type and at your square footage. Then ask what changed between the permit set and the as-built condition, and why.

    A firm with real technical depth will discuss occupancy load, ceiling plenum conflicts, and sprinkler head relocation without deflecting to the general contractor.

    Ask How the Team Manages Disruption, Lead Times, and Change Orders

    Your business has to keep running. Ask how phased construction, after-hours work windows, and temporary partitions get handled on an occupied floor.

    Then ask for their change order policy in writing: who approves, at what dollar threshold, and how the schedule impact gets documented.

    Confirm Who Owns Fabrication, Installation, and Final Coordination

    Find out whether millwork is subcontracted or built in-house, and who attends installation. A single accountable party for design, fabrication, and final coordination removes the finger-pointing that stalls closeout.

    That clarity is the same thing that makes the finished space hold up once your team moves in.

    A Clear Process Creates a More Resilient Commercial Space

    Commercial design succeeds when the process is disciplined enough to absorb surprises. Field conditions change, lead times shift, and inspectors ask for revisions; a documented program, itemized budget, and owned installation schedule keep those events from becoming delays.

    The businesses that end up with functional spaces are the ones that treated planning as the real work. Space plans, elevations, and finish schedules are not paperwork; they are the agreement that everyone builds from. Design-build delivery tightens that agreement further by keeping drawing and fabrication in the same conversation.

    If you are moving from inspiration toward a committed project, the next step is a conversation about your operations, your lease terms, and your timeline. Threshold Design Lab has spent thirty years on commercial interior design in this city, with fabrication handled in-house through TDL Custom. Bring us the lease and the headcount you expect in three years, and we can tell you what the space will actually need. Reach the team at paul@thresholddesignlab.com, call (773) 433-0042, or start a project conversation.

    Frequently Asked Questions

    What Does Commercial Interior Design Include?

    Commercial interior design includes programming, space planning, code and accessibility review, finish and fixture specification, furniture planning, and construction oversight. Many firms also handle procurement, custom millwork, and installation. Scope varies, so confirm what appears in the contract.

    How Is Commercial Interior Design Different From Residential Design?

    Commercial work is governed by occupancy classification, egress requirements, accessibility standards, and durability ratings that residential interior design does not face. Commercial projects also involve landlords, permit reviews, and vendor coordination at a larger scale. The design process is similar; the constraints are not.

    How Much Does Commercial Interior Design Cost in Chicago?

    Fees depend on square footage, scope, and whether fabrication and project management are included, and most firms price each project individually instead of publishing rates. Expect an itemized budget during the design phase that separates design fees, construction, millwork, and furniture. Ask for that breakdown before you sign.

    What Should Be Included in an Office Interior Design Plan?

    An office plan should include a dimensioned space plan, a reflected ceiling plan, power and data locations, a furniture plan, a finish schedule, and acoustic zoning for focus and collaboration areas. It should also account for headcount growth. Anything less leaves decisions to the contractor.

    How Long Does a Chicago Commercial Build-Out Usually Take?

    Timelines run from design through permit, construction, and installation, with permit review and long-lead items driving most of the variability. Custom furniture, glass systems, and specialty lighting are common causes of delay. Placing long-lead orders during design development is the most reliable way to protect the date.

    Do Commercial Interior Designers Handle Custom Millwork and Installation?

    Some do and some subcontract it. Firms with in-house fabrication produce shop drawings from the same team that drew the elevations, which reduces interpretation errors on commercial millwork and built-ins. Ask directly who builds the work and who supervises installation day.

  • Elements of Kitchen Design: Decisions to Make Before You Order

    Elements of Kitchen Design: Decisions to Make Before You Order

    Should the island seat four or hold a prep sink? Do you order the range before the cabinets, or does that sequence create a costly mistake? These are the questions a showroom is not built to answer, and they shape a kitchen remodel long before demolition starts. They are also far easier to get right on paper than in drywall.

    Professional designers work through the elements of kitchen design in a deliberate order: layout first, then cabinetry, then surfaces, then lighting and utilities. That sequence exists because each choice constrains the next. A refrigerator moved eighteen inches changes the counter run, which changes the cabinet sizes, which changes the outlet plan. Working out of order is how homeowners end up with a beautiful kitchen space that feels wrong to cook in.

    What follows is that sequence, in the order a designer actually works it, so you can hold your own kitchen to the same discipline. The point is to reach your first design meeting able to read a space plan, question an elevation, and ask about clearances, appliance specifications, and material selections without taking anyone’s word for it.

    Start With Layout, Workflow, and Circulation

    Layout comes first because everything else attaches to it. Until the positions of the stove, refrigerator, kitchen sink, and dishwasher are settled, no cabinet, countertop, or light fixture can be specified with any confidence.

    A space plan is the deliverable that locks this down. It shows walls, door swings, window openings, appliance footprints, and clearances at scale. Good practice keeps the plan honest about what the room can hold, including the mechanical realities of Chicago’s older two-flats and greystones where soil stacks and chimney chases refuse to move.

    Which Elements of Kitchen Design Should Be Planned First?

    Plumbing and gas locations, structural walls, and window positions come first because they are the most expensive to change. Then appliance placement, then circulation paths, then counter space.

    Once those fixed points are mapped, you can test three or four layout options against the same footprint. Each one gets measured for walkway width, counter runs, and door conflicts before any of them earns a material palette.

    Build Practical Zones Around Daily Tasks

    Zones organize a kitchen around what happens in it. Four of them cover most of what the room has to do:

    • Cooking zone: range or cooktop, landing space on both sides, spice and oil storage within arm’s reach
    • Preparation zone: the longest uninterrupted counter run, ideally between sink and cooktop
    • Cleaning zone: sink, dishwasher, trash pull-out, and drying space grouped tightly
    • Storage and staging: refrigerator, pantry, and the counter that receives groceries

    Counter space allocations follow the zones. The NKBA planning guidelines call for a landing area of at least 24 inches on one side of the primary sink and 18 on the other, with 12 inches on one side of the cooking surface and 15 on the other.

    Use the Work Triangle Without Forcing It

    The kitchen work triangle connects sink, refrigerator, and cooking surface. The NKBA guideline is that the three legs of that triangle total no more than 26 feet, with no traffic path cutting through the middle.

    Treat the work triangle as a diagnostic rather than a rule. In a long open-plan kitchen with two cooks, zone-based planning often outperforms it. The triangle still catches obvious errors, like a refrigerator stranded across a walkway from every prep surface.

    Choose a Layout That Protects Traffic Flow

    An L-shaped kitchen with an island can work well in many Chicago floor plans, because it keeps two work walls intact and pushes household traffic to the perimeter. Galley layouts work in narrow footprints when both ends stay open.

    Allow 36 inches of clearance on all sides of a kitchen island, and 42 to 48 inches where two people pass regularly. If the island carries a breakfast bar at standard 36-inch counter height, plan a 12-inch overhang for knees. With circulation settled, the cabinet plan can be built to fill it.

    Design Cabinetry and Storage Around Real Use

    Cabinetry gets designed from the inside out. You count what the kitchen has to hold, then build the boxes around that inventory, and the elevations follow.

    This is the step homeowners skip most often. Ordering kitchen cabinets from a catalog before inventorying contents produces a kitchen that looks resolved and functions poorly, with a pantry that cannot fit cereal boxes upright.

    Inventory the Parts of a Kitchen Before Designing Storage

    Walk your current kitchen and list what lives in it: stockpots, sheet pans, small appliances, recycling, table linens, dog food. Note what sits on the counter because it has no home. Those items become storage requirements on the plan.

    Kitchen components each need a dimension, not a category. A stand mixer needs 17 inches of clear height in a deep drawer or a lift shelf. Sheet pans need vertical dividers at roughly 2-inch spacing. Those numbers drive cabinet widths and interior fittings.

    Choose Cabinet Configurations That Improve Reach and Access

    Deep drawers outperform base cabinet doors for almost everything heavy. A 24-inch-deep drawer brings the back contents to you; a door and fixed shelf make you kneel and reach.

    Configurations worth specifying by name on your drawings:

    • Deep drawers in 30-inch and 36-inch widths for cookware and dishes
    • Lazy Susan or corner pull-out to recover blind corner volume
    • Tray dividers above the wall oven or beside the cooktop
    • Toe-kick drawers for flat items in small kitchens
    • Open shelving limited to one wall, for items used daily

    Interior inserts belong in the drawing set, not the punch list. Deciding them late means retrofitting hardware into boxes that were not bored for it.

    Coordinate Cabinetry With Appliance and Island Dimensions

    Integrated appliances require the cabinet plan and the appliance spec sheet to agree to the sixteenth of an inch. Panel-ready refrigerators publish exact panel sizes, hinge clearances, and reveal requirements, and those numbers belong on your elevations before fabrication begins.

    This is where in-house millwork changes the outcome. When the same team draws the elevations and builds the boxes, a shop drawing question about a 3/8-inch reveal gets answered in a day rather than passing through three parties and returning as a change order. That matters most on islands, banquettes, and full-height runs, where a small discrepancy repeats across every unit. Custom millwork fabrication is where those details either hold or drift.

    With boxes and appliances coordinated, the surfaces that cover them can be selected against known dimensions.

    Select Surfaces, Finishes, and Details That Belong Together

    Surfaces are chosen as a system, not one at a time. Countertops, backsplashes, and flooring share a room and read together under the same light, so they are specified as a single material selection package.

    Bring physical samples into the actual kitchen space and view them at different hours. A quartz that looks warm under showroom halogen can turn gray under north light in a Chicago winter.

    Compare Countertop Materials for Wear, Maintenance, and Visual Weight

    Quartz resists staining and needs no sealing, which suits families who cook daily. Natural stone like marble etches with lemon and wine but develops a patina many clients prefer. Butcher block invites knife work and requires oiling.

    Visual weight is the second criterion. A 3-centimeter slab with a mitered edge reads heavy and architectural; a 2-centimeter eased edge reads light. The NKBA guidelines put total countertop frontage at 158 inches, 24 inches deep, which is worth knowing before you fall for a slab: it sets both the cost and how much of the room a busy veining pattern is going to occupy.

    Make the Backsplash and Flooring Work as a Material System

    Pick the countertop first, then the backsplash, then the flooring. Ceramic tile in a simple field keeps a heavily veined stone from competing with itself. Luxury vinyl plank and luxury vinyl tile hold up to spills and dropped cast iron, and they tolerate Chicago basements and slab conditions where hardwood struggles.

    Grout color is a design decision, not a jobsite one. Matching grout makes a tile field read as one plane; contrasting grout emphasizes line and pattern. Specify it on the material schedule.

    Use Color, Line, Form, and Texture With Intent

    Limit the palette to two cabinet colors and one metal finish, then let texture do the rest. Bold colors work on an island or a pantry wall where they have a boundary. Symmetry around the range or window gives the eye a place to rest.

    Texture carries a modern kitchen when the color range is narrow: rift-sawn oak against honed stone, matte paint against polished nickel. These pairings get documented on elevations so nothing is decided during installation. Once the surfaces are set, lighting and utilities determine whether they perform.

    Plan Lighting, Appliances, and Utilities Before Procurement

    Lighting and electrical planning must be resolved before cabinets are ordered, because circuits, junction boxes, and can locations depend on cabinet positions. Rough-in happens behind finished walls, and revisiting it later means cutting.

    The procurement phase is where these decisions turn into orders, schedules, and lead times. A model number changed after the plan is approved can ripple through cabinet widths, hood sizing, and the electrical schedule.

    Layer Kitchen Lighting for Work, Mood, and Visual Focus

    Layered lighting uses three sources with separate switches. Ambient lighting from recessed cans or a central fixture covers the room. Task lighting, mostly under-cabinet LED, puts light on the counter where your body would cast a shadow. Accent lighting picks out glass cabinets or a stone backsplash.

    Pendant lights over an island are placed by cabinet dimension, not guesswork: center them on the island, roughly 30 to 36 inches above the counter. Skylights help in interior kitchens with one exterior wall.

    Coordinate Appliance Specifications With the Cabinet Plan

    Order appliance spec sheets before finalizing cabinetry. Induction cooktops need specific cutout dimensions and a dedicated 240-volt circuit. Energy-efficient appliances vary in depth by two or three inches between models, which changes counter overhang.

    Range hood sizing follows the cooktop: the hood should be at least as wide as the cooking surface, with 21 to 30 inches of overhead clearance. Ducted venting to the exterior needs a run planned around joists.

    Resolve Electrical Planning, Ventilation, and Outlet Placement Early

    Outlet placement gets drawn on elevations, not decided by an electrician on site. Common items to mark: island outlets, appliance garage power, under-cabinet transformer locations, and dedicated circuits.

    Ventilation, plumbing, and electrical all appear on a mechanical plan alongside the cabinet drawings, and comparing the two catches conflicts before framing closes. Working through full-service interior design coordination keeps these trades aligned to one drawing set. That coordination is what carries a plan into construction.

    Turn Your Kitchen Vision Into a Buildable Plan

    A dream kitchen becomes buildable when every element has been decided, dimensioned, and documented before ordering begins. Layout drives cabinetry, cabinetry drives surfaces, and lighting and utilities follow the cabinet plan. Working that sequence produces space plans, elevations, an itemized budget, and material selections you can hold a contractor to.

    That documentation is also what protects your budget. Change orders come from decisions deferred, not from ambitious design. When you can point to an elevation and a spec sheet, the conversation on site is about execution.

    Threshold Design Lab has worked this sequence on Chicago kitchens for thirty years, with TDL Custom building the millwork in-house. If you are somewhere in the middle of it, with a folder of images and no space plan yet, that is the useful moment to talk: a kitchen renovation designer is most valuable before the ordering starts, not after. Start a project conversation, call (773) 433-0042, or email paul@thresholddesignlab.com.

    Frequently Asked Questions

    What Are the Essential Elements of a Kitchen Design?

    The essential elements are layout and circulation, cabinetry and storage, countertops and surfaces, lighting layers, appliances and utilities, and hardware and fixtures. Each one constrains the next, which is why designers settle them in that order. Material cohesion ties them together across all six.

    What Should Be Decided Before Ordering Kitchen Cabinets and Appliances?

    Appliance model numbers, plumbing and gas locations, and the finished space plan should all be locked before cabinets are ordered. Appliance spec sheets set cutout sizes and clearances that determine cabinet widths. Ordering out of that sequence usually means filler strips or a change order.

    How Do I Choose the Right Kitchen Layout for My Home?

    Start with what cannot move: structural walls, windows, and stacks. Then test layouts against clearance requirements, allowing 36 inches around an island and 42 inches in shared walkways. In older Chicago homes, an L-shape with an island preserves two work walls while keeping traffic on the perimeter.

    What Lighting Layers Does a Functional Kitchen Need?

    A functional kitchen needs ambient, task, and accent lighting on separate switches. Under-cabinet task lighting matters most because overhead fixtures put your shadow on the counter. Pendants over an island sit 30 to 36 inches above the surface.

    How Can I Make Kitchen Materials and Finishes Feel Cohesive?

    Select countertops first, then backsplash, then flooring, viewing samples together in the room at different times of day. Hold the palette to two cabinet colors and one metal finish. Document grout color, edge profiles, and hardware on the material schedule so nothing gets decided on site.