Tag: luxury interiors

  • Tudor Style Interior Design That Lets a North Shore Tudor Stay a Tudor

    Tudor Style Interior Design That Lets a North Shore Tudor Stay a Tudor

    It is four o’clock on a February afternoon in Winnetka, and the living room is already dim. The oak paneling has darkened over the decades, the leaded casements filter what little daylight there is into small diamonds on the floor, and the beamed ceiling seems lower than it did when you toured the house in June. You bought this home for its character, and now you are wondering how to live in it without the rooms closing in on you. Good Tudor style interior design starts right there: with the honest admission that these houses are beautiful and sometimes hard to live in, and that both things can be addressed without stripping away what makes them special.

    The Tudor Revival homes found across Winnetka, Wilmette and Glencoe share a vocabulary: steep gables, half-timbering, heavy wood trim, arched doorways, plaster walls with a hand-troweled texture, and windows divided by lead came. Inside, that vocabulary can read as either cozy or gloomy depending on how the rooms are lit, furnished and finished. The work is mostly a matter of judgment, element by element.

    Dark paneling is a finish decision before it is a design decision

    Most homeowners assume the paneling has to go or has to be painted. Neither is automatic. Original quarter-sawn oak or walnut paneling is irreplaceable in any practical sense, and much of the darkness you see is accumulated finish, not the wood itself. Decades of varnish, wax and smoke amber over time. A careful cleaning and a test patch of finish refreshing often reveal a lighter, warmer tone with visible grain, which changes the feel of a library or dining room more than you might expect.

    If the paneling is a later addition, or a lesser species stained to imitate something finer, painting is a reasonable choice. Even then, the color matters. Bright white on Tudor millwork tends to look chalky and flattens the profiles. A soft putty, a muted green or a deep, saturated color can respect the room’s weight while giving it more life, and a sample board viewed at four in the afternoon in February will tell you more than any chip in daylight.

    There is also a middle path: keep the paneling in the rooms where it does the most work, often the library or dining room, and lighten the walls in rooms where it was never original or where light matters more, such as a breakfast room or family room.

    Leaded glass deserves repair, not replacement

    Leaded casements are often the most photographed feature of a Tudor and the most misunderstood. They can feel drafty, and the came can sag over time. Replacing them with modern units saves a few degrees of comfort and costs the house its face. Restoration specialists can reset and reglaze panels, and well-fitted interior storm panels can noticeably reduce drafts while leaving the glass visible from both sides.

    Inside, treat the windows as a feature worth showing off. Heavy, layered drapery was once common in these homes, but it swallows the light you are trying to gain. Simple panels on slim iron or wood rods, hung high and wide so they clear the glass entirely when open, let the leading do its work. In a bedroom where privacy and darkness matter, a discreet shade mounted inside a deep jamb can solve the problem without competing with the window.

    Beamed ceilings and plaster walls set the tone of the whole house

    Exposed beams are where many Tudor renovations go wrong in one of two directions. Some owners paint them white to “open up” the room, which usually looks like an apology. Others leave them dark while surrounding them with dark walls and dark floors, which compounds the cave effect.

    The better approach is contrast. Keep beams in their natural or refreshed wood tone, and give the plaster between them a warm, light finish that reflects light back into the room. Limewash or a mineral paint with some depth suits the hand-applied character of original plaster far better than a flat, uniform coat. Where the original plaster is intact, repair it; new drywall reads too crisp and too modern against old timber.

    Lighting finishes the job. Beamed ceilings resist recessed cans, both physically and aesthetically. Instead, consider concealed uplighting along the tops of beams where structure allows it, wall sconces placed at the right height, and picture lights on paneling. Lamps do more in a Tudor than in almost any other house type, so plan outlets in the floor and along walls during any renovation so a reading lamp can sit beside the chair that needs it, not wherever a 1920s outlet happens to be.

    Unsure whether your paneling is original or which leaded panes can be saved? We are happy to walk the house with you, room by room, and talk through what to keep. That first consultation is free, and it can happen on site in Winnetka, Wilmette or Glencoe or over video.

    The kitchen is where a Tudor home renovation earns its keep

    Original Tudor kitchens were service rooms, often small, closed off and separated from a butler’s pantry. That arrangement rarely survives modern family life, and a Tudor home renovation usually puts most of its effort here. The challenge is to give you a kitchen that functions like a new one while still belonging to the house, which makes it a design problem and a construction problem at once: the plaster, the old framing and the new cabinetry all have to agree. Small solutions carry a lot here, such as a refrigerator hidden behind paneled doors that match the pantry, or storage built into the thickness of an old wall.

    A few principles hold up well:

    • Use the pantry. Opening the wall between kitchen and butler’s pantry, or reworking the pantry into a scullery or coffee station, often gives you the space you need without pushing into the dining room.
    • Choose cabinetry with weight. Inset doors, substantial rails and stiles, and hardware in aged brass or iron suit the house. Thin slab fronts and handleless designs fight it.
    • Keep the stone and tile calm. Honed stone, handmade tile and plaster range hoods sit comfortably beside heavy trim. Highly polished, busy surfaces tend to look dropped in from another house.
    • Echo, do not copy. An arched opening, a beam detail or the profile of existing trim can be repeated in the new kitchen so it feels continuous with the rest of the home.

    For more on the cabinetry and finish vocabulary that carries a traditional kitchen, our guide to traditional kitchen style goes deeper.

    Bathrooms can be fully modern behind a period face

    Tudor bathrooms were typically small and tiled to the ceiling. Some original tile is worth saving, particularly colorful glazed tile in good condition, but more often bathrooms are where you gain comfort with the least loss of character. A walk-in shower, heated floors and good ventilation all fit inside a Tudor bathroom as long as the visible materials suit the house.

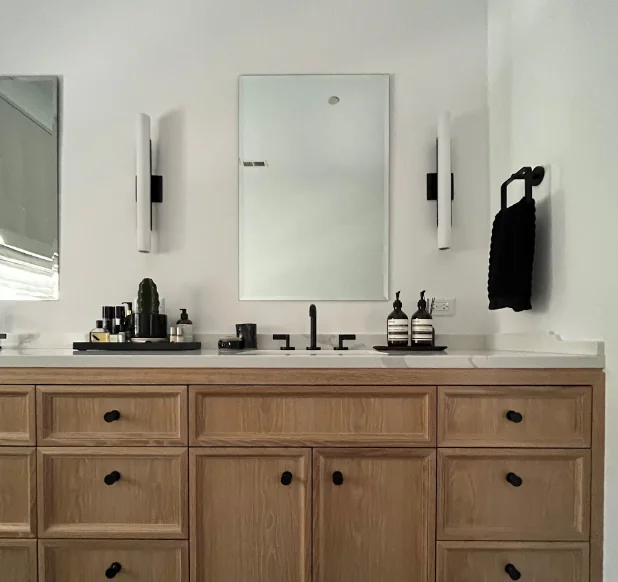
    Look to unlacquered or aged metal finishes, furniture-style vanities with legs or plinths, and floor tile patterns that would have been familiar in the period, such as small hexagons or simple checkerboards. Mirrors with substantial frames and a sconce on each side make the room feel finished, and they light a face far better than a bar fixture overhead. A primary bath carved out of a former sleeping porch or a little-used bedroom can be the most rewarding space in the renovation.

    Furnishing a Tudor revival interior without making it a period set

    Heavy furniture makes a Tudor feel heavier, and pieces that ignore the architecture make it feel like a rental. A Tudor revival interior is at its best when it mixes eras: a good antique refectory table with modern upholstered chairs, a clean-lined sofa in a textured fabric against paneled walls, a contemporary rug in a muted palette under a beamed ceiling.

    Scale is the thread. Tudor rooms often have generous widths but strong architectural elements, so furniture needs presence. Spindly pieces get lost. Upholstery in wool, linen, leather and velvet suits the house, and a measured amount of pattern, perhaps in a rug or a pair of chairs, keeps paneled rooms from feeling monotonous.

    Color can be richer than you might expect. Deep greens, oxblood, ochre and inky blues look natural against oak, while lighter, warmer neutrals in hallways and upper floors give the eye a rest. Planned room by room, the house reads as one story rather than a series of separate decorating decisions.

    Working with a design partner on Tudor interior design

    Tudor interior design asks for both restraint and technical skill. It involves deciding which original elements to protect, coordinating specialists for glass and plaster, detailing new millwork so it matches old profiles, and keeping track of all the hidden conditions older houses reveal once walls are opened. The residential interior design services at Threshold Design Lab cover that full span, from the first walk-through of an old house to ordering, coordinating specialists and overseeing the installation, and the studio’s own custom millwork background is what lets a new bookcase borrow its casing profile from the original trim in the hall.

    If you are still getting a sense of how design work on the North Shore differs from work in the city, our overview of interior design on Chicago’s North Shore is a helpful starting point, and our Evanston project is a nearby North Shore example of the studio’s residential work.

    A Tudor can be bright and still be a Tudor

    The best renovated Tudors do not look renovated. They look like the house finally got the light, the kitchen and the comfort it was always capable of. That comes from treating each element on its own terms: refreshing original paneling before reaching for paint, repairing leaded glass, lighting beams instead of hiding them, and putting modern function in the places where it costs the least character.

    Every Tudor has its own mix of treasures and problems, and the right plan starts with seeing yours in person. Ask Threshold Design Lab for a visit, or phone (773) 433-0042, and we will start with the rooms that feel darkest.

    Frequently Asked Questions

    Should I paint the dark wood paneling in my Tudor?

    Only after you know what it is and what is on it. Paint is very hard to strip fully from carved or molded profiles, so it is close to a one-way decision on original hardwood. Homes built before 1978 are more likely to have lead-based paint, so the EPA recommends hiring a contractor certified and trained in lead-safe work practices before anyone sands or strips old finishes.

    Can I open up the floor plan of a Tudor Revival home?

    Partially, and selectively. Many Tudors have bearing walls, chimneys and arched openings that anchor the plan, and fully open layouts tend to erase the sequence of rooms that gives these houses their charm. Widening a few key openings, especially between kitchen and family space, usually delivers the connection families want.

    Are recessed lights appropriate in a Tudor home?

    Sparingly. In kitchens, baths and closets they are practical. In living rooms, libraries and dining rooms with beamed or plaster ceilings, sconces, picture lights, lamps and concealed uplighting usually look better and preserve the ceiling.

    What colors work best in a Tudor style interior?

    Colors with some depth and warmth sit best next to oak and plaster: muted greens, warm whites, ochre, deep reds and dark blues. Very cool grays and stark whites tend to look harsh against old wood.

    How do I keep a Tudor kitchen from feeling like a different house?

    Repeat something from the architecture, such as an arch, a trim profile or a beam detail, and choose cabinetry with traditional proportions and hardware with an aged finish. Keep appliances paneled or recessed where possible so the room reads as furniture and millwork first.
  • How Condo Renovation Rules and Board Approval Shape a Chicago Remodel

    How Condo Renovation Rules and Board Approval Shape a Chicago Remodel

    The email from your property manager usually arrives with three attachments: a renovation application, a condo alteration agreement that runs longer than you expected, and a list of building policies covering everything from work hours to how the freight elevator gets padded. Those documents are your building’s condo renovation rules, and they decide more about your remodel than most people realize at the start. They set when work can begin, what the board needs to see, who is allowed in the building, and how long each phase can take. Owners who read them before the first drawing tend to sail through review, while owners who find them after demolition is booked can end up with a crew waiting in the lobby for a signature.

    A Chicago high-rise board reviews the approval package document by document, and each one has a natural place in the project schedule. Fold them in as the design develops and the paperwork moves alongside the drawings instead of trailing behind them.

    Every building writes its own rules, so the first read sets the plan

    Chicago has no common standard for condo board renovation approval. A Gold Coast tower with a full-time engineering staff and a Lincoln Park vintage building with a volunteer board will ask for very different things. Some buildings want a short application and a contractor’s certificate of insurance. Others want stamped drawings, a review by the building engineer, a deposit and a preconstruction meeting with management.

    Treat the rules as part of the design brief. They often settle questions that change the layout: whether hard flooring needs an acoustic underlayment, whether plumbing can be relocated, whether the building allows work on Saturdays, and how large any one delivery can be. A plan drawn without those answers usually gets redrawn.

    The application and scope description tell the board what you intend

    The application is the cover sheet of the whole process. It identifies the unit, the owner, the contractor and the general scope. Boards read it to judge risk, so a clear scope description helps. “Kitchen and primary bathroom remodel, existing plumbing locations retained, no structural changes” tells a reviewer far more than “renovation.”

    That one sentence also signals which parts of the review will be light and which will be heavy. Work that stays on existing drains and leaves walls between units untouched tends to move faster than work that opens a slab or touches a common element. Our project lead rarely moves mechanicals in a condo for exactly this reason: good planning inside the existing layout gives the design more freedom than a fight with the building’s infrastructure ever would.

    Drawings show the board what will change and what will stay

    Most associations ask for drawings, and the level of detail varies. A typical package includes a floor plan showing existing and proposed conditions, and often elevations for kitchens and baths. When plumbing or electrical work is involved, the board or its engineer may want to see where fixtures connect and what is being added.

    Having design and construction under one roof helps here. At Threshold Design Lab, Phase 01 produces space plans, elevations and material selections, and those drawings form the core of what the board reviews. The approval set grows out of documents that already exist, so nobody has to produce a second drawing package just for the association.

    Permits are a separate question from board approval, and they depend on the scope and the building. We go over what applies to your project case by case in the first consultation, where the specifics of your building can be discussed properly.

    Insurance certificates and contractor credentials protect the building

    Nearly every alteration agreement requires certificates of insurance from the general contractor and, often, from every subcontractor who will be in the building. Many buildings also want the association and the management company named as additional insureds. These certificates have to match the building’s wording exactly, and a certificate that is missing a name or uses the wrong entity will be sent back.

    Licensed trades matter here too. Plumbing and electrical work in a condo connects to systems the whole building relies on, which is why boards look for licensed plumbers and electricians on the application. Threshold Design Lab works with licensed plumbers and electricians, and gathering their licenses and insurance alongside the rest of the package keeps a missing trade document from holding up the start date.

    Holding a renovation application and an alteration agreement you have not fully decoded yet? Bring both to a free first meeting with our studio, at your kitchen table or on a video call, and we will read through the building’s requirements with you.

    The condo alteration agreement is the document that governs the work

    The condo alteration agreement is the contract between you and the association. It usually spells out responsibilities for damage to common areas or neighboring units, the deposit the building holds, what happens if work runs past an agreed date, and how the board can stop work that breaks the rules. Some agreements require the owner to sign; others require both owner and contractor.

    Read the agreement for obligations that affect the design schedule. Common examples include a requirement to notify neighbors before work begins, a cap on how many days demolition can last, mandatory inspections by the building engineer before walls are closed, and a final walkthrough before the deposit is returned. Each of those goes on the project calendar as a fixed date that everything else works around.

    Work hours, elevator reservations and deliveries set the pace on site

    Approval is only half of what the rules control. The other half is daily logistics. Many high-rises limit construction noise to weekday hours, restrict demolition further, and require the freight elevator to be reserved for every delivery and every debris removal. Corridors usually need protection from the elevator to the unit door.

    These rules affect sequencing. Cabinetry, stone and large glass panels must fit the freight elevator cab, so measurements of the elevator and the route to the unit are taken before anything is ordered. Deliveries are grouped to use fewer reservations. Trades that would overlap in a house are often scheduled one after another so the building is never asked to host more people or more noise than its rules allow.

    How a design-build team folds the rules into the schedule

    The condo renovation approval process works best when it runs in parallel with design and procurement instead of standing as a gate in front of them. The building rules are reviewed before the first sketch, so design decisions respect them from the start. The approval set is assembled from the design documents as they are finalized. Insurance certificates and trade credentials are requested while the board is reviewing drawings. Long-lead items are ordered once approval is in hand, with delivery dates set around elevator availability.

    At Threshold Design Lab, your project lead files the board application, chases the certificates of insurance and books the freight elevator, so management has one point of contact for the whole renovation and you never end up relaying messages between the property manager and the plumber. Our Lake Shore Gold Coast condo project, a bedroom and hallway redesign, is one example of scheduling vendors and subcontractors inside a downtown building, and our residential interior design and remodeling page describes how we take condo work from first plan to installation.

    Board paperwork is only one part of a condo project. Kitchens, baths and the handoff from design to installation have their own pressure points, which we cover in what shapes a smooth condo renovation in Chicago. Owners still settling the look of the unit can start with condo interior design in Chicago.

    Approval is a planning document as much as a hurdle

    The buildings that ask the most of you are usually the ones that protect your investment most closely once you live there. Their rules are easier to meet when they are written into the brief, reflected in the drawings, and tracked on the calendar next to tile and cabinetry, so board review runs as one stage of the project and the crew is never left waiting on it.

    Tell us which building you live in and what you hope to change, and we will map its rules onto a realistic plan and calendar. Set up a no-cost first consultation, or reach the studio at (773) 433-0042 during weekday hours.

    Frequently Asked Questions

    Do I need board approval for cosmetic updates like paint or new cabinet hardware?

    Many buildings exempt purely cosmetic work, but the definition varies. Some associations treat any work involving a contractor as an alteration that requires notice, even if no drawings are needed, and some still want the painter’s insurance certificate on file. Check your building’s policies or ask management before scheduling painters or installers.

    Can I start design work before the board approves the renovation?

    Yes. Boards review drawings, so design has to come first. Starting early also lets your team spot conflicts with the building’s rules, such as a flooring underlayment requirement or a ban on relocating drains, before they reach the board, which reduces the chance of a resubmission.

    What happens if the board asks for changes to my plans?

    Boards sometimes request revisions, such as additional detail on waterproofing or confirmation that a wall is not shared. Your design team revises the affected drawings and resubmits. A clear first submission with scope notes on every sheet makes revisions less likely.

    Who is responsible if a renovation damages a neighbor’s unit?

    The alteration agreement usually assigns that responsibility, and it often falls on the unit owner, backed by the contractor’s insurance. Buildings are strict about certificates of insurance for this reason, and the waterproofing and corridor protection plans in your package deserve real attention.

    Does the board approval process change in older vintage buildings?

    Older self-managed buildings may have fewer written rules, but boards can still require notice, insurance and limits on hours. Without a formal process, put the scope and schedule in writing for the board anyway, so expectations are clear on both sides and neighbors know what to expect.

  • Interior Design in North Shore Chicago: Planning a Home That Fits Its Setting

    Interior Design in North Shore Chicago: Planning a Home That Fits Its Setting

    When you own a home in Winnetka, Evanston, or Lake Forest, the design questions start before any furniture is chosen. A 1920s Colonial with a paneled library, a mid-century house with original cedar ceilings, or a newer build on a deep wooded lot each comes with rules the rooms should follow. Pieces that look right in a showroom can feel wrong once they sit beside original trim, a long view to the lake, or a grandparent’s sideboard.

    Interior design in North Shore Chicago works best when you plan the whole house around its architecture, its lot, and the pieces you intend to keep, with one partner responsible from first drawing to final install. Housing varies a great deal from town to town, but many homes here have more rooms, more original detail, or a closer tie to their landscape than a typical city condo. That gives your designer more to coordinate: more rooms, more custom work, and more trades.

    Read on to see how the style of your house should guide new work and where space planning should begin. Later sections cover when custom millwork earns its cost, how a full-service project stays on schedule, and how to compare firms on what they will deliver and who answers for it.

    How Do North Shore Homes Shape the Design Brief?

    Your house shapes the design brief more than any trend does. The age, style, and setting of the home set the limits and the openings for every room. A good brief records those facts first, then layers your goals on top.

    What Makes Interior Design in North Shore Chicago Different?

    Scale is often the first difference. Many North Shore homes, though far from all, have more rooms, taller ceilings, and longer sight lines than a city two-flat or condo. A sofa that fills a Lincoln Park living room can look lost in a Kenilworth great room. Furniture, rugs, and lighting all need to be sized to the room, not to a catalog photo.

    Age is the second. Many towns here grew in waves, so one street can hold a Tudor, a Colonial, and a 1960s ranch. Many of Lake Forest’s early twentieth-century country houses, for example, were planned around household staff. Those plans often include back halls, butler’s pantries, and service wings that now need new jobs.

    Good residential interior design here starts with what the house already does well. Then it fixes what no longer fits how you live. A former maid’s room might become a mudroom; a formal parlor might become a library with built-in shelving.

    How Should Prairie, Colonial, and Mid-Century Details Guide New Work?

    Each style gives you a different set of rules. Follow them, and new work looks like it belongs. Ignore them, and even expensive finishes look added on.

    • Prairie homes stress long horizontal lines, wood detailing, built-ins, and art glass. New cabinetry should carry those horizontal bands and keep trim heights aligned across a room.
    • Colonial and Georgian homes rely on symmetry and classical trim. Centered openings, paired sconces, and paneled doors keep new rooms in step with the original plan.
    • Mid-century homes use open plans, warm wood, and big glass. Clean slab fronts and low built-ins suit them, and light fixtures should avoid crowding original ceilings.

    The Willits House in Highland Park shows how deep this goes. Frank Lloyd Wright designed its furniture along with its built-in cabinetry and seating. In a Prairie-influenced home, the millwork is part of the architecture. That is why trim profiles, wood species, and stain colors should be decided together, early.

    How Do Estate Lots and Waterfront Homes Connect Interiors to the Outdoors?

    Big lots and waterfront homes ask you to design for the view and for the light it brings. A wall of windows facing the lake changes where you can place art, screens, and dark wood. Morning glare off the water can wash out a television or fade upholstery over time.

    Plan furniture around the view first, then add window treatments that control light without blocking the scene. Material choices follow from this. Floors near terrace doors take wet shoes and sand, so durable stone or tile may serve better than soft wood in that zone.

    This link between inside and outside is a matter of interior architecture. Sight lines through a house, the height of window sills, and where a hallway opens to a garden all affect the feel of each room. Work them out with your architect or landscape designer before finishes are locked.

    Planning Across a Larger Home

    A larger home needs a whole-house plan before any single room is designed. When rooms are planned one at a time, colors drift, trim changes, and furniture ends up in the wrong place. Full-service planning keeps every room tied to one set of decisions, an idea this guide to whole-home design explores in more depth.

    Where Should Space Planning Begin?

    Start with how you move through the house each day. Trace the path from garage to kitchen, from bedrooms to laundry, and from front door to the rooms guests use. Those routes tell you where storage, seating, and lighting should go.

    Next, map which rooms do which jobs. Older homes in particular can have formal rooms that sit empty and service areas that are too small. A space plan shows where to borrow square footage, such as turning a little-used dining room into a family office.

    Plan the kitchen early too, since it touches so many other rooms. A kitchen remodel often moves walls, plumbing, and doorways, and each of those moves shifts the plan for the rooms around it.

    How Can New Rooms Accommodate Heirlooms Without Feeling Staged?

    Measure and photograph your heirlooms before the design starts. A long walnut sideboard, a grand piano, or a set of family portraits needs a planned wall, not a leftover corner. When the plan includes them from day one, they look chosen.

    Mix eras on purpose. Pair an antique dresser with a simple modern lamp, or set a traditional rug under clean-lined chairs. This contrast keeps a room from looking like a period set.

    Think about care, too. Fine old wood needs distance from heat vents and direct sun. That can change where a sofa sits or which wall gets the art.

    Which Decisions Need Space Plans, Elevations, and an Itemized Budget?

    Some choices are too costly to make by eye. These are the moments to ask for drawings and numbers:

    • Space plans for furniture layout, traffic paths, and any wall changes
    • Elevations for built-ins, fireplace walls, kitchen runs, and paneled rooms, showing heights and trim lines
    • An itemized budget for each room, so you can see where money goes and trade one line for another
    • Material selections gathered in one place, so stone, wood, and fabric are judged together

    Elevations matter most where millwork meets windows, outlets, or vents. A drawing catches the clash before a cabinet is built six inches too wide. An itemized budget also lets you phase the work, such as finishing main rooms now and bedrooms next year.

    When Does Custom Millwork Matter?

    Custom millwork earns its cost when your rooms have odd sizes, strong period details, or storage needs stock cabinets cannot meet. Older North Shore houses often have all three: walls that are rarely straight, ceilings that vary, and trim profiles unique to the house.

    Cabinetry That Fits the Architecture and the Way Rooms Are Used

    Custom cabinetry can match an original crown molding, follow a curved wall, or fill a ceiling to the inch. Stock boxes come in set widths, so they leave filler strips and dead gaps. In a paneled library or a Prairie dining room, those gaps stand out.

    Fit also means use. A family that cooks daily needs deep drawers near the range and a hidden spot for small appliances. A mudroom needs lockers sized for boots, sports gear, and wet coats. Many of these pieces are custom built-ins drawn around one family’s routine.

    Style follows the house. A Colonial may call for inset doors and a classic painted kitchen, while a mid-century home suits flat walnut fronts. Choosing profiles that respect the original architecture is a design decision, not a catalog one.

    Why Fabrication Details Should Be Resolved Before Construction

    Millwork details affect walls, wiring, and plumbing, so they must be set before those trades finish. Where does the outlet go inside the coffee station? How deep is the wall for a recessed bookcase? Is there blocking behind the drywall to hold heavy upper cabinets?

    When these answers come late, crews open finished walls or move outlets twice. Fabrication drawings settle them first. They list exact sizes, hardware, finishes, and how each piece meets the floor and ceiling.

    A designer who also builds the custom millwork shortens the distance between drawing and shop. The same people who drew the cabinet answer the installer’s questions about it.

    How Does a Full-Service Project Stay Coordinated?

    A full-service project stays coordinated when one team owns the schedule, the orders, and the site from start to finish. That team keeps designers, vendors, and trades working from the same plan. You make decisions; they handle the hand-offs.

    From Design Approvals to Procurement and Scheduling

    Ordering starts once you approve the drawings and selections. Custom sofas, stone slabs, lighting, and cabinetry each have their own lead times. A full-service team orders in the right sequence so long-lead items arrive when the site is ready.

    The schedule ties these orders to the trades. Electricians need fixture specs before rough-in. Stone fabricators need cabinets installed before they template. One late decision can hold up three crews, so your designer should flag those dates early. Ask any firm to show you a sample project schedule and who updates it.

    What Happens During Installation and Final Coordination?

    Installation is where many pieces arrive at once and small problems surface. A cabinet may meet an uneven floor, or a chandelier may need a stronger mount. The design team resolves these on site so the work keeps moving.

    Final coordination covers the last layer: hardware, window treatments, art hanging, and rug placement. It also includes a walk-through to catch touch-ups. In a large home, this stage alone can involve dozens of deliveries and several trades.

    The goal is a house that feels finished on move-in day. That only happens when someone tracks every open item to the end.

    How Should You Compare Design Partners?

    Compare design partners by what they will deliver and who answers when something goes wrong. Style portfolios help, but scope and accountability decide how a large project goes. Ask each firm to describe its full process, not only its look. If you have never hired a designer, it helps to understand what working with an interior designer asks of you before the first interview.

    Decorator, Interior Designer, or Design-and-Fabrication Partner?

    Each type fits a different job:

    • A decorator focuses on furniture, fabrics, color, and accessories. This suits a refresh with no walls, cabinets, or trades involved.
    • An interior designer plans space, details finishes, and works with contractors. This suits remodels that change layouts or need code-aware planning.
    • A design-and-fabrication partner does the design work and also builds custom millwork in-house. This suits homes that need built-ins, kitchens, or paneled rooms made to fit.

    The difference shows up in custom work. A decorator usually relies on outside shops to interpret the drawings. A design-and-fabrication partner draws, builds, and installs, so a mistake has one owner.

    Credentials are worth asking about, with the right expectations. Illinois’s Registered Interior Designers Act protects the title “registered interior designer.” It does not license the practice of interior design itself, and it does not require a registered designer for work on a single-family home. A registration tells you about training and examination; it does not tell you who will build your cabinets.

    Questions to Ask About Scope, Budget, and Accountability

    Bring these questions to each interview:

    1. Which phases do you handle: design, ordering, scheduling, and installation?
    2. Will I get space plans, elevations, an itemized budget, and material selections?
    3. How do you charge, and what does the fee cover?
    4. Who builds the custom millwork, and who fixes it if it does not fit?
    5. Who runs the site day to day, and how often will I get updates?
    6. Can I see finished work similar in scale to my home?

    Fee setups vary widely. Designers may charge a flat fee, an hourly rate, or cost plus a set markup, and many ask for a retainer up front. Know which model each firm uses before you compare totals.

    A North Shore House Tells You What It Needs

    North Shore homes reward a plan that starts with the house itself: its style, its lot, and the pieces you mean to keep. The hardest problems show up where design meets building, such as a cabinet that must match 1920s trim or a window wall that rearranges your layout. Those details belong in drawings long before anyone orders material.

    Full drawings, a clear budget, and early fabrication decisions slow the first months. In exchange, every trade works from one plan, and that is what keeps a large house on track when dozens of deliveries start arriving.

    If you are weighing a project of that size, Threshold Design Lab, a full-service design studio, would be glad to hear how you live in the house now, which rooms work, and which pieces are staying, before anyone draws a line.

    Frequently Asked Questions

    How much does an interior designer cost for a North Shore home?

    Cost depends on scope, the fee model, and how much custom work the home needs. Designers commonly charge a flat fee, an hourly rate, or cost plus a markup on goods, and antiques or custom pieces raise the total. An itemized budget makes it possible to compare firms line by line.

    Should you hire a designer before starting a renovation or new build?

    Yes, bring a designer in before construction drawings are final. Early input lets cabinetry, lighting, and outlets be planned into the walls instead of added later, and lets the plumbing and appliance layout be shaped before rough-in.

    Can an interior designer work with your existing architect and builder?

    Yes, a good designer works alongside the architect and builder from a shared set of drawings. The designer handles interior plans, millwork, finishes, and furnishings while the architect handles structure. Clear roles and one schedule keep the team from working at cross purposes.

    What is the difference between an interior decorator and a full-service designer?

    A decorator styles rooms with furniture, fabric, and accessories, while a full-service designer also plans space, manages orders, and oversees installation. Full-service firms with in-house fabrication can also build the custom millwork. That scope matters most in large homes with built-ins and remodels.

    How do you compare proposals from North Shore interior designers?

    Compare what each proposal includes, not only its price. Check for space plans, elevations, an itemized budget, ordering, scheduling, and installation oversight, and ask who builds and installs any custom pieces.

  • Luxury Hotel Room Interior Design That Balances Bespoke Detail and Durability

    Luxury Hotel Room Interior Design That Balances Bespoke Detail and Durability

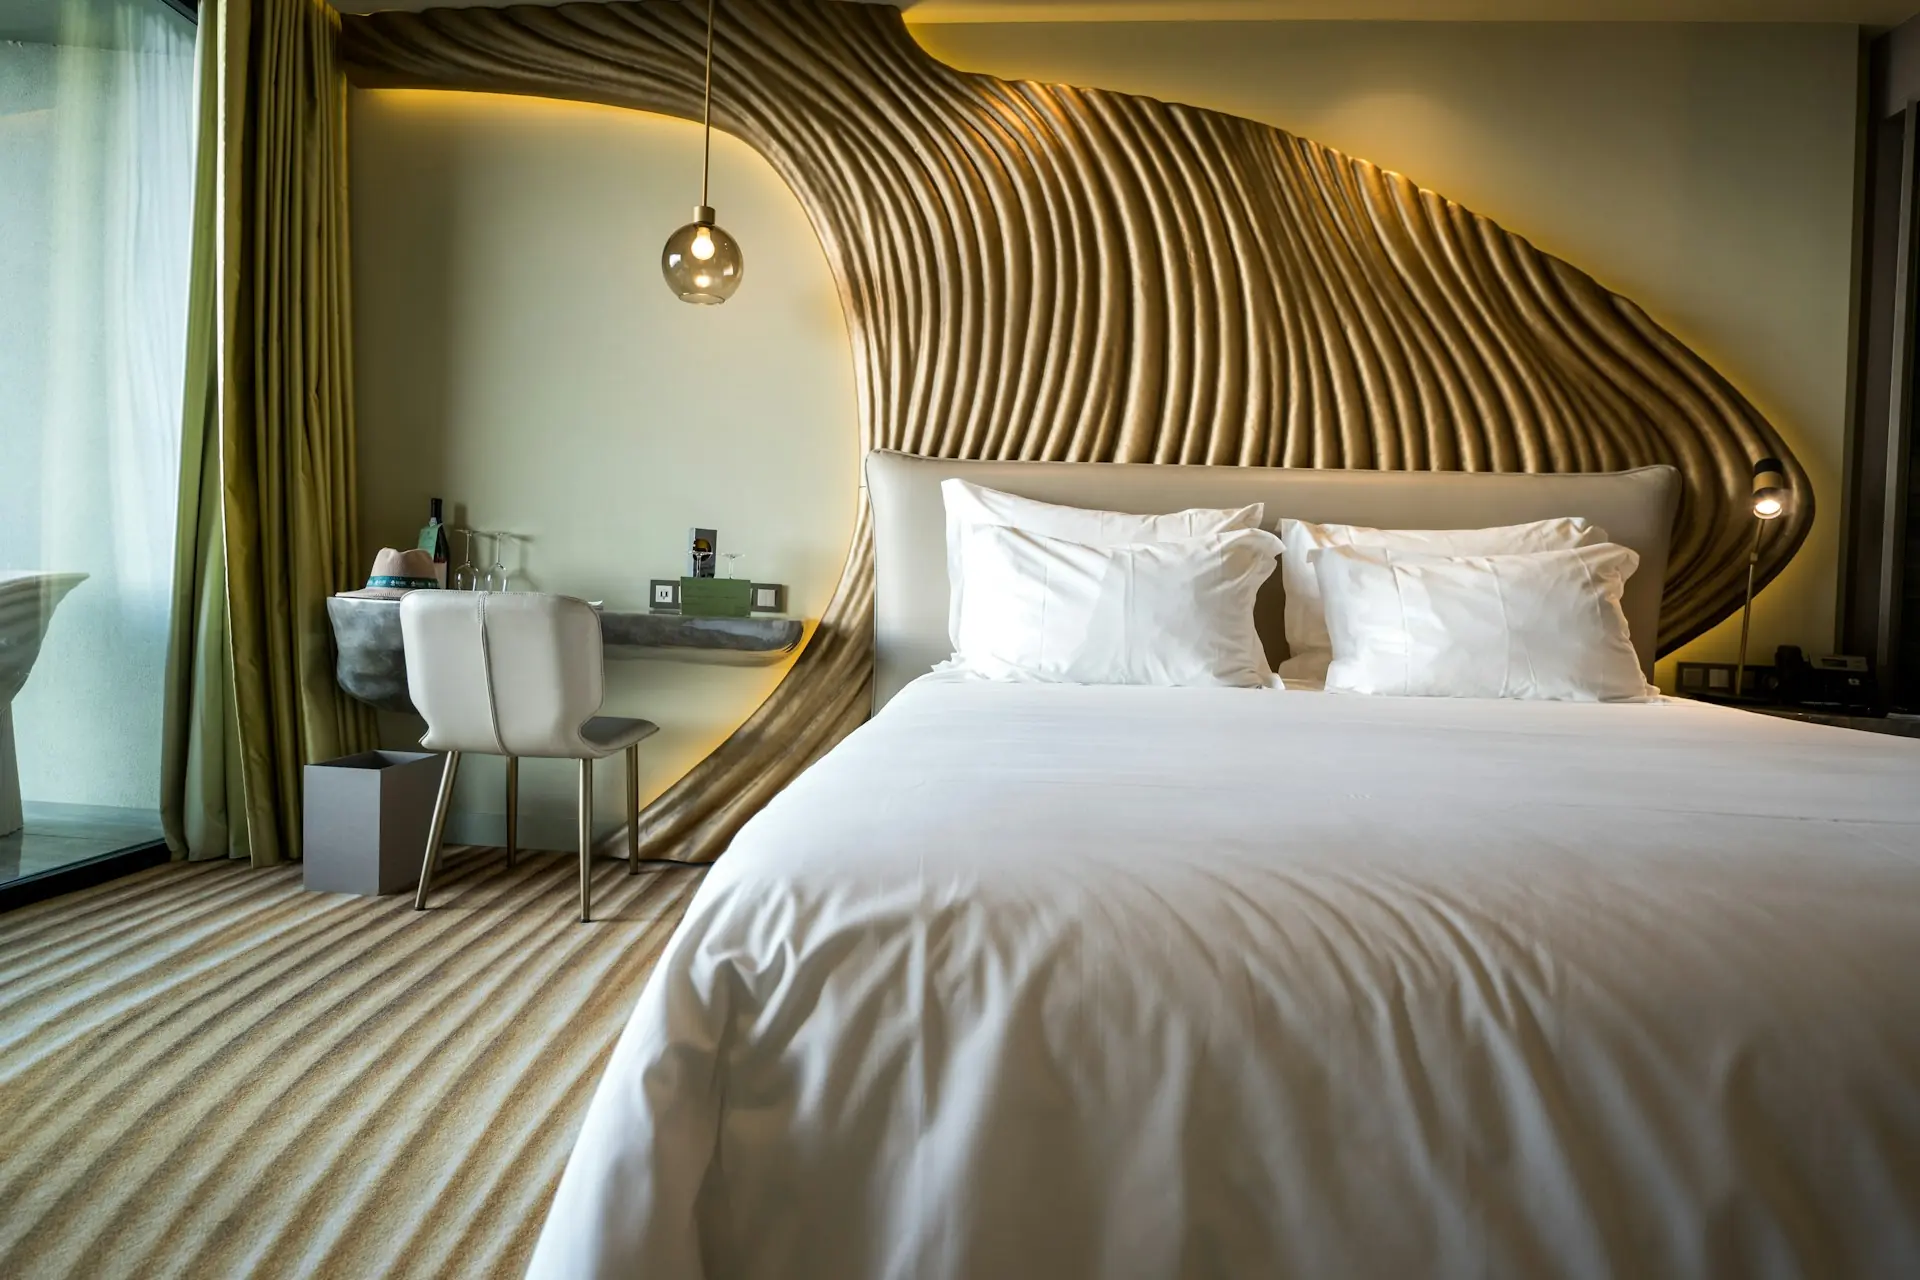
    You can render a guest room in an afternoon. Building it 80 times is harder. Every headboard, luggage niche, and reading light has to survive housekeeping carts, rolling suitcases, and guests who stay three nights or three weeks. Luxury hotel room interior design succeeds when bespoke details, like millwork headboards, built-in storage, and furniture sized to the room, are engineered for daily wear from the first drawing.

    Most guest rooms do not fall short because of the concept. They fall short in translation: a nightstand ends up two inches too deep, an upholstered panel stains by month six, or a lighting plan forgets the guest who wants to read while a partner sleeps. Threshold Design Lab, whose hospitality work includes the Walton Residences extended-stay hotel redesign, starts every guest room project by asking how the room has to perform.

    A guest room asks for its decisions in a set order: the room’s constraints, the guest’s movements, the details that make it distinct, the light and controls, and finally the drawings and fabrication that make every room match. Along the way, you will see which pieces are worth making custom and what to check before you approve them.

    What Must a Guest Room Do Before It Looks Luxurious?

    A guest room has to work for someone who has never seen it before. That guest arrives tired, often at night, and needs to find the bed, the outlets, the closet, and the light switch without thinking. Hotel room design starts with that first-hour experience. Style comes after.

    This is where a guest room parts ways with a residential bedroom. A homeowner learns their room’s quirks. A hotel guest never stays long enough, so the room has to explain itself. The lobby, lounge, and bar have their own rules, covered in this guide to hotel lobby design.

    Accessibility is part of that first layer. For transient lodging, the 2010 ADA Standards set the number of accessible guest rooms in section 224 and the requirements for those rooms in section 806. Which requirements apply depends on the type of facility and the type of room, so the owner’s accessibility consultant or architect should confirm them for each room type before clearances, closet rods, and switch heights are drawn.

    How Does Luxury Hotel Room Interior Design Accommodate Extended Stays?

    Extended stays call for a room that supports routines as well as rest. A guest staying two weeks unpacks fully. They cook light meals, work at the desk every day, and need space for groceries, laundry, and a second pair of shoes.

    That changes the plan in specific ways:

    • Full unpacking storage: drawers and hanging space sized for a full wardrobe, beyond an overnight bag.
    • A real work surface: a desk deep enough for a laptop and papers, with power at the surface.
    • Kitchenette function: a sink, a small fridge, and a cabinet for dishes, planned with the same care as a compact galley.
    • Separation of zones: sleeping, working, and eating each get their own light and their own spot in the room.

    A long-stay room has to feel like a place you live, not a place you pass through. The storage, the desk, and the light are how it earns that.

    Where Do Limited Space and Heavy Use Shape the Plan?

    Limited floor area and constant use shape almost every dimension in the room. A typical urban guest room leaves little margin. Each piece of furniture competes with the clear path from the door to the bed and the window.

    Heavy use adds a second layer. Housekeeping moves furniture daily, vacuums along every base, and wipes every surface. Corners get bumped by luggage, and drawers and doors cycle far more often than they would at home. So you choose radiused edges where carts pass and wall-hung pieces where floors need cleaning. You also pick hardware rated for commercial use, because comfort that lasts past opening day is what a guest actually experiences as luxury.

    Plan the Room Around the Guest’s Daily Movements

    Plan the room by tracing what a guest does, in order: arrival, unpacking, sleep, morning routine, work, departure. Each step tells you where furniture, storage, and power belong.

    Place the Bed, Luggage, and Seating Before Choosing Furniture

    Lock in three positions first: the bed, the luggage spot, and the seat. The bed wall sets the room’s focus and the location of headboard power. The luggage spot needs to sit near the entry and the closet, so a guest can open a suitcase without blocking the path.

    Seating comes third. In rooms with floor-to-ceiling windows, a chair near the glass gives the guest a place to sit with the view. Keep it clear of the drapery track and any heating unit below the window. Once these three points are fixed, furniture sizes follow from the space left over.

    Build Storage for Short Visits and Longer Stays

    Built-in storage works hardest when it serves both a one-night guest and a two-week one. A short-stay guest wants a luggage bench and a few hooks. A long-stay guest wants deep drawers, a full closet, and a place to hide the suitcase once it is empty.

    One millwork wall can handle both. Picture an open luggage shelf at the bottom, a hanging section with a safe and iron, and drawers above. Built-ins also free floor space, since they sit tight to the wall with no gaps for dust.

    For extended-stay rooms with kitchenettes, plan dish storage, a trash pull-out, and a counter run long enough to prep a meal. Those three items decide whether the kitchenette gets used or ignored.

    Size Bespoke Furniture to the Room, Not a Catalog

    Bespoke hotel furniture design lets each piece fit the room’s real dimensions. A catalog nightstand might be 22 inches deep when the room has 18 to spare. That extra depth pinches the walk to the window or the bathroom.

    Built to the room, a desk can span the exact width between a wall and a window return. A headboard can tie in the nightstands so they never shift. A luggage bench can align with the closet face.

    Custom pieces do ask for decisions earlier. They need field dimensions and approved drawings before fabrication starts, so measure the built rooms, which may vary from plan, before releasing production.

    Create a Distinctive Room with Details That Can Be Built

    Make the room memorable through one or two strong built elements, then let materials carry the rest. Statement pieces work best when they also do a job. A beautiful headboard that hides wiring and holds reading lights earns its place.

    Make a Millwork Headboard Both a Focal Point and a Functional Element

    A statement headboard can anchor the room and solve three or four practical problems at once. Built as a full-wall millwork panel, it holds the reading lights, the outlets, and the USB ports. It can hide the cable runs and protect the wall from bed movement.

    The detailing decides whether it holds up. Upholstered inserts should be removable for cleaning or replacement. Wood edges near the bed need durable finishes that resist scuffs from linens and luggage. Electrical cutouts must be coordinated with the electrician before the panel is fabricated, since a wrong box location means remaking a piece.

    In-house fabrication changes the result here. When TDL Custom builds the custom millwork from the same drawings the designers produce, the headboard in room 412 matches the rendering, and it matches the one in room 214. Profile choice shapes the room’s character too: a clean slab face reads modern, while a paneled face suits a historic building. The same discipline applies to commercial millwork in Chicago at a larger scale.

    Choose Tactile Materials That Hold Up to Repeated Use

    Pick materials that feel good to the hand and are rated for contract use. Guests touch the room constantly: drapery, upholstery, desk edges, door pulls. Those surfaces deliver the sense of luxury, so they need to stay that way.

    For fabrics, the contract textile performance guidelines cover flammability, wet and dry crocking, colorfastness to light, physical properties, and abrasion. The right set depends on the fabric’s construction, its use (upholstery, drapery, wallcovering), and whether it sits indoors or outdoors. Ask for that data on every textile you approve.

    For hard surfaces, solid wood and quality veneers can be refinished. Stone tops resist rings and heat. Brushed metal hardware hides fingerprints better than polished finishes, which helps housekeeping keep rooms ready.

    Layer Light and Technology Without Adding Friction

    Light and technology should make the room easier to use. The goal is a room a guest can settle into in two minutes, without a manual.

    Give Guests Separate Light for Reading, Working, and Unwinding

    Give each activity its own light source on its own control. Reading lights at the headboard should aim at the page and stay off the partner’s pillow. Task lighting at the desk needs enough output for paperwork. A softer ambient layer, like a cove or a floor lamp, sets the mood for evening.

    Plan these layers with the millwork. A reading light set into the headboard has to be located during drawing review, along with its switch and its wire path. Desk lighting can be built into a shelf above the work surface. Each fixture tied to millwork becomes part of the fabrication schedule.

    Keep Controls Intuitive and Consider Glare at the Window

    Controls should be few, labeled, and placed where the guest needs them. A master switch by the door and a matching one at the bed solve most problems. Smart controls help when they reduce steps, like one button that turns everything off at night. They add friction when a guest needs an app to dim a lamp.

    Floor-to-ceiling windows bring views and glare. Morning sun can wash out a TV and wake a guest early. Pair a sheer layer for daytime with a blackout layer for sleep. Recess the tracks into the ceiling or a millwork valance so the drapery reads as built in, and place the TV and desk so neither faces the glass head-on.

    Carry the Design from Drawings to Repeatable Installation

    Hotel interior design only pays off when the 50th room matches the first. That depends on drawings that resolve every detail and a process that coordinates fabrication, deliveries, and installers across floors.

    Use Plans, Elevations, and Material Selections to Resolve Details Early

    Plans, elevations, and material selections are where problems get solved cheaply. A space plan confirms clearances and the guest’s path. Elevations show every outlet, light, and hardware location on the headboard and storage walls. Material selections lock in finishes, fabrics, and stone with samples you can approve, and an itemized budget ties each choice to its cost.

    All of it should start from your operating needs, brand, and guest profile, which is why the first meeting is mostly listening. Build a mock-up room before full production when the schedule allows. It shows how the headboard, lights, and storage perform with a real bed and real luggage.

    Coordinate Fabrication, Procurement, and Installation Across Rooms

    Coordination keeps room types consistent from floor to floor. Procurement covers ordering furniture and custom pieces, coordinating vendors and subcontractors, building the schedule, and managing lead times. Installation oversight resolves technical questions in the field.

    For a hotel, that means sequencing millwork deliveries to match the floors ready for install. Electricians rough in before headboards arrive. Each piece gets labeled by room type so installers set the right unit in the right room. The fewer handoffs between drawing and install, the fewer places for an error to creep in.

    Details That Still Work After the First Stay

    Luxury hotel room interior design is judged by the hundredth guest as much as the first. The details that hold up are built to the room, tied into power and light during drawing review, and made from materials with contract performance data. A headboard that hides wiring and takes a removable insert will still look sharp years in.

    Getting there means asking for decisions earlier than most owners expect: field measurements, electrical locations, and approved samples before production. That early effort is what lets every room match and keeps maintenance simple.

    For a guest room program, the design and fabrication team at Threshold Design Lab can start small with you: one room type, one mock-up, and a frank list of what your housekeeping staff fights with today. The rest of the commercial interior design program can grow from there.

    Frequently Asked Questions

    What makes a hotel room feel luxurious rather than simply expensive?

    A room feels luxurious when it is easy to use and pleasant to touch. Clear lighting, storage that fits a full wardrobe, and furniture sized to the room all count. Expensive finishes alone fall flat if the guest cannot find an outlet or a place to unpack.

    How can a small hotel room feel bespoke without losing usable space?

    Built-in millwork can combine several jobs into one piece. A headboard wall can hold lights, power, and nightstands, and a single storage wall can cover luggage, hanging, and drawers. Built-ins sit tight to the wall, which keeps the floor open.

    Which guest room details are worth making custom?

    The headboard, the storage wall, and the desk usually give the most return when made custom. These pieces define the room’s look and handle the most use. Chairs and lamps can come from contract suppliers as long as they meet the property’s durability needs.

    How should a hotel room be designed for extended stays?

    Plan for daily routines: full unpacking storage, a true work surface, and a compact kitchenette. Sleeping, working, and eating each need their own zone and their own light, so the room works as a place to live for a week or more.

    What should an owner review before approving guest room millwork?

    The elevations, for every outlet, light, and hardware location, along with field measurements of the built rooms. Finish samples and fabric performance data should be checked against how the room will be cleaned. A mock-up room is the best final check before full production.

  • Luxury Living Room Interior Design Ideas Rooted in Architectural Detail

    Luxury Living Room Interior Design Ideas Rooted in Architectural Detail

    Most living rooms that feel expensive in photographs feel ordinary in person. The cause is usually the same: the room was finished with furniture and accessories while the ceiling, walls, windows, and fireplace stayed plain. You notice it when a beautiful sofa sits under a flat ceiling with one fixture in the middle, or when new shelving is pushed against a wall and never looks like it belongs.

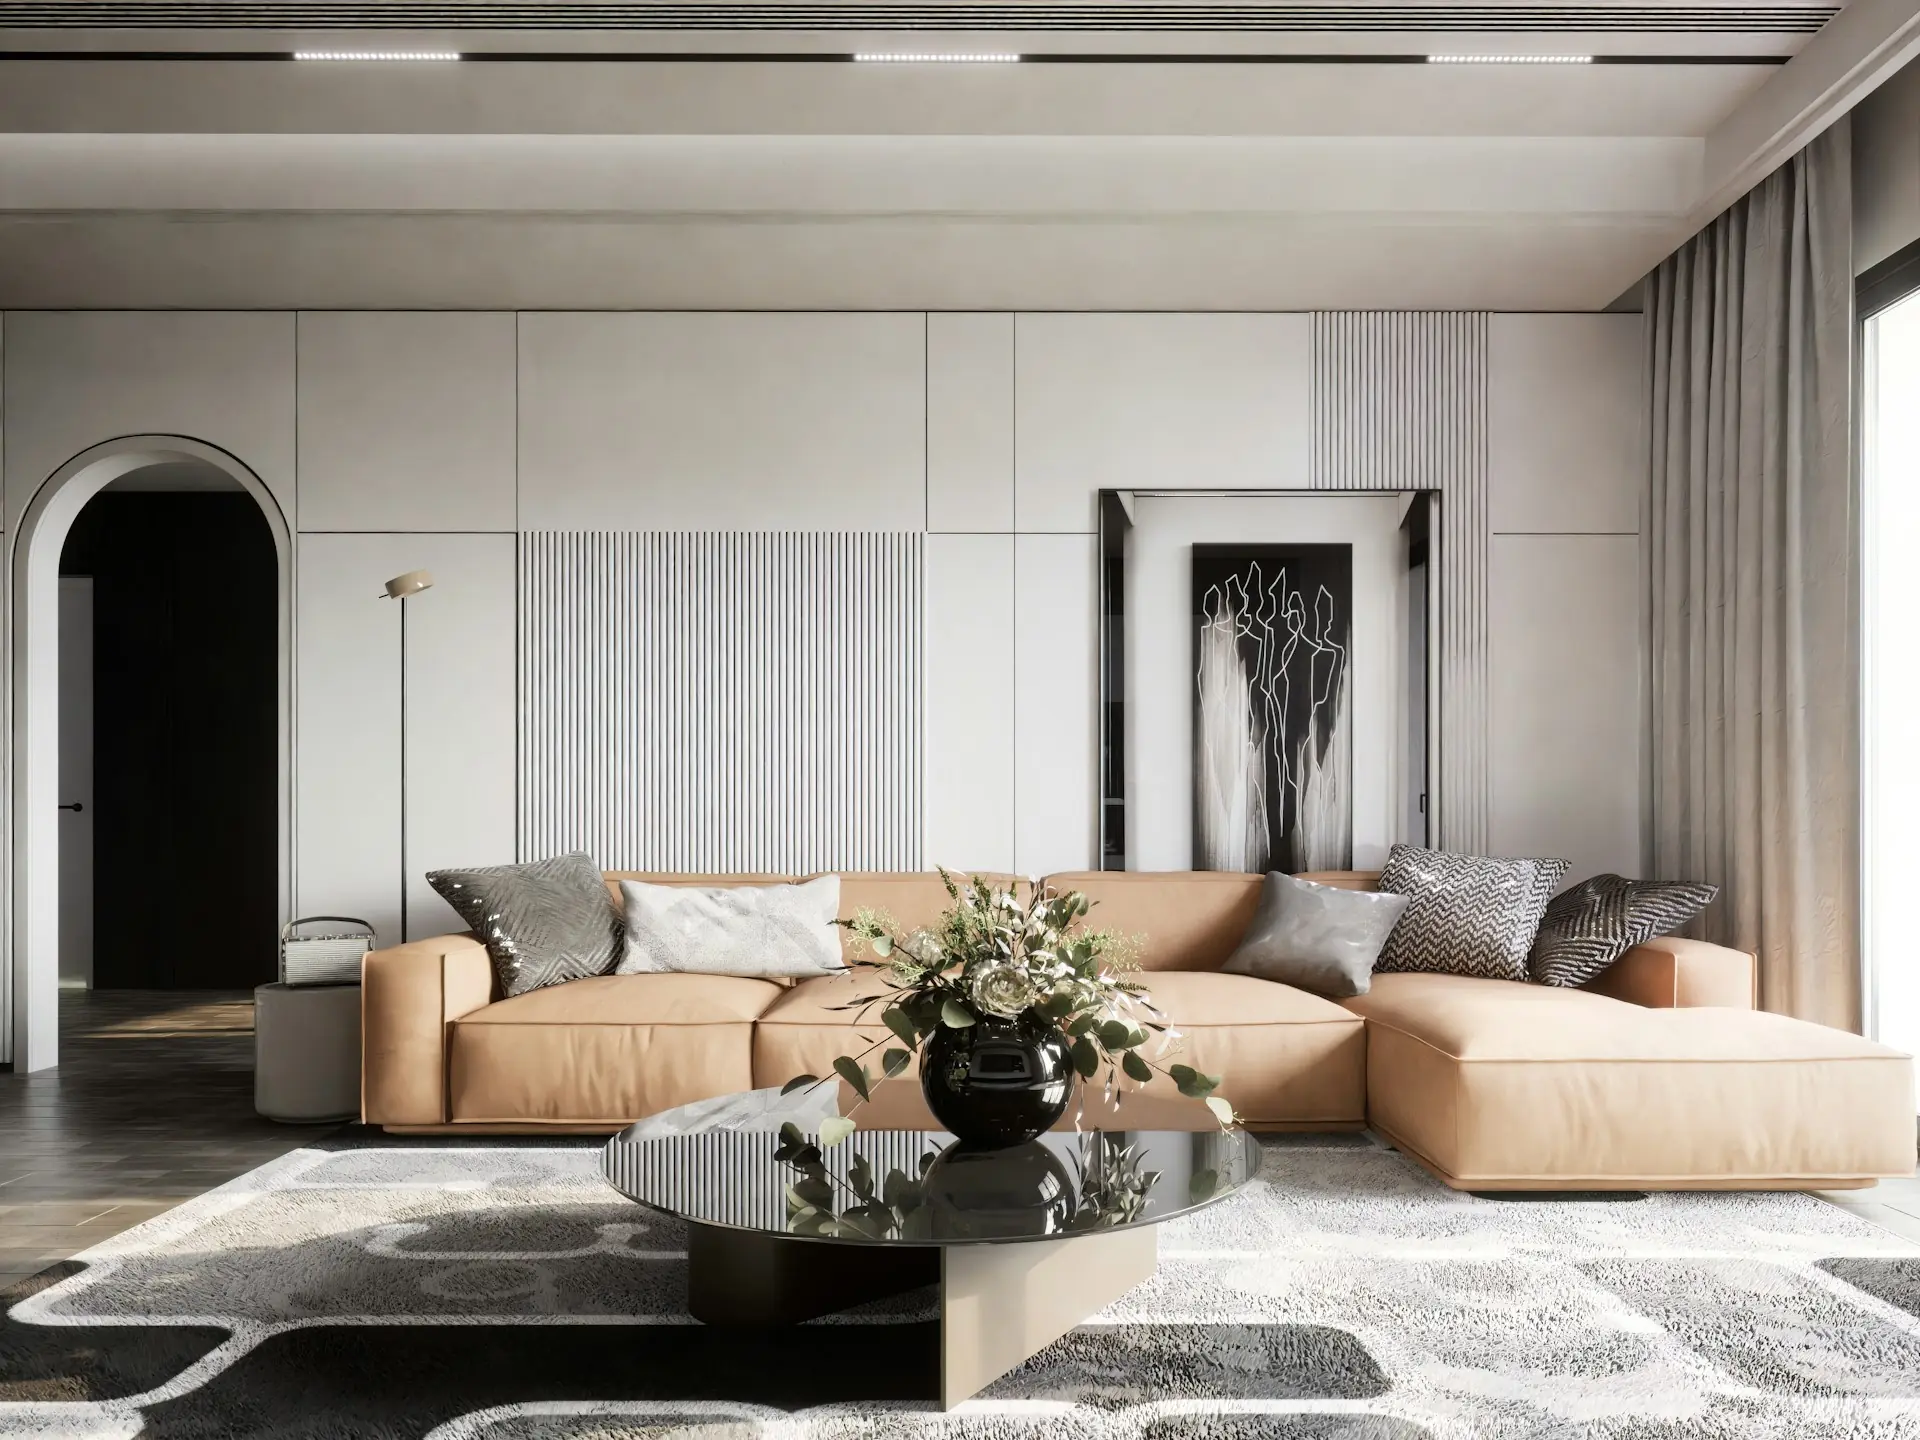
    The strongest luxury living room interior design ideas start with the architecture: ceiling treatments, framed windows, a fireplace built into the wall, and custom millwork sized to the room, with furniture and finishes layered on top. When the shell of the room carries the character, every later choice has something to answer to. When it does not, you end up buying more objects to fill a gap that only construction can close.

    Keep reading for the ideas worth bringing to a first design meeting, from what a coffered ceiling does to your lighting options to how a sofa, a rug, and a media wall should be sized. Each idea comes with the dimension or decision that has to be fixed before anyone cuts wood.

    Architectural Ideas That Give the Room Its Character

    Architectural features set the mood before any furniture arrives, so decide on them first. A ceiling, a window wall, and a fireplace are fixed points. Everything else in the room will either line up with them or fight them.

    Luxury Living Room Interior Design Ideas That Start at the Ceiling

    A coffered ceiling is the clearest way to make a high ceiling feel intentional. The grid of beams breaks a tall, empty surface into smaller fields, which gives the eye a pattern to follow and makes the room feel finished from every seat.

    The beam layout should come from the room plan. Center the grid on the main seating area or the fireplace wall, and the room reads as orderly. Center it on the room’s walls when the fireplace sits off-center, and the two will compete.

    Coffers also decide your lighting. If you want a chandelier, one field of the grid must sit over the seating group. If you want recessed lights or strip lighting inside the coffers, decide which fields hold them before the framing goes up, and tell the contractor the fixture weight before the ceiling closes.

    In older Chicago homes, a ceiling may hide old plaster, uneven joists, or pipes. Opening it up for new trim can reveal surprises, so plan time for the contractor to check what sits above before beam spacing is final.

    Frame Window Walls Without Losing Natural Light

    Floor-to-ceiling windows deliver the most light when the drapery sits outside the glass. Mount the rod near the ceiling and extend it past the frame on each side. When the panels are open, they rest on the wall and leave the glass clear.

    Drapery hung from the ceiling also makes the wall feel taller. Panels that stop at the sill cut the wall in half. Panels that just touch the floor carry one long line from ceiling to floor.

    Decide on the drapery before the ceiling is finished. A recessed track or a pocket in the ceiling hides the hardware and keeps the line clean, while adding it later means cutting into finished drywall or plaster. Fabric weight matters too: in a north-facing room, a lighter lined fabric keeps the light you have, and heavy velvet suits a room with strong sun.

    Make the Fireplace Part of the Architecture

    A fireplace works best when its surround reaches the ceiling or ties into flanking millwork. A small mantel on a large wall looks like an afterthought. A full-height stone surround becomes the wall itself.

    Natural stone needs early planning. Slabs are heavy, so the wall and floor must carry the weight. Each slab also looks different, so you should see the actual stone before it is cut.

    An electric fireplace opens more options, since it needs no chimney. That makes it useful in condos and newer buildings where a wood-burning unit is not possible. It still comes with limits: the manufacturer’s clearances, the circuit it needs, and what the wall is built of all decide where it can go. Pick the exact model before the surround is drawn, because the opening, the power location, and any trim around the unit all depend on it.

    Seating and Proportion Before Statement Furniture

    Plan the layout around how people sit and move before you choose a single standout piece. For the planning side, from layout to lighting, this guide to luxury living room design goes step by step. A sculptural chair in the wrong spot only blocks a path.

    Plan the Seating Around Conversation and Circulation

    Start with how many people need to sit together on a normal evening. Then group the seats so each person can see the others’ faces without turning their whole body. Pulling seating off the walls toward the center makes this easier.

    Next, trace the paths people take through the room. A walkway should never cut through the conversation area. Leave clear routes from the entry to the windows, the fireplace, and any doors. In an open plan, the back of the sofa often marks the edge of the living area, so it should line up with the kitchen’s walkways and sightlines too.

    Choose a Sofa That Fits the Room’s Scale

    Size the sofa to the wall and the seating plan first, then choose the style. A common rule of thumb puts the sofa at about two-thirds the length of the wall behind it, which leaves room for side tables and lamps.

    A sectional creates one strong seating group in a large room, and a modular one can be rearranged later. Curved sofas soften a room full of straight lines, like a coffered ceiling or paneled walls, and turn people toward each other, though they need more floor space than a straight sofa of the same seat count.

    Check delivery access early. Chicago walk-ups, vintage elevators, and tight stair turns limit what you can carry in, and a modular piece is often the only way a large sofa gets through the door. Measure doors, halls, and turns before ordering.

    Use a Properly Sized Rug to Define the Seating Area

    A rug should be large enough for the front legs of every main seat to rest on it. A small rug floating in the middle makes the furniture look scattered; a larger one pulls the group into one unit. In open plans, it also marks where the living space ends without a wall.

    Order the rug after the furniture plan is final. Custom sizes take time to make, and a rug cut to the wrong size cannot be fixed. Leave an even border of floor showing, especially near built-ins or a hearth.

    Built-In Millwork That Resolves Real Room Needs

    Built-ins earn their place when they solve a storage, display, or media problem that loose furniture cannot. Shelves and cabinets that reach the ceiling read as part of the wall, not as furniture placed against it.

    Design Shelving Around What You Own and Display

    Measure your collection before anyone draws a shelf. Tall art books, records, and ceramics all need different heights and depths, and shelving designed around real items looks full and planned.

    Mix open shelves with closed cabinets. Use the lower section for doors and drawers, and keep the upper shelves open for display, so daily clutter hides where it collects.

    Think about spans as well. Long shelves loaded with books will sag over time. Thicker shelves, hidden supports, or shorter spans prevent it, and each choice changes how the unit looks.

    Flanking a fireplace with built-in shelving frames the hearth and balances the wall. Set the shelf lines to the mantel height or the coffer grid above, so the wall reads as one composition. Custom built-ins like these work best when they are drawn with the room, not added to it.

    Integrate the Television Without Letting It Dominate

    The best media wall places the television at eye level from the main seat and lets it recede when it is off. Panel doors, a recessed niche, or a dark backing all help it blend in.

    Pick the TV model before the millwork is drawn. Screen size, mount depth, and the ventilation the equipment needs set the opening. Guess wrong and the screen will not fit, or the receiver behind it will run hot in a closed cabinet.

    Plan the wiring with the electrician and the cabinetmaker together. Cable boxes, speakers, and routers need cool, ventilated space and a path for wires, and hidden wiring only stays hidden if the conduit is in the wall before drywall.

    Avoid hanging the TV high above a fireplace if you can. It strains the neck and pulls focus from the hearth, and a side wall with built-in cabinetry usually works better.

    Set Millwork Dimensions and Profiles Before Fabrication

    Every key dimension must be fixed in drawings before fabrication starts: shelf heights, door sizes, trim profiles, and how the unit meets the ceiling and floor. Most rooms are not perfectly square, especially in older buildings, so fabricators add scribe strips that let the unit fit tight against a leaning wall or a sloping floor.

    Profiles should match the room. A clean square edge suits a modern interior, while a molded edge fits a pre-war home with original trim. Custom paneling can also line up with outlets, shelves, and window trim in a way stock wall panels cannot.

    Drawn and built by one custom millwork team, the shelf lines you approved are the shelf lines that end up on your wall.

    Materials and Finishes That Reward a Closer Look

    Choose high-quality materials for the surfaces you touch every day, and let a few strong contrasts carry the room. Fewer, better materials feel calmer up close than many competing finishes.

    Balance Natural Stone with Warm Wood

    Natural stone and wood work best as a pair. Stone brings weight and pattern. Wood brings warmth and softens the cool feel of stone.

    A marble coffee table brings veining to the center of the room, but marble stains and etches, so it suits a household that uses coasters. A solid wood table handles daily use better and wears into character. Tie loose pieces to the built finishes: if the fireplace is limestone, walnut shelving and a walnut table connect the room. Bring samples home and look at them in both day and evening light.

    Choose Upholstery and Metal Finishes with the Build in Mind

    Velvet adds depth because it catches light differently as you move, and performance velvets resist wear in homes with kids or pets. Linen, wool, and velvet in one palette feel related rather than collected.

    Metal finishes work best as repeats of one choice. Brushed brass on a lamp, a cabinet pull, and a picture light ties the room together. Since pulls, sconces, and fireplace trim often come from different vendors, order samples from each and check them side by side, because “brushed brass” varies more than you would expect.

    Lighting Decisions That Shape How the Room Feels

    Light the room at several heights. A room lit by one overhead fixture looks flat after dark; light from lamps, walls, and the ceiling together gives it depth.

    Build a Lighting Plan Beyond One Ceiling Fixture

    Use at least three types of light: ambient light to fill the room, task light to read by, and accent light to show off art or texture.

    • Floor lamps suit reading corners and the ends of sofas.
    • Table lamps add warm, low light at seated eye level.
    • Wall sconces light the walls and free up table space.
    • Recessed or cove lighting gives even fill light and can wash a wall of shelves.

    Sconces and floor outlets must be placed early. A sconce needs a junction box in the wall before drywall, and a floor outlet lets a lamp sit beside a floating sofa without a cord crossing the floor.

    Choose a Chandelier for the Ceiling Height and Seating Plan

    Size a chandelier to the room and hang it high enough for clear passage. In a tall room, a larger fixture fills the vertical space; in a standard room, a flatter fixture keeps headroom.

    Center it over the seating group, not the room’s walls, when the two differ. Pick one strong fixture and keep the rest simple, because two bold chandeliers in one room split its focus.

    Build Light into the Millwork

    Strip lighting under shelves or inside coffers turns built-ins into light sources. The cabinetmaker has to cut the channels and plan where the drivers sit, and the electrician has to run power to exactly those points.

    Decide on the control system before the wiring goes in, too. Scenes for reading, hosting, or movies are easy to set up later, but some systems need extra wires or a central panel with room for the equipment, and those have to be in the walls first.

    Choose the Details That Deserve to Be Built In

    The details worth building in are the ones you cannot add later without opening walls or ceilings: coffered beams, wiring for sconces and the TV, fireplace surrounds, and millwork scribed to the room. Sofas, rugs, and objects can change over the years.

    That split is the most useful of all luxury living room interior design ideas. Put effort and budget into the fixed shell first, then furnish in stages, once final dimensions, chosen appliances, and agreed profiles are on the drawings. The same shell-first thinking carries into the bedroom; these luxury bedroom ideas are a natural next read.

    If you have a living room that photographs better than it feels, bring it to the Chicago interior designers at Threshold Design Lab. A conversation about the ceiling, the walls, and the fireplace is often enough to show what the shell is missing, and its residential interior design team can draw it from there.

    Frequently Asked Questions

    What Makes a Living Room Look Luxurious Without Adding More Furniture?

    Architectural detail does more than extra pieces. A coffered ceiling, full-height drapery, wall paneling, and layered lighting give the room depth with no added clutter. Removing anything that does not serve the seating plan helps as much as adding.

    Can a Small Living Room Feel Luxurious?

    Yes, a small living room can feel luxurious when every inch is planned. Built-in shelving replaces bulky cabinets, modular seating fits tight entries, and drapery hung at the ceiling makes walls feel taller. Fewer, better materials keep the room calm.

    How Do You Design a Luxury Living Room Around a TV?

    Set the TV at seated eye level and build it into millwork that hides wires and equipment. The exact model should be chosen first, since its size and ventilation needs set the opening. Panel doors or a dark recess help the screen fade when it is off.

    Which Living Room Upgrades Are Worth Building in Rather Than Buying Later?

    Anything tied to the walls, ceiling, or wiring: ceiling treatments, fireplace surrounds, media walls, sconce boxes, and shelving that reaches the ceiling. These are hard to add after the room is finished, while furniture and accessories can change at any time.

    How Can a Luxury Living Room Be Planned on a Budget?

    Put money into the fixed shell first and furnish in phases. Lighting, a well-sized rug, and drapery hung high often change a room more than a new piece of furniture, and they can be planned now and bought over time.

  • Contemporary Luxury Interior Design: Built to Outlast Trends

    Contemporary Luxury Interior Design: Built to Outlast Trends

    You are standing in your living room with a folder of saved images, and something does not add up. The finishes you love look current, but you have watched enough kitchens and baths age badly to know that “current” has a shelf life. The real question behind contemporary luxury interior design is not which stone or fixture to pick. It is whether the space will still feel right in five, ten, or twenty years.

    That question is answered long before a finish schedule exists. It is answered in the floor plan, in ceiling heights and sightlines, in how a cabinet meets a wall, and in whether the materials were chosen for how they age rather than how they photograph. 

    A full-service process that carries a project from space planning through fabrication and installation protects those decisions, because nothing gets flattened in translation between the drawing and the shop floor.

    Keep reading to learn how to separate lasting design from trend-driven styling, using concrete decision points: proportion, material performance, layered lighting, and custom fabrication. By the end, you will know what to ask a designer about a proposal, and how to tell whether a plan is grounded in construction reality or in mood boards alone.

    Define the Look Before Selecting a Finish

    Before anyone opens a sample box, you need a written definition of the look you are after. Luxury interior design that ages well starts as a set of principles, not a shopping list.

    Write down three or four words that describe how the space should feel and how it should perform. Calm, tailored, warm, uncluttered. Those words become a filter every later decision has to pass through, which is what keeps a project from drifting.

    How Contemporary Luxury Interior Design Avoids Trend Cycles

    Contemporary style is fluid by nature. As explained in a guide to contemporary interior design, the look borrows from many movements and keeps moving forward. This is exactly why it can date fast when applied only at the surface.

    The fix is to put permanence where change is expensive. Layouts, cabinetry, stone, and lighting locations should follow durable logic. Trend expression belongs in art, textiles, and accessories, which can be swapped without demolition. That single rule separates modern luxury interiors that hold up from ones that need a redo in five years.

    Luxury Minimalist Interior Design Versus Stark Minimalism

    Quiet luxury is often confused with emptiness. True luxury minimalist interior design is functional minimalism: fewer objects, but each one carefully made, with clean lines and generous space around them.

    Stark minimalism removes storage and comfort along with clutter. Functional minimalism hides the clutter instead, using integrated cabinetry, appliance panels, and concealed pantry zones so surfaces stay clear without daily effort. The room reads calm because the systems behind it work, not because you are living with less than you need.

    Luxury Modern Interior Design and the Role of Personal Character

    A space that looks curated by no one in particular will always feel like a showroom. Luxury modern interior design earns warmth from specificity: the books you actually read, a piece of art with a story, a chair chosen for how you sit.

    Balance timeless pieces with a small number of statement pieces. A sculptural table, one bold light fixture, one strong textile. Three focal points is usually the most a single room should carry.

    Start With Proportion, Flow, and Functional Zones

    Proportion does more for a room than any finish. Get the plan right and modest materials look expensive. Get it wrong and premium materials still feel awkward.

    Start with measured drawings, not furniture shopping. Space plans and elevations reveal whether a sofa blocks a window, whether a walkway pinches at 30 inches, and whether natural light reaches the seating area at the hours you actually use it.

    Plan Sightlines and Circulation Before Furnishing

    Walk the plan before you buy anything. Trace the paths from entry to kitchen, kitchen to dining, and bedroom to bath, then measure what is left over for furniture.

    A few working minimums help:

    • 36 inches for primary walkways through a room
    • 30 to 36 inches between a dining table and the nearest wall
    • 14 to 18 inches between a sofa and a coffee table
    • 42 to 48 inches for aisles on both sides of a kitchen island

    When circulation is protected first, a luxurious living space feels effortless. That is the same discipline behind residential interior design that reads as calm rather than crowded.

    Create Purposeful Transitions in Open-Plan Rooms

    Open plans need edges, or every zone bleeds into the next. Rugs, ceiling changes, a shift in flooring direction, or a low millwork element can define a zone without adding walls.

    Mirrors placed opposite windows extend natural light deeper into the plan. Accent chairs turned toward the main seating group signal that a corner is part of the room, not a leftover. Geometric shapes in casegoods and rugs help mark boundaries the eye reads instantly.

    Use Bespoke Furniture and Millwork to Resolve Awkward Proportions

    Most homes have a wall that is too short, a soffit that is too low, or a return that stock cabinetry cannot cover. This is where bespoke furniture and custom millwork do work no catalog piece can.

    Built to field dimensions, a run of cabinetry can absorb an out-of-square wall, align with a window head, and carry a continuous reveal across the room. When the shop drawing comes from the same team that drew the elevation, the design-to-fabrication handoff has no gap in it.

    Build Lasting Depth Through Material Selection

    Premium materials earn their cost through performance and patina, not through price tags. The question to ask about every surface is simple: what will this look like after five years of real use?

    Specify with maintenance in mind. Honed marble hides etching better than polished. Unlacquered brass develops a warm patina. Lacquered brass stays bright until the coating wears unevenly. Neither is wrong, but choosing without knowing is how regret starts.

    Choose Premium Materials for Their Performance and Patina

    High-quality materials age. Cheap ones simply wear out. Natural stone, solid hardwood, wool, and full-grain leather all improve with contact, while thin veneers and printed surfaces only degrade.

    Material Ages Well Because Best Used
    Honed natural stone Hides etching and wear Counters, hearths
    Unlacquered brass Develops even patina Hardware, fixtures
    Full-grain leather Softens, gains depth Seating, benches
    Wool and linen Resist crushing, breathe Rugs, drapery
    Reclaimed wood Already stable and marked Shelving, ceilings

    Balance Natural Stone and Metal With Tactile Textiles

    Hard materials alone make a room echo and feel cold. Pair marble, metal, and glass with textiles that absorb sound and invite touch: velvet, silk, suede, wool, linen, and the occasional fur throw.

    A useful ratio is roughly two-thirds hard natural materials and one-third soft goods in living areas. Natural elements such as reclaimed wood or a stone-based lamp bridge the two. The artisanal craftsmanship and timeless elegance these rooms are known for come from that mix, not from any single hero material.

    Layer a Neutral Foundation With Controlled Contrast

    Build the shell in a neutral color palette: beige, taupe, soft gray, warm white. Neutral tones let architecture and texture carry the room, and they tolerate change as art and textiles rotate.

    Then add controlled contrast. One or two jewel tones in pillows, a rug, or an upholstered chair give the palette tension without committing your walls or cabinetry to a color you may tire of. Material depth sets the stage. Lighting decides whether anyone sees it.

    Use Lighting and Technology to Support Daily Living

    Lighting design is the difference between a room that photographs well and a room that works at 7 a.m. and 9 p.m. Plan it during space planning, while walls are still on paper.

    Map fixture locations against tasks first, then style them. Layered lighting means three roles working together, each on its own control, so one room can serve breakfast, homework, and dinner without changing furniture.

    Layer Ambient, Task, and Accent Lighting

    Ambient light fills the room evenly. Task lighting handles counters, desks, and reading. Accent lighting shapes art, texture, and millwork.

    In practice, that looks like recessed or cove fixtures for ambient. Undercabinet strips and table lamps for task. Adjustable heads or wall sconces for accent. Dim each layer separately. Keep color temperature consistent, usually 2700K to 3000K, so warm woods and stone read correctly.

    Make Statement Fixtures Serve an Architectural Purpose

    Statement lighting fixtures should do a job before they make a statement. A chandelier over a dining table sets the room’s center line. A pendant over an island confirms the work zone. Sconces flanking a bed replace nightstand clutter.

    Size and height matter more than style. Hang dining chandeliers about 30 to 36 inches above the table, and scale the fixture to roughly half to two-thirds the table width. Statement chandeliers that ignore those numbers read as decoration dropped into a room rather than part of it.

    Integrate Smart Systems Without Disrupting the Interior

    Smart home integration should disappear into the architecture. That means deciding early where keypads, thermostats, speakers, and shade pockets live, then coordinating rough-in before drywall.

    Automated lighting scenes, motorized shades that protect finishes from harsh natural light, and zoned climate control all add comfort when the hardware is concealed. In commercial interior design, the same discipline keeps technology from cluttering a public-facing space. All of it depends on documentation that a builder can actually follow.

    Turn a Refined Vision Into a Buildable Plan

    A refined vision only matters if it survives construction. The bridge is documentation: space plans, elevations, an itemized budget, and confirmed material selections, produced before demolition starts.

    That package is what lets you compare bids fairly, catch conflicts early, and hold a schedule. When a proposal lacks elevations or an itemized budget, you are being asked to approve an idea, not a plan.

    Align Space Plans, Elevations, Budgets, and Material Selections

    Phase one deliverables should lock the four things that drive cost and quality. Space plans set circulation. Elevations set cabinet heights, reveals, and tile layouts. The itemized budget assigns real dollars to each line. Material selections confirm lead-in specifications.

    Review them together, not separately. A stone slab choice changes edge details on an elevation. A plumbing fixture changes rough-in dimensions. This is the core of a full-service interior design approach, and it is where most timeline problems are prevented.

    Coordinate Procurement, Lead Times, and Technical Decisions

    Procurement is where schedules are won or lost. Custom stone, imported tile, and appliances can run months out. Orders are staged against the build calendar rather than placed as they come to mind.

    Meanwhile, technical questions keep arriving: ductwork versus soffit height, panel alignment on an appliance, an out-of-plumb wall behind a run of cabinets. Having fabrication and design under one roof shortens those answers from weeks to a day. You can see how that plays out across completed design and build projects.

    Begin a Collaborative Chicago Interior Design Conversation

    Chicago housing stock, from Lincoln Park greystones to River North high-rises, rarely offers square walls or generous tolerances. That is precisely where an interior design consultation grounded in construction experience pays off.

    Threshold Design Lab pairs design with in-house fabrication through TDL Custom. Bespoke furniture, cabinetry, and high-quality materials are drawn, built, and installed by one accountable team. Tell us about your space, and we will walk you through what the process looks like from concept through installation.

    Frequently Asked Questions

    What Defines a Contemporary Luxe Interior Style?

    It is defined by proportion, material quality, and restraint rather than a fixed look. Clean lines, a neutral foundation, and a few well-made focal points carry the room. Trend expression is limited to art and textiles.

    How Can I Create a Refined, Modern Look Without Making a Room Feel Cold?

    Add texture and warmth in the soft layer: wool rugs, linen drapery, leather or velvet seating, and wood tones. Warm the light too, staying near 2700K. Dim each layer separately so evenings feel softer.

    Which Materials and Finishes Work Best for an Upscale Living Room?

    Honed natural stone, solid or engineered hardwood with a real wear layer, unlacquered brass, and full-grain leather all age gracefully. Pair them with wool and linen textiles so the room absorbs sound instead of echoing.

    What Furniture Pieces Are Essential for a Polished, Modern Luxury Home?

    A properly scaled sofa, two accent chairs, one substantial coffee or dining table, and integrated storage handle most needs. Custom-built cabinetry or a bespoke piece is worth it wherever stock sizing leaves awkward gaps.

    How Do I Balance Minimalist Design With Warmth, Texture, and Comfort?

    Reduce the number of objects. Increase the quality and tactility of what remains. Concealed storage keeps surfaces clear, while layered textiles and natural materials supply the warmth minimalism can otherwise lose.

    What Lighting Choices Make a Bedroom Feel Elegant and Sophisticated?

    Use wall sconces or pendants beside the bed to free nightstand space, plus a dimmable ambient layer and one accent source. Keep every fixture on a dimmer. Add blackout or dual shades for control over natural light.

    Choosing Permanence Over the Next Style Cycle

    The spaces that still feel right a decade later were not lucky. They were planned around circulation, built with materials chosen for how they age, and lit for the way the room is actually used.

    If you are holding a folder of inspiration and want to see it become drawings, a budget, and a schedule, that is a conversation worth having without pressure. Threshold Design Lab listens first. Then shows you what a full-service path from concept through installation would look like for your home.

    Reach out when you are ready. No verdict, no sales pitch, just a clear look at what your project would take.