Category: Blog

  • Office Interior Design in Chicago: What Owners Should Vet First

    Office Interior Design in Chicago: What Owners Should Vet First

    You have a lease, a headcount, and a deadline. The question is whether the office you build actually helps your team do better work or just looks good in a photo.

    Office interior design in Chicago carries specific challenges that owners in other markets may never face. Think century-old building stock, strict landlord work letters, hybrid schedules that shift quarterly, and permitting timelines that punish poor planning.

    Every finish, partition, and furniture decision either supports the way your people move through their day or works against it.

    The best process starts by listening to how your team actually works before sketching a single layout. A vertically integrated model connects design, space planning, and in-house fabrication under one roof. 

    That means the vision your team agrees on during programming survives the build without being diluted by handoffs between disconnected vendors.

    Keep reading to learn how to separate high-performing workplace design from surface-level aesthetics and how to navigate Chicago’s building realities. You will also see how to plan layouts before choosing finishes, evaluate material durability, and select a delivery model that protects your investment.

    By the end, you will understand how a phased fabrication process, including custom millwork built to your exact specifications, keeps a commercial project on budget and on schedule.

    What Makes a Workplace Perform, Not Just Photograph Well

    A reception area with designer lighting means nothing if your sales team can hear every phone call from the adjacent open plan. Workplace design that performs starts with measurable outcomes: fewer interruptions per hour, shorter walks between collaborative zones, and acoustic privacy where it counts.

    Workflow, Adjacencies, and Daily Movement

    Your office layout should mirror how departments actually interact, not how the org chart says they should. Workplace strategy begins by mapping which teams collaborate daily, which need proximity to shared resources, and which require separation for focused tasks.

    A common mistake is placing a high-traffic break area between two quiet departments. When your design firm maps adjacencies before drawing walls, you reduce unnecessary foot traffic and shorten the distance between teams that depend on each other. 

    These movement patterns compound. Even saving 30 seconds per trip adds up to hours of recovered productivity each week.

    Acoustics, Lighting, and Focus Support

    Open offices without acoustic planning create a noise floor that forces employees into headphones or conference rooms. Effective office design layers sound masking, absorptive ceiling panels, and enclosed focus rooms to give people genuine choice about their work environment.

    Lighting follows a similar logic. Relying entirely on overhead fluorescents ignores the reality that task work, video calls, and collaborative sessions each need different light levels. Tunable LED fixtures and access to natural daylight through thoughtful partition heights can reduce eye strain and improve alertness without increasing energy costs.

    Brand Expression Without Sacrificing Function

    You can embed your brand into a workspace through material choices, color accents, and spatial rhythm rather than oversized logos. A law firm and a tech startup should feel different the moment you walk in, but both need functional circulation, adequate storage, and comfortable meeting spaces.

    The real test is whether a visitor can sense your company’s values through the space itself. That expression should come from the palette, the proportions, and the quality of the built environment, not from decorative afterthoughts bolted onto a generic layout.

    How Chicago Constraints Shape Office Interior Design

    A 1920s Loop office tower and a converted Fulton Market warehouse present two completely different starting points for interior architecture. Yet both demand the same level of code compliance and landlord coordination.

    Older Building Conditions and Code Reality

    Many Chicago commercial spaces sit inside buildings with plaster walls, irregular column grids, and mechanical systems that predate modern HVAC standards. Your general contractor and design firm need to field-verify dimensions early because as-built drawings, if they exist, are often unreliable by several inches.

    Fire-rated corridor requirements, ADA accessibility standards, and Chicago’s specific electrical and plumbing codes add layers that a design concept must accommodate from day one. Discovering a code conflict after demolition starts is one of the most expensive mistakes in tenant improvement work.

    Landlord Requirements, Permits, and Building Coordination

    Most Chicago office leases include a work letter that defines what the landlord will cover and what falls to you. Some landlords require you to use their preferred contractors for base-building tie-ins. Others restrict construction hours to evenings and weekends.

    Permitting in Chicago also moves on its own schedule. Submitting incomplete drawings or missing a required review can add weeks. A design firm experienced with commercial interior projects in Chicago builds permit strategy into the project timeline from the start. It is not an afterthought.

    Hybrid Work Patterns and Flexible Footprints

    Your headcount on a Tuesday may differ from Friday by 40% or more. Designing for a fixed desk-per-person ratio wastes square footage you are paying for every month.

    Flexible footprints use modular furniture systems, moveable partitions, and bookable focus rooms to accommodate shifting occupancy. The goal is a space that feels intentional at 60% capacity and functional at 100%.

    Planning the Layout Before Finishes and Furniture

    The most common budgeting error in office projects is choosing finishes and office furniture before the spatial plan is locked. A polished conference table means nothing if it blocks a required egress path.

    Programming Headcount, Meeting Needs, and Storage

    Programming is the formal step where commercial interior designers document every functional requirement your space must meet. This includes current headcount, projected growth, meeting room ratios, file storage, copy and mail areas, and specialty zones like server closets or mothers’ rooms.

    A thorough program produces a square-footage budget broken down by function. Without it, you are guessing at room sizes and discovering shortfalls during construction.

    Zone Typical SF per Person or Unit Notes
    Individual workstation 48 to 64 SF Open plan, varies by furniture system
    Private office 100 to 150 SF Depends on role and meeting needs
    Small huddle room (2 to 4) 80 to 120 SF High demand in hybrid offices
    Large conference room (8-plus) 250 to 350 SF Include AV and acoustic treatment
    Break or kitchen area 15 to 20 SF / person Scales with total headcount
    File and storage 5 to 10 SF / person Declining but still necessary


    Space Planning for Collaboration and Privacy

    Space planning translates your program into a floor plan that balances open collaboration areas with enclosed private zones. The ratio between these two categories should reflect your team’s actual work patterns, not a trend article.

    Placing collaborative zones near the building core and quiet zones along the perimeter takes advantage of natural light for focused work. Transition areas, like a casual seating zone between open desks and conference rooms, reduce the acoustic bleed that undermines both environments.

    Circulation, Accessibility, and Future Reconfiguration

    Every layout must maintain clear primary and secondary circulation paths that meet ADA width requirements and local egress codes. Pinch points near copy rooms or kitchen entries create daily friction that compounds into real frustration.

    • Primary corridors should be at least 60 inches wide for ADA compliance.
    • Secondary paths between workstations need a minimum of 36 inches.
    • Accessible routes must connect all floors and restrooms without detour.
    • Furniture systems with modular wiring allow reconfiguration without rewiring.
    • Demountable walls cost more upfront but save significantly when teams reorganize.

    Building reconfiguration potential into the initial layout protects your investment over a five- to ten-year lease.

    Materials, Furnishings, and Build Quality That Hold Up

    A residential-grade countertop in a break room with 80 daily users will show wear within months. Commercial interior design demands materials tested for the volume and intensity of workplace use.

    Commercial Grade Surfaces and Durability Standards

    Flooring, countertops, and wall finishes in a commercial office must meet specific performance ratings. Luxury vinyl tile (LVT) rated for commercial use, for example, handles rolling chair traffic without delaminating. Solid surface or quartz countertops resist staining from daily coffee spills far better than marble or butcher block.

    Selecting modern finishes with genuine durability requires understanding ASTM abrasion ratings, fire ratings, and chemical resistance. These specs are not glamorous, but they determine whether your space looks sharp at year five or needs a costly refresh at year two.

    When Custom Pieces Solve Real Operational Problems

    Off-the-shelf office furniture works for standard layouts, but irregular floor plates and specific workflow needs often demand custom solutions. A reception desk that must integrate a transaction counter, AV controls, and concealed storage cannot come from a catalog.

    This is where fabrication connects directly to design intent. TDL Custom, the in-house fabrication arm of Threshold Design Lab, builds custom millwork and furniture to exact project specifications.

    When the same team that designs a built-in credenza also builds it, tolerances stay tight. Field modifications happen in real time rather than through weeks of back-and-forth with an outside vendor.

    Custom furniture also solves problems like non-standard column enclosures, angled walls in older Chicago buildings, and integrated technology housing that no stock piece can address.

    Procurement, Lead Times, and Installation Coordination

    Lead times for commercial furniture and materials currently range from 6 to 16 weeks depending on the manufacturer and product line. Procurement planning must start during the design development phase, not after construction documents are issued.

    • Order furniture and long-lead items as soon as selections are approved.
    • Confirm delivery windows with your general contractor’s schedule.
    • Stage large deliveries off-site if building loading docks have restrictions.
    • Coordinate electricians and data cabling installers before furniture arrives.
    • Schedule final punch-list walkthrough before employee move-in day.

    Aligning procurement with construction phasing prevents the expensive gap where a finished space sits empty waiting on furniture.

    Choosing a Delivery Model That Protects Design Intent

    The gap between a beautiful rendering and a disappointing built result almost always traces back to how many handoffs occurred between concept and installation.

    Full-Service Teams Versus Fragmented Vendor Stacks

    When you hire a design firm, a separate general contractor, an independent furniture dealer, and a standalone AV integrator, each party optimizes for their own scope. Conflicts between these scopes produce change orders, finger-pointing, and compromises that erode the design.

    A full-service design model consolidates design, documentation, procurement, and project oversight under a single point of accountability. You get one team tracking every detail, from the finish on a custom cabinet door to the electrical rough-in behind it.

    How In-House Fabrication Changes Outcomes

    Most commercial interior design firms outsource millwork and custom fabrication to third-party shops. This introduces a translation layer: the designer’s intent must be communicated through drawings, interpreted by a shop detailer, and then built by craftspeople who have never visited the site.

    When fabrication lives in-house, as it does at Threshold Design Lab, the designer can walk into the shop, review a prototype, and adjust a detail before it ships to the job site. 

    Panel profiles, edge treatments, and joinery methods are decided in conversation, not in a chain of redlined PDFs. This shortens lead times and eliminates the most common source of field-fit problems.

    Virtual Consultation, Phasing, and Occupied Renovations

    Not every project requires your team to relocate during construction. Phased renovations allow sections of the office to remain operational while adjacent zones are under construction. This demands careful sequencing of demolition, dust barriers, and noise-producing work.

    Virtual consultations during the early design phases can accelerate decision-making for owners who travel or manage multiple locations. Remote review sessions for material boards, 3D models, and construction documents keep the project moving without requiring every stakeholder to be in the same room.

    How to Evaluate a Chicago Partner Before You Commit

    The first question to ask a prospective commercial interior design firm is not about their aesthetic. It is about their documentation process and how they manage a project from contract through punch list.

    Questions to Ask About Process, Documentation, and Oversight

    Request a sample project schedule, a scope-of-work outline, and a change-order policy before signing anything. A firm that cannot show you these documents either does not use them or does not want you to compare.

    Ask how they handle contractor coordination, permit submissions, and landlord approvals. In Chicago, these three areas consume more project time than most owners expect. A firm that treats them as afterthoughts will cost you in delays and rework.

    You should also ask who your day-to-day contact will be. Some firms assign a senior designer for the pitch and hand you off to a junior coordinator afterward. Clarify this upfront.

    Portfolio Signals That Indicate Operational Understanding

    When reviewing a design firm’s project portfolio, look beyond the photography. Ask what the client’s headcount was, how long the project took, and what challenges arose during construction.

    A portfolio that shows only empty, styled rooms tells you about aesthetics. A portfolio accompanied by floor plans, material schedules, and before-and-after comparisons tells you about process. The difference matters when your project hits an unexpected structural condition or a landlord changes the rules mid-build.

    Where Residential Design Experience Helps, and Where It Does Not

    Some firms with strong residential design portfolios bring a refined material sensibility that elevates commercial spaces. Hospitality-influenced finishes, warm wood tones, and textured fabrics can make an office feel welcoming rather than institutional.

    That said, residential experience alone does not prepare a firm for commercial code reviews, multi-trade coordination, or ADA compliance. The ideal partner brings the warmth of residential thinking and the rigor of commercial process. If a firm cannot speak fluently about both, keep looking.

    Frequently Asked Questions

    What Factors Most Influence the Total Cost of Hiring a Commercial Interior Designer in Chicago?

    Project size, scope of custom work, permit complexity, and material selections drive cost more than the design fee itself. Older Chicago buildings often require mechanical upgrades and code remediation that add to the budget. Designer fees also vary significantly by market and specialization, so request a detailed fee breakdown before comparing proposals.

    How Do Small Offices Optimize Space Planning, Storage, and Circulation Without Sacrificing Privacy?

    Start by assigning shared storage rather than individual file cabinets, which can free 10 to 15% of your floor area. Use furniture-height partitions and acoustic panels to create visual and sound separation without building full walls. Bookable focus rooms as small as 50 square feet give employees a private option without consuming permanent square footage.

    Which Modern Workplace Design Features Best Support Hybrid Work, Acoustics, and Focused Tasks?

    Sound masking systems, enclosed phone rooms, and reservable desks rank highest for hybrid teams. Tunable lighting that adjusts for video calls and focused work also makes a measurable difference. The key is designing for peak and off-peak occupancy simultaneously so the space never feels empty or overcrowded.

    What Is the Typical Timeline from Programming Through Construction for a Tenant Improvement Project?

    Most Chicago tenant improvement projects take 4 to 8 months from programming through move-in, depending on permit timelines and custom fabrication scope. Programming and design development typically require 4 to 8 weeks. Permitting in Chicago can add 3 to 6 weeks. Construction duration depends on project size and phasing requirements.

    How Should Companies Evaluate Commercial Interior Design Firms for Permitting Experience and Contractor Coordination?

    Ask for examples of Chicago permit sets the firm has submitted and approved. Request references from general contractors who have built their designs. A firm that can show a track record of clean permit approvals and coordinated construction schedules will save you time and money compared to one learning the process on your project.

    How Can a Design Team Align Brand, Hospitality Style Finishes, and Durability Requirements in a Workplace?

    Material selection is where brand, comfort, and longevity intersect. Choose commercial-rated fabrics in your brand’s color palette. Specify custom cabinetry and millwork with finishes that reflect hospitality warmth while meeting fire and abrasion standards. A vertically integrated team can prototype these finishes in-house before committing to full production. 

    Your Office Should Work as Hard as Your Team 

    The difference between a workspace that retains talent and one that pushes people to work from home comes down to whether design decisions were made with operational data or just visual instinct. 

    Every section of this guide pointed to the same principle: vet process, not just portfolio. When you are ready to explore how a listening-first design process and in-house fabrication can shape your Chicago office project, tell us about your workspace. 

    Threshold Design Lab will walk you through programming, layout, materials, and phasing at whatever pace your timeline requires.
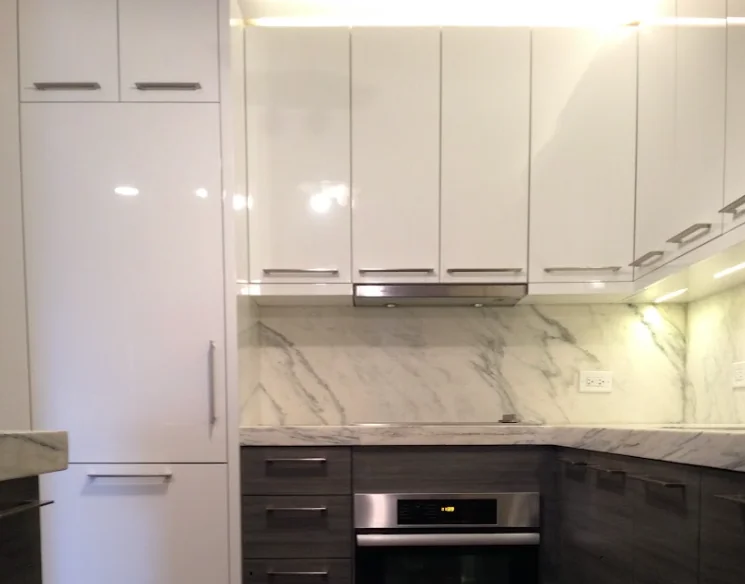
  • Custom Millwork vs Stock Cabinets: When the Higher Cost Pays Off

    Custom Millwork vs Stock Cabinets: When the Higher Cost Pays Off

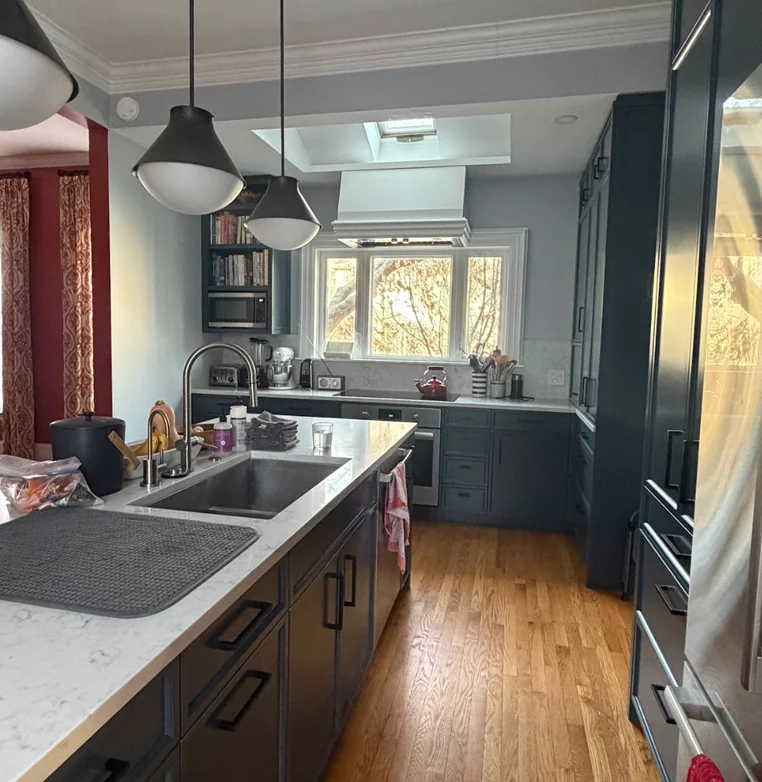
    You are standing in a kitchen with walls that are not plumb, corners that do not meet at ninety degrees, and a ceiling height that falls between two standard cabinet sizes.

    This is the moment the question of custom millwork vs stock cabinets stops being abstract and becomes personal. The choice you make here will affect how your kitchen looks, how it functions daily, and how much value it holds a decade from now.

    The strongest answers come from a vertically integrated model, one that pairs residential design services with in-house fabrication. Design intent and construction execution stay under one roof. When your walls are out of square, the team that drew the plans is also the team milling the panels and scribing the face frames.

    Keep reading to learn how stock, semi-custom, and fully custom cabinetry differ in materials, construction, and long-term return. 

    You will also see where each option fits best based on home type, timeline, and budget. By the end, you will understand how shop drawings translate a design concept into a finished, site-specific cabinet package.

    How the Three Cabinet Paths Differ

    A stock cabinet arrives in fixed sizes, typically in three-inch increments, from a factory that may produce thousands of identical units per week. Semi-custom cabinetry and fully bespoke work occupy progressively more flexible positions on that same spectrum.

    What Counts as Stock, Semi-Custom, and Fully Bespoke Work

    Stock cabinetry comes pre-built in standardized dimensions. You choose from a set catalog of door styles, finishes, and widths. Cabinet manufacturers ship these units quickly because they are already sitting in a warehouse or rolling off a production line.

    Semi-custom cabinets offer more flexibility. You can modify door styles, adjust depths by small increments, and select from a broader finish palette. The manufacturer still works from a base catalog, but the modifications let you address some spatial quirks that stock cannot accommodate.

    Fully custom cabinetry starts with raw material and a blank sheet. Every dimension, joint, panel profile, and finish is determined by your project’s exact requirements. Nothing is limited to a catalog.

    Why Cabinetry Is Only One Part of Broader Millwork

    Kitchen cabinets are the most visible component. Custom millwork also includes wall paneling, built-in shelving, library walls, range hoods, and integrated storage. When these elements are designed and fabricated together, the grain direction, finish sheen, and reveal lines stay consistent across the entire room.

    Stock and semi-custom lines rarely extend beyond kitchen cabinetry. If you need a matching paneled refrigerator surround or a built-in banquette, you are sourcing from a different vendor. That split almost always produces visible inconsistencies in color, sheen, or profile.

    When a Standard Product Line Is Enough

    Stock cabinets work well in rental properties, secondary spaces, or kitchens with standard dimensions and no unusual architectural features. If your walls are plumb, your ceiling is a common height, and your layout does not require unusual configurations, a stock line can deliver a clean result at a lower price point.

    The question shifts when your space demands something the catalog does not contain.

    Custom Millwork vs Stock Cabinets: Fit and Integration

    A two-inch gap between a cabinet run and a plaster wall is not a cosmetic problem you can caulk away. It signals a fundamental mismatch between a standardized product and a non-standard room.

    Why Older Chicago Homes Expose Dimensional Limits

    Chicago’s housing stock includes century-old greystones, workers’ cottages, and mid-century two-flats. These homes were built before modern framing standards. Walls drift, floors slope, and ceiling heights vary from room to room. 

    A stock cabinet designed for an eight-foot ceiling and ninety-degree corners will not sit flush in a kitchen where neither condition exists.

    In a kitchen renovation in Chicago, field measurements often reveal that opposite walls differ by an inch or more. Ordering stock cabinets against those measurements means relying on filler strips, which break the visual line and collect grease.

    Using Site-Specific Scribing to Eliminate Fillers and Gaps

    Scribing is the process of trimming a cabinet panel or face frame on site so it conforms to the exact contour of an adjacent wall, ceiling, or floor. Custom fabrication shops cut panels slightly oversized, then scribe them during installation for a gapless fit.

    This step is impossible with stock cabinets because you cannot trim a pre-finished, pre-edged panel without exposing raw substrate. Semi-custom lines sometimes allow minor scribing, but the finished edges and standard depths limit how far you can go.

    The fabrication dimension matters here. In an integrated workflow, the millworker reviews field dimensions before cutting begins. Panels arrive on site with scribing allowances already built into the material. That connection between design intent and physical construction is what eliminates the filler strip entirely.

    Designing Around Islands, Corners, and Built-Ins

    Islands, blind corners, and built-in storage demand dimensions that stock lines rarely offer. Consider the following comparison:

    Feature Stock Cabinets Semi-Custom Custom Millwork
    Island depth options Fixed (typically 24″) Adjustable in small increments Any dimension
    Corner solutions Lazy Susan or blind base Wider selection, some custom pulls Fully tailored to angle
    Integrated appliance panels Limited or unavailable Available at upcharge Standard offering
    Built-in seating or shelving Not available Not available Designed as part of the room
    Hidden storage Rarely offered Limited options Engineered to specification


    When your layout calls for a 38-inch-deep island with an integrated outlet panel and waterfall edge, stock and semi-custom options cannot deliver.

    Materials, Joinery, and Daily Performance

    The box behind the door determines how your cabinets perform ten years after installation. It is not the door style or the finish color.

    Comparing MDF, Particleboard, Veneer, and Solid Hardwood

    Stock cabinets typically use particleboard for the box and medium-density fiberboard (MDF) for door panels. Both materials are stable in controlled environments but degrade when exposed to moisture. A single dishwasher leak can swell particleboard beyond repair.

    Semi-custom cabinetry often upgrades the box to furniture-grade plywood with MDF doors. This combination resists moisture better and holds fasteners more reliably over time.

    Custom woodwork uses the material that best serves each component:

    • Solid hardwood for face frames, stiles, and rails
    • Furniture-grade plywood for box construction and shelving
    • MDF for painted door panels where dimensional stability matters
    • Wood veneer over plywood for stained surfaces that need grain continuity

    Each material is selected for its role, not for cost minimization.

    How Joinery and Hardware Affect Durability

    Stock cabinets rely on staples, cam locks, and hot-melt glue. These fastening methods are fast to assemble but loosen under repeated stress. A heavily used drawer on cam-lock joints will start to wobble within a few years.

    Custom joinery uses dado joints, mortise-and-tenon connections, and dovetailed drawer boxes. These joints distribute stress across a larger surface area and tighten with seasonal wood movement rather than loosening.

    Soft-close hinges and drawer slides are standard in both semi-custom and custom tiers, but the mounting substrate matters. A soft-close hinge screwed into particleboard will strip its hole faster than one mounted in hardwood or plywood.

    What Serviceability Looks Like After Move-In

    A custom cabinet with bolted face frames and individually removable doors can be serviced without disturbing adjacent units. You can replace a single drawer front, swap a hinge, or refinish one panel without pulling an entire run.

    Stock cabinets are harder to service because replacement parts follow the manufacturer’s production cycle. If a door style is discontinued two years after your install, matching it becomes costly or impossible.

    Fabrication Standards, Finishes, and Quality Control

    The Architectural Woodwork Institute (AWI) defines three grades of millwork quality. The grade specified in your project contract determines every tolerance, joint type, and finish standard your cabinets must meet.

    What AWI and NKBA Signal in a Renovation Context

    AWI standards cover everything from grain matching to gap tolerances. Premium grade, the highest tier, requires flush joints with no visible gaps and book-matched veneer across panels. 

    The National Kitchen and Bath Association (NKBA) provides guidelines focused on ergonomic layout and clearance dimensions. When you hire a millwork shop that builds to AWI Premium grade, you are specifying measurable outcomes. 

    The gap between a door and its frame will not exceed a defined fraction of an inch. Veneer leaves will mirror each other across a seam. These are not aesthetic preferences. They are contractual standards.

    Stock and semi-custom lines rarely reference AWI. Their quality is governed by internal manufacturing specs, which vary by brand and price tier.

    Why Shop Drawings Matter Before Fabrication Starts

    Shop drawings are the detailed technical plans that translate a design into cutting lists, assembly sequences, and hardware schedules. They specify every dimension, material, edge treatment, and finish before a single board is cut.

    Reviewing shop drawings before approving custom fabrication lets you catch conflicts early. A panel that looks correct in a 3D rendering may interfere with a plumbing chase or an HVAC register. Shop drawings expose those conflicts at a stage where changes cost nothing beyond a revised print.

    Stock cabinets ship without shop drawings. Semi-custom orders may include basic layout plans. They do not reach the component-level detail that custom shop drawings provide.

    Finish Consistency Across Cabinets, Paneling, and Trim

    When your project includes cabinets, wall paneling, a range hood surround, and crown molding, finish consistency across all elements becomes critical. A custom shop sprays or hand-applies finish to every component in the same batch, under the same conditions, using the same formula.

    Mixing a stock cabinet line with separately sourced trim and paneling almost always produces visible color shifts. Even the same stain applied by two different shops on two different days will look different under kitchen lighting. That batch-level consistency is one reason luxury kitchen designers specify single-source fabrication for high-end projects.

    Finish options in custom work extend beyond stain and paint to include metal finishes, built-in lighting channels, and textured lacquers. None of these appear in a stock catalog.

    Lead Times, Budget Pressure, and Long-Term Return

    Stock cabinets ship in one to three weeks. Semi-custom lines typically require four to eight weeks. Custom millwork runs eight to sixteen weeks depending on complexity and material sourcing.

    How Production Methods Change Timeline Risk

    Factory-built stock cabinets carry the shortest lead time but the highest risk of back-order delays. A supply chain disruption at one plant can delay your entire kitchen by months. You have no alternative source for the same product.

    Semi-custom lines operate on a build-to-order model. Your order enters a queue at the manufacturer’s facility, and timelines depend on current volume. Seasonal surges during spring and fall can push delivery dates beyond the quoted window.

    A local millwork shop controls its own production schedule. Lead times are longer at the outset, but the fabrication happens within driving distance of your job site. If a field measurement changes after demolition, the shop can adapt the cut list within days. That proximity reduces the risk of a timeline-breaking surprise during installation.

    Where Custom Work Can Protect Kitchen Remodel Budget

    The sticker price of custom cabinetry is higher per linear foot. The total project cost, which includes filler strips, scribe molding, shims, and the labor to make stock cabinets look fitted, tells a different story.

    Consider these common add-on costs when stock cabinets meet an irregular room:

    • Filler strips and scribe molding: $300 to $800
    • Additional carpentry labor for shimming and scribing: $500 to $1,500
    • Separate trim fabrication to match cabinet finish: $400 to $1,200
    • Replacement parts for discontinued styles (within five years): $200 to $600 per door

    Custom work absorbs those line items into the base price. The result is a more predictable total budget with fewer change orders during installation.

    Resale Value and the Cost of Replacing a Poor Fit

    A kitchen renovation is one of the highest-return improvements you can make. Kitchens with built-in, site-specific cabinetry present as more polished and intentional than those with visible filler strips and mismatched trim.

    The real cost of a poor fit shows up when you try to sell. A buyer’s inspector flags gaps, moisture damage at particleboard seams, and cabinet doors that do not close flush.

    Correcting those issues before a sale often costs more than the premium you would have paid for custom work at the outset. That long-term math is what makes the final decision less about price and more about fit.

    Choosing the Right Path for Your Renovation

    The right cabinet path depends on three variables: your home’s physical conditions, your timeline, and the scope of work beyond the kitchen boxes themselves.

    Best-Fit Scenarios for Stock, Semi-Custom, and Custom

    Stock cabinets fit best in new construction with standard framing, rental properties where longevity is less critical, and simple galley layouts with no islands or built-ins. They also make sense when your timeline is under four weeks.

    Semi-custom cabinets suit homes with minor dimensional quirks, moderate budgets, and layouts that require a few non-standard sizes. If your kitchen needs one or two modified boxes but otherwise follows a standard configuration, semi-custom delivers a reasonable balance.

    Custom cabinetry is the clear choice for historic homes with out-of-square walls. It also suits projects with integrated millwork beyond the kitchen, and homeowners who want material and finish control down to the grain match. It is also the right path when your renovation includes wall paneling, library shelving, or built-in storage that must read as a single, unified installation.

    Questions to Ask Before You Approve Shop Drawings

    Before signing off on shop drawings, confirm the following:

    • What AWI grade is specified, and what tolerances does that allow?
    • Are field dimensions taken after demolition, or estimated from plans?
    • Which materials are used for box construction versus door panels?
    • How are finish samples approved, and will all components be finished in one batch?
    • What is the change-order process if field conditions differ from drawings?
    • Who handles installation, and is the installer the same team that fabricated?

    These questions separate a rigorous process from a loose one, regardless of which tier you choose.

    How to Match Scope to Timeline, Home Type, and Priorities

    If your renovation includes only cabinets in a standard-dimension kitchen, a semi-custom line with a six-week lead time may be the most efficient path. If your project extends to built-in millwork like paneling, range hoods, and storage, a single fabrication source eliminates the coordination risk of managing multiple vendors.

    Your home type narrows the decision further. A 1920s Chicago bungalow with plaster walls and uneven floors will punish stock cabinets. A 2020 townhome with laser-leveled framing will accept them without issue. Match the product to the building. Not the other way around.

    Frequently Asked Questions

    What Are the Main Differences Between Made-to-Order Cabinetry and Ready-to-Assemble Options?

    Made-to-order cabinetry is built to your project’s exact dimensions using materials you select, with joinery designed for long-term durability. Ready-to-assemble (RTA) options ship flat-packed in standardized sizes and rely on cam locks and dowels for assembly. The primary differences are dimensional flexibility, material quality, and structural longevity.

    How Do Labor, Lead Times, and Installation Complexity Compare Across Cabinet Types?

    Stock cabinets install fastest because they require minimal on-site modification, but they often need filler strips and shims that add labor hours. Semi-custom lines take four to eight weeks to arrive and install with moderate complexity. Custom millwork has the longest lead time but typically installs with fewer on-site adjustments because components arrive pre-fitted to field dimensions.

    What Cost Drivers Most Affect the Total Price of a Built-to-Spec Cabinet Package?

    Material selection, box construction method, finish type, and hardware grade are the four largest cost drivers. Solid hardwood face frames, dovetailed drawer boxes, and hand-applied lacquer finishes each add cost over their standard counterparts. The number of non-standard dimensions and integrated features such as pull-out organizers or built-in lighting also move the total upward.

    When Does a Semi-Custom Cabinet Line Make More Sense Than a Fully Bespoke Build?

    Semi-custom makes sense when your kitchen has mostly standard dimensions with only a few quirks, your timeline is under eight weeks, and your project does not include integrated millwork beyond the cabinet boxes. It delivers better material quality than stock without the lead time or cost of a fully custom build.

    How Do Material Choices and Finishes Impact Durability, Maintenance, and Resale Value?

    Particleboard boxes degrade with moisture exposure and hold fasteners poorly over time. Plywood and solid hardwood resist both. Painted MDF doors maintain a smooth surface but show chips more readily than stained hardwood. For resale, kitchens with durable materials and consistent finishes across cabinets, trim, and paneling appraise higher than those with mixed-vendor components.

    What Budget Range Is Realistic for a Full Kitchen Cabinet Replacement, Including Hardware and Installation?

    For a mid-sized Chicago kitchen of roughly 150 square feet, stock cabinets with hardware and installation typically run $8,000 to $15,000. Semi-custom ranges from $15,000 to $35,000. Fully custom millwork, including soft-close hardware and professional installation, generally starts around $35,000 and can exceed $75,000 depending on material, finish, and scope. 

    The Decision That Shapes Every Morning in Your Kitchen. 

    The question of custom millwork vs stock cabinets comes down to how well the product fits your space, your daily use, and your long-term expectations. Stock works when the room cooperates. Custom works when you need the room to cooperate with your vision. 

    If your renovation involves a Chicago home with dimensional surprises, integrated built-ins, or finishes that need to read as one unified composition, a conversation with Threshold Design Lab is a good starting point. 

    The studio’s in-house fabrication through TDL Custom connects your design to the shop floor, so what gets drawn is what gets built. Tell us about your project when you are ready to move from planning to production.

  • Custom Kitchen Cabinets in Chicago: What Actually Justifies the Cost?

    Custom Kitchen Cabinets in Chicago: What Actually Justifies the Cost?

    Choosing custom kitchen cabinets in Chicago means committing real money to a result you will live with for decades. Before you sign a contract or approve a shop drawing, you need to understand what you are actually paying for. 

    The real question is whether the premium over stock or semi-custom options reflects genuine construction differences or just a marketing label. That distinction matters more than most homeowners realize.

    The answer usually comes down to process. A studio that controls the full path, from space planning through cabinet production and installation, keeps design intent and build quality aligned. 

    Nothing gets lost in the handoff between separate design and fabrication shops. That kind of vertical integration is what closes the gap between how a kitchen looks on a rendering and how it feels when you open a drawer five years later.

    Keep reading to learn what separates truly custom cabinetry from its alternatives and which construction details drive cost and longevity. You will also see how to evaluate competing proposals before production begins.

     By the end, you will know the right questions to ask any fabricator or designer about materials, joinery, finish systems, and site coordination.

    What Makes Cabinetry Truly Custom

    Custom cabinets are built to dimensions, materials, and configurations that exist nowhere in a catalog. Every box, shelf, and drawer is sized to a specific kitchen rather than adapted from a standard module.

    How Site-Specific Dimensioning Changes the Result

    A custom cabinet project starts with precise field measurements of your kitchen’s walls, floors, and ceiling. In many Chicago homes, especially pre-war buildings and early-twentieth-century bungalows, those surfaces are not plumb or level. 

    A fabricator working from site-specific dimensions can taper a filler panel by an eighth of an inch or adjust a crown molding scribe to follow a ceiling that dips. Stock cabinets cannot do this. They leave gaps that get filled with caulk and trim pieces that never look intentional.

    This level of precision also means your kitchen layout can claim every usable inch. Instead of rounding down to the nearest three-inch increment, a custom shop builds the cabinet that actually fits the space. The result is more storage, cleaner sight lines, and fewer compromises.

    Where Custom Differs From Stock and Semi-Custom

    Stock cabinets come in fixed sizes, fixed finishes, and fixed interior configurations. Semi-custom cabinets offer some flexibility, typically in width increments and door style choices, but still rely on a manufacturer’s standard box construction. 

    Fully custom cabinets have no such constraints. You choose the species, the joinery method, the interior layout, the finish, and the exact dimensions. 

    According to the National Kitchen and Bath Association (NKBA), designers working with various cabinet types must understand fillers, overlays, and extended stiles to use each option effectively.

    The cost gap between these tiers is real, but so is the quality gap. When your scope involves non-standard ceiling heights, integrated appliance panels, or unusual corner conditions, custom is often the only path that avoids visible workarounds.

    Why Kitchen Design and Fabrication Must Be Coordinated

    Design drawings and shop drawings serve different purposes. A design elevation shows what the kitchen should look like. A shop drawing translates that vision into panel sizes, dado depths, and hinge placements that a fabricator can cut and assemble. 

    When these two steps happen under separate roofs, details get lost. A designer may specify an inset door, but the fabricator builds an overlay because no one confirmed the reveal dimension.

    Studios that handle both design and custom millwork in-house eliminate that translation gap. The designer who selects the door profile is in direct contact with the person milling it, which means problems surface on a screen, not on an installation day.

    The Construction Details That Matter Most

    The difference between cabinets that last twenty years and cabinets that sag after five comes down to materials, joinery, and finishing methods chosen before a single board is cut.

    Box Construction, Drawer Boxes, and Joinery

    Cabinet boxes can be framed (with a face frame attached to the front) or frameless (where the box edge is the finished face). Frameless construction, common in European-style kitchens, demands tighter tolerances because there is no frame to hide a gap.

    Either approach works well when executed with quality materials: 3/4-inch plywood sides, dado-and-rabbet joints, and solid wood or Baltic birch drawer boxes. Particleboard and stapled butt joints are the hallmarks of budget construction, and they show their age quickly in a high-use kitchen.

    Drawer boxes deserve special attention. Dovetail joinery, whether hand-cut or machine-cut, creates a mechanical lock that resists the pulling force you apply thousands of times a year. 

    Paired with undermount, soft-close slides rated for 75 pounds or more, a well-built drawer box will outlast the finish on the cabinet face.

    Door Styles, Finish Systems, and Hardware Tolerances

    Your door style sets the visual tone. Shaker doors, raised panels, slab fronts, and beaded inset frames each require different milling setups and finishing sequences. 

    A catalyzed lacquer or conversion varnish finish, applied in a controlled spray booth, offers better durability and chemical resistance than a brush-applied paint. Current kitchen cabinet trends show wood tones edging out white, which makes grain selection and stain consistency even more critical.

    Hardware tolerances also affect daily experience. Concealed European hinges with six-way adjustability let an installer fine-tune door alignment after the cabinets are on the wall. 

    If the fabricator pre-bores hinge cups at imprecise locations, no amount of field adjustment will produce flush, even gaps. This is a detail you can verify by asking to see a sample door and hinge assembly before production starts.

    Cabinet Installation and Field Adjustments

    Even perfectly built cabinets can look wrong if the installation is careless. A skilled installer uses shims, laser levels, and scribe strips to bring every cabinet into alignment regardless of wall and floor conditions. 

    Crown molding, light valances, and toe kicks are fitted on-site, often requiring hand-scribing to follow irregular surfaces.

    The installation phase also includes final hardware mounting, drawer slide adjustment, and door alignment. When the team that built the cabinets is also the team installing them, field fixes happen faster because the installer knows the construction inside and out. That direct link between shop and site is what keeps the final result tight.

    How Custom Cabinet Work Integrates With the Rest of the Kitchen

    Cabinets do not exist in isolation. Every joint between a cabinet and another surface, whether a countertop edge, an appliance panel, or a plumbing chase, requires coordination that starts in the design phase.

    Appliance Planning, Ventilation, and Clearances

    Appliance dimensions and utility requirements must be finalized before cabinet shop drawings are approved. A 36-inch range needs a specific rough opening, a defined ventilation path for the hood above, and clearance from combustible materials on either side. 

    Integrated refrigerators and dishwashers require panel-ready dimensions that vary by manufacturer, sometimes by fractions of an inch. If your cabinet fabricator does not receive the appliance spec sheets early, panels will not align.

    Ventilation deserves its own conversation. A ducted range hood needs a chase routed through upper cabinets and potentially through the ceiling. That chase must be planned into the cabinet layout from day one. It should not be carved out after boxes are built.

    Countertops, Reveals, and Edge Conditions

    The joint between your cabinet and your countertop affects both appearance and function. A flush, zero-reveal edge gives a modern, integrated look, but it is demanding. 

    The cabinet box must be dead-level, and the countertop material, whether quartz, marble, or butcher block, must be templated after cabinet installation. A slight overhang of 1/4 inch is more forgiving and hides minor inconsistencies.

    Countertop materials also dictate structural support. Natural stone slabs need a solid subtop or additional corbels at unsupported spans over 12 inches. Your residential interior design team should specify these details in the elevation drawings so the cabinet shop builds in the right support from the start.

    Storage Planning for Islands, Pantries, and Specialty Zones

    Islands often serve double or triple duty: prep surface, seating area, and storage hub. Custom fabrication lets you configure the island interior with specific drawers for utensils, pull-outs for trash and recycling, and open shelving on the dining side. 

    Walk-in or reach-in pantry cabinet systems can include adjustable shelving, pull-out racks, and integrated lighting that stock inserts simply do not offer.

    Specialty zones, like coffee stations, baking centers, or spice drawers, benefit from the same site-specific approach. Each one requires its own electrical, plumbing, or ventilation consideration.

    Why Chicago Homes Often Need Custom Kitchen Cabinets

    Chicago’s housing stock presents construction realities that standard cabinets were never designed to handle. From century-old masonry walls to high-rise condo logistics, the case for bespoke work is often structural, not just aesthetic.

    Older Walls, Uneven Floors, and Non-Standard Ceiling Heights

    Many Chicago homeowners live in buildings constructed before standardized lumber dimensions existed. Plaster-over-masonry walls can be out of plumb by an inch or more across an eight-foot run. 

    Hardwood floors in vintage two-flats often slope toward the center of the building. A stock 96-inch-tall pantry cabinet will not reach a 102-inch ceiling. Shimming it to level on a sloped floor leaves visible gaps at the crown.

    Custom cabinets solve these problems at the fabrication stage, not on installation day. The shop builds scribe rails and adjustable toe kicks into the design, and ceiling-height uppers are manufactured to the actual measured height, not a catalog assumption.

    Condo Constraints, Delivery Access, and Building Coordination

    If you live in a Chicago high-rise, your building likely requires freight elevator reservations, insurance certificates from contractors, and approved delivery windows. Large pre-assembled cabinet runs may not fit through a service entrance or around a hallway corner. 

    A fabricator experienced with condo kitchen remodels will plan panel sizes and assembly sequences around these access constraints. Sometimes cabinets are built in sections that bolt together on-site.

    Building coordination also includes noise restrictions, dust containment requirements, and scheduling around other unit renovations. These logistics are standard in Chicago condo work. A fabricator unfamiliar with them can burn weeks of your project timeline.

    When Bathroom Vanities and Adjacent Millwork Should Be Considered Together

    If your scope extends beyond the kitchen, there is a compelling reason to fabricate bathroom vanities and hallway built-ins during the same production run. Ordering all millwork from one shop ensures consistent wood species, stain color, and finish sheen throughout your home. 

    It also consolidates lead times and delivery logistics. Chicago homeowners renovating multiple rooms often find that bundling millwork reduces per-unit cost and creates a cohesive design language across the entire project.

    How to Compare Proposals Without Missing Hidden Risks

    The cheapest bid is rarely the best value, and the most expensive one is not automatically the most thorough. Knowing what to look for in a cabinet proposal protects your budget and your timeline.

    Questions to Ask About Materials, Lead Times, and Finishing

    Before you compare numbers, make sure every bidder is quoting the same scope. Ask these specific questions:

    • What plywood grade and thickness are used for box construction?
    • Are drawer boxes solid wood, plywood, or melamine?
    • What finish system is applied, and is it sprayed in a controlled booth?
    • What is the current lead time from shop drawing approval to delivery?
    • Does the quote include installation, and if so, by whom?

    A fabricator who cannot answer these questions clearly is either outsourcing production or has not yet specified your project. Either way, you are exposed to surprises.

    Red Flags in Allowances, Vague Drawings, and Scope Gaps

    Watch for line items labeled “allowance” without a defined dollar amount or material specification. An allowance for hardware, for example, could mean $5 per pull or $50 per pull. That difference across 40 doors adds up fast. 

    Vague drawings that omit interior configurations, panel thicknesses, or finish callouts are another warning sign. If you cannot see exactly what you are getting, you cannot hold the fabricator accountable.

    Proposal Element Green Flag Red Flag
    Material spec Species, grade, and thickness listed “Premium plywood” with no detail
    Finish System named, sheen specified “Painted” with no method noted
    Hardware Brand, model, and cost per unit “Allowance” with no cap
    Installation Included with named installer “Available for additional cost”
    Timeline Weeks from approval to install “TBD” or “subject to scheduling”


    What a Clear Process Should Include Before Production Begins

    A reputable fabricator will present finalized shop drawings with dimensions, material callouts, and hardware specifications for your written approval before cutting a single sheet of plywood. 

    You should also receive an itemized budget, a production schedule with milestone dates, and a clear change-order policy. Industry best practice calls for detailed cabinet proposals that spell out every specification to prevent disputes during production.

    If a firm cannot walk you through this sequence, step back. Clarity before production is the single best predictor of a smooth installation.

    Moving From Inspiration to a Buildable Plan

    The distance between a Pinterest board and a finished kitchen is measured in decisions, not images. Closing that gap requires a specific sequence of approvals before any material is ordered or cut.

    What to Finalize Before Approving Shop Drawings

    Your shop drawings are the last checkpoint before production. By this stage, you should have confirmed all appliance models and their rough-in dimensions and selected your countertop materials and edge profiles. You should also have chosen your door style and finish and approved the interior configuration of every cabinet. 

    Changes after shop drawing approval typically trigger change orders that add cost and extend your timeline.

    Review the drawings with your designer, not just the fabricator. Your designer understands the spatial intent, sight lines, and material relationships that the fabricator may not prioritize. This review is where questions about reveals, scribe conditions, and crown details get resolved on paper rather than on the job site.

    When an Integrated Design-and-Fabrication Team Adds Value

    When your designer, project manager, and millwork shop operate as separate entities, each handoff introduces a chance for miscommunication. A detail that is obvious to the designer, like a specific grain direction on an island panel, may never reach the fabricator’s cut list. 

    Studios that keep full-service design and fabrication under one roof reduce these handoff risks because the same team that drew the elevation is reviewing the shop drawing and scheduling the install.

    This matters most on complex projects. Kitchens with integrated luxury design elements, multi-room millwork scopes, or tight condo timelines are where a single miscommunication can delay the whole project by weeks. An integrated team does not guarantee perfection, but it removes the most common failure point in custom cabinet work.

    Frequently Asked Questions

    What Factors Most Affect the Total Cost of a Made-to-Order Kitchen Cabinet Project?

    Material selection, door style complexity, finish system, and the number of specialty accessories (pull-outs, drawer inserts, integrated lighting) drive the bulk of the cost. Labor hours for site-specific fitting and installation also factor in, especially in older Chicago homes where walls and floors require extra scribing and shimming.

    How Do Semi-Custom and Fully Custom Cabinets Compare for Fit, Finish, and Timeline?

    Semi-custom cabinets offer limited size adjustments and a fixed menu of door styles, typically arriving in six to ten weeks. Fully custom cabinets are built to your exact dimensions and specifications, with lead times often ranging from ten to sixteen weeks depending on finish complexity and shop capacity.

    Where Can Homeowners Find Quality Cabinet Makers and Showrooms in the Chicago Area?

    Start by reviewing completed project portfolios from local firms, asking for client references, and visiting active job sites if possible. Trade directories from ASID and the NKBA list vetted professionals, and local design showrooms often maintain relationships with established fabricators.

    What Materials and Finishes Hold Up Best for High-Use Kitchens and Easy Maintenance?

    Catalyzed lacquer and conversion varnish finishes resist moisture, heat, and household chemicals better than standard latex paint. For box construction, 3/4-inch cabinet-grade plywood outperforms particleboard and MDF in durability and screw-holding strength, especially around hinges and drawer slides.

    How Long Does the Design, Fabrication, and Installation Process Typically Take?

    From the first design meeting through completed installation, a typical custom kitchen cabinet project takes four to six months. The design and planning phase usually accounts for four to six weeks. Fabrication runs eight to twelve weeks, and installation takes one to two weeks depending on project scope.

    What Should Be Included in a Cabinet Quote, Contract, and Warranty Before Signing?

    Your contract should include itemized material specifications, a finish schedule, hardware brand and model numbers, a production timeline with milestones, a payment schedule tied to deliverables, and a warranty covering materials and workmanship for a minimum of one to two years.

    Start the Conversation About Your Kitchen

    Custom kitchen cabinets in Chicago are an investment that pays off when every detail, from joinery to field installation, reflects how you actually use your kitchen. The difference between a good result and a great one often comes down to whether your design, fabrication, and installation teams are working from the same page.

    Every project at Threshold Design Lab begins with a conversation. If you are ready to move from inspiration to a detailed plan, tell us about your space, and we will take it from there. Let’s talk about what your kitchen could become.

  • Custom Cabinetry in Chicago: When Fully Custom Pays Off

    Custom Cabinetry in Chicago: When Fully Custom Pays Off

    Imagine standing in a kitchen where the upper cabinets stop three inches short of the ceiling, the corner unit wastes valuable storage space, and the drawers feel hollow when you close them.

    This gap between expectation and reality leads many Chicago homeowners to consider custom cabinetry. Whether you are renovating a 1920s greystone or updating a high-rise condo, the real question is whether custom cabinets suit your unique space, goals, and standards.

    The best answers come from a process that listens first and connects design intent directly to fabrication. Instead of sending drawings to a third-party manufacturer, an in-house shop builds the millwork it designs. 

    That direct connection between concept and construction catches dimensional problems in the shop drawings, not during installation.

    Below, you will see how fully custom cabinetry compares to semi-custom on key factors: dimensional flexibility, material quality, long-term value, and fabrication control. You will also learn which project signals indicate that fully custom is the right choice, and how a thorough shop-drawing process can prevent costly rework.

    How Fully Custom Compares to Semi-Custom

    A fully custom cabinet starts as a blank sheet tailored to your walls. A semi-custom cabinet starts as a pre-engineered box, modified within set options. This difference influences every decision, from material grade to how well the cabinets fit your space.

    Where Dimensional Flexibility Makes a Difference

    Semi-custom cabinets come in width increments of three inches, usually from 9 to 36 inches. If your wall measures 127 inches, you fill the extra space with filler strips or accept a less efficient layout. Fully custom cabinet design removes this problem because each unit is built to precise measurements.

    In Chicago, this flexibility matters. Plaster walls bow, floor joists settle over time, and original window placements rarely line up with standard cabinet sizes. Custom designs absorb these irregularities, while semi-custom solutions rely on shims and fillers.

    Dimensional freedom also impacts vertical space. You can specify a 42-inch upper cabinet to reach a 9-foot ceiling or design a stepped crown detail for a sloped soffit. These options disappear when you are limited to catalog sizes.

    When Semi-Custom Is a Good Fit

    Semi-custom kitchen cabinets work well when your layout is straightforward, and your walls are mostly plumb. A newer townhome with standard 96-inch ceilings and drywall usually accommodates semi-custom boxes without issue.

    Budget also plays a significant role. If your kitchen budget is $25,000 to $40,000, semi-custom cabinets allow you to spend more on countertops, appliances, or tile while still achieving a solid result. Finish options may be limited, and the construction may use staples instead of dovetails, but the cabinets will function.

    Semi-custom stops working well when your layout requires non-standard depths, integrated appliance panels, or a finish outside the manufacturer’s palette.

    How Long-Term Value Differs From Upfront Price

    Factor Semi-Custom Fully Custom
    Typical kitchen cost range $20,000 to $45,000 $45,000 to $120,000+
    Box construction Stapled or cam-lock Dovetail or mortise-and-tenon
    Width increments 3-inch steps To the 1/16 inch
    Finish options Catalog palette Unlimited
    Average functional lifespan 15 to 20 years 25 to 40+ years
    Resale perception Standard Premium differentiator


    The price difference narrows when you include the cost of filler strips, field modifications, and early replacement. Fully custom cabinets often hold or increase home value in Chicago’s resale market, where buyers expect bespoke finishes.

    What Chicago Homes Need From Custom Cabinetry

    A 1920s Chicago bungalow rarely has a perfectly square room, and kitchens in pre-war two-flats were designed for different cooking and storage needs. Custom kitchen cabinets exist partly because the city’s housing stock was not built for modular solutions.

    Adapting to Older Walls, Floors, and Openings

    Lath-and-plaster walls can vary by a full inch across a ten-foot run. Floor planes in brick two-flats often slope toward the center of the building. When you install a level cabinet on an uneven floor, the doors may not align, and gaps may appear.

    Custom fabricators measure on-site, build to actual conditions, and scribe-fit panels to irregular surfaces. This process removes guesswork and avoids visible compromises during installation. When planning a kitchen remodel in Chicago, site verification is the most important step before cutting any materials.

    Older openings create additional challenges. Doorways, pass-throughs, and window headers rarely sit at uniform heights. Custom cabinetry wraps around these conditions instead of bumping into them.

    Planning for Condos, Historic Homes, and Small Spaces

    Condo kitchens in Chicago high-rises often measure under 100 square feet, with plumbing stacks that cannot move and structural columns that interrupt wall runs. In these spaces, every inch of cabinet depth and every vertical zone counts.

    Historic homes add another layer: preservation guidelines or neighborhood expectations influence door styles, molding profiles, and hardware. A traditional kitchen style in a Ravenswood manor requires more period accuracy than a contemporary loft in the West Loop.

    • Condo constraint: Fixed plumbing stacks and columns that dictate layout
    • Historic constraint: Molding profiles and door styles that must respect the era
    • Small footprint constraint: Shallow-depth bases or custom-height uppers to maximize capacity
    • Ceiling constraint: Varying heights within the same room requiring stepped cabinet runs

    Designing Storage for Daily Use

    The most useful custom cabinets are designed around your actual cooking, cleaning, and storage habits. A household that batch-cooks on weekends needs different drawer depths and pantry widths than one that orders takeout most nights.

    During design, a thoughtful firm will ask about your daily routines before recommending products. This conversation shapes interior fittings, drawer organizers, and the placement of everyday dishes versus seasonal items. The construction of each unit follows your use patterns, not a catalog default.

    Materials, Joinery, and Finish Quality

    The wood species you choose affects how your cabinets age. The joinery holding them together determines whether they last. Premium materials without proper construction break down under daily kitchen use.

    How Premium Materials Improve Durability

    Solid hardwoods like white oak, walnut, and hard maple resist dents and moisture better than MDF or particleboard. For painted cabinets, using solid hardwood frames with MDF center panels reduces seasonal wood movement that can crack paint.

    Plywood box construction outperforms particleboard in screw-holding strength, moisture resistance, and long-term load capacity. In Chicago, where indoor humidity ranges from below 20% in winter to above 60% in summer, material choice directly affects whether doors warp and drawer slides stick.

    When you invest in custom millwork services, you control both the species and the panel construction, a choice that semi-custom lines rarely offer.

    Construction Details That Set Bespoke Work Apart

    Dovetail drawer boxes signal quality construction, but the most important details are often hidden. Mortise-and-tenon face frames, captured-back panels, and dado-joined shelves create a rigid box that resists racking.

    Fabricators cut these joints on CNC routers or precision saws, then hand-fit them before assembly. The sequence matters: they dry-assemble the box, check for square, then glue and clamp. Assembly lines often skip the dry-fit, leading to cabinets that twist under pressure.

    This connection between design and craftsmanship separates bespoke cabinetry from upscale semi-custom.

    Why Finish Consistency Matters

    A factory-applied catalyzed conversion varnish outlasts a field-applied lacquer in hardness, chemical resistance, and UV stability. The difference is clear after two years of daily use, when one finish still looks uniform, and the other has yellowed or chipped.

    For painted finishes, preparation is key. Proper sanding between coats, tack-clothed surfaces, and controlled spray-booth humidity create a finish that looks like a single, unbroken plane of color. If a shop’s finishing room lacks environmental controls, consider it a warning sign.

    Matching color across different substrates, such as a solid maple rail next to an MDF panel, requires a skilled finisher. This expertise gives a timeless design its visual integrity for years.

    Beyond the Kitchen: Built-Ins and Whole-Home Applications

    A floor-to-ceiling bookcase in a living room uses the same construction principles as a kitchen upper, but the design shifts from daily-use efficiency to architectural presence. Custom cabinets fit any room where storage, display, or spatial definition matters.

    Bookcases, Media Walls, and Home Office Storage

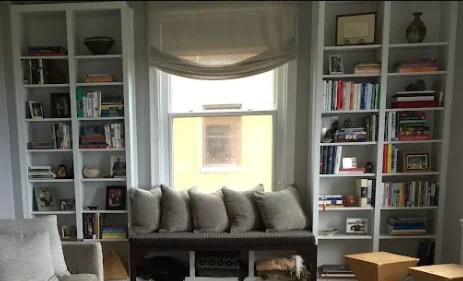
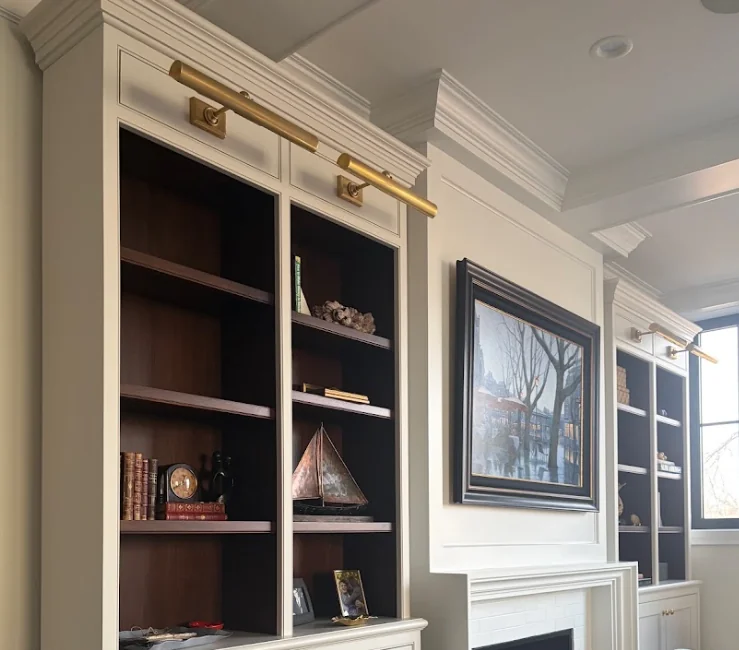
    Built-in bookcases in Chicago’s older homes often flank a fireplace or fill an alcove with a non-standard width. A custom unit fills that space completely, with adjustable shelves and a base plinth fitted to the floor.

    Media walls now replace standalone entertainment centers. They integrate cable management, ventilation for electronics, and closed storage for items you want hidden. Fabricators route back panels for wiring channels during production, not as an afterthought.

    Home office built-ins follow similar logic. A residential interior project might include a desk surface cantilevered from a wall-mounted cabinet, with file drawers sized to your workflow.

    Bath, Laundry, and Mudroom Applications

    Bathroom vanities face more moisture than kitchen cabinets. Marine-grade plywood, waterproof drawer materials, and sealed end panels protect your investment in these environments. A custom vanity lets you choose the height you want, not just standard options.

    Laundry rooms benefit from upper cabinets sized to clear a washer’s door swing and base cabinets that hold a pull-out hamper or ironing board. Mudroom cabinetry in a Chicago home with a rear entry needs coat hooks at two heights, boot storage below, and a bench seat with a flip-top lid.

    • Bathroom: Marine-grade panels, custom vanity heights, integrated lighting valences
    • Laundry: Hamper pull-outs, drying rack cabinets, appliance-clearance uppers
    • Mudroom: Dual-height hooks, boot trays, bench-seat storage, mail sorting

    How Cabinetry Supports Countertops and Adjacent Surfaces

    Your countertops rest on your cabinets, so the cabinet boxes must be level and securely connected to support heavy stone slabs. Weak cabinets can flex under a quartz or quartzite top, eventually cracking the seam.

    Custom base cabinets can include reinforced top rails and cross-bracing, engineered for your chosen countertop material. This coordination between cabinet fabrication and stone templating is planned from the start, not solved during installation.

    The relationship between cabinetry and adjacent surfaces includes backsplashes, window sills, and transition moldings. Each intersection should be dimensioned in the shop drawings.

    Lead Times, Fabrication, and Installation Risk

    A fully custom kitchen build usually takes 10 to 16 weeks from design approval to installation. Most delays result from deferred decisions or assumed measurements. Careful attention to detail during pre-production eliminates most risks during installation.

    What In-House Fabrication Can Control

    When design and fabrication happen in the same location, changes to a door profile or drawer configuration become simple. The designer can confirm adjustments directly on the shop floor.

    In-house fabrication also ensures material consistency. The team applies a single batch of veneer or stain across every component of your project. If you buy from an outside manufacturer, you rely on their inventory management to maintain consistency throughout the production schedule.

    Lead-time transparency improves with in-house work. The team tracks each component through cutting, milling, assembly, finishing, and staging. You receive direct updates instead of secondhand information from a third-party manager.

    How Shop Drawings and Site Verification Prevent Rework

    Shop drawings turn your design into fabrication-ready dimensions. They specify every reveal, hinge bore location, and scribe allowance for uneven walls. Reviewing and signing a shop drawing before production is your best protection against rework.

    Before finalizing shop drawings, a fabricator measures your space with a laser, documents wall angles and floor planes, and notes any mechanical obstructions. These field measurements override the architectural plan.

    Skipping this step often leads to problems. Even a small error, such as a 1/4-inch mistake on an 8-foot cabinet run, can cause misaligned doors, awkward fillers, and disappointing results.

    Questions to Ask Before You Commit

    Before signing a contract for custom cabinetry, make sure you have clear answers to these questions:

    • Who measures the site, and when?
    • Are shop drawings included, and do you approve them before production?
    • Is fabrication done in-house or outsourced?
    • What does the finish warranty cover?
    • How are change orders handled after production begins?
    • What is the installation timeline, and who protects existing finishes?

    These questions help you identify firms that control their process and clarify your project scope from the beginning.

    Choosing the Right Scope for Your Project

    The most costly mistake in a cabinet project is choosing the wrong level of customization for your space. Matching scope to need is essential for a successful outcome.

    Signals That Justify a Fully Custom Investment

    If your walls are out of plumb by more than 1/4 inch, your layout needs non-standard depths, or your design requires integrated appliance panels and flush-inset doors, you need fully custom cabinetry. These are dimensional requirements, not just style choices.

    Other clear signals include needing a specific wood species or grain orientation, matching existing millwork in a historic home, or planning built-ins for multiple rooms. Each requires fabrication flexibility that catalog-based products cannot provide.

    A kitchen that serves as your home’s social center, where you cook daily and entertain often, also benefits from a custom investment. The difference in durability between dovetail-joined hardwood drawers and stapled particleboard boxes becomes clear after a few years of heavy use.

    Situations Where Semi-Custom May Be Enough

    A guest bathroom vanity, basement wet bar, or rental unit kitchen may not need a fully custom build. In these cases, a quality semi-custom line with solid wood doors and plywood boxes can deliver good results at a lower price.

    If your layout fits standard modules without too much filler, and you are satisfied with a set palette of finishes, semi-custom works well. Confirm that the manufacturer’s sizing matches your wall dimensions before ordering.

    Semi-custom is also a good option for tight timelines. Production typically takes 4 to 6 weeks, compared to 10 to 16 weeks for fully custom, which can be important when working with a contractor on a set schedule.

    Starting a Design Conversation With the Right Priorities

    Before contacting any firm, clarify three things: your spatial constraints, your daily use patterns, and the finish quality you expect for the next 20 years. These factors shape the scope recommendation more than budget alone.

    Bring photos of your existing space, a list of what is not working, and any inspiration images for your desired style. A portfolio of completed projects can help you set realistic expectations.

    When you are ready to move forward, Threshold Design Lab and TDL Custom provide a fully integrated process. 

    That means listening-first design, precision shop drawings, in-house millwork production, and installed results that match the original intent. You can start a project conversation with a straightforward discussion about your space and whether fully custom is the right choice.

    Frequently Asked Questions

    How much should I budget per linear foot for a fully custom kitchen cabinet build and install?

    Budget $800 to $1,500 per linear foot for a fully custom kitchen with hardwood frames, dovetail drawers, and a catalyzed finish, installed. The range depends on wood species, interior fittings, and layout complexity. High-end projects with specialty veneers or integrated lighting may cost more.

    What timeline is typical for design approval, fabrication, and installation for a kitchen remodel?

    Plan for 10 to 16 weeks from signed shop drawings to completed installation. Design development before that stage adds 3 to 6 weeks, depending on how quickly you make material and layout decisions. Rushing shop drawings is not recommended.

    Which wood species and finishes hold up best in a high-use kitchen with Chicago’s seasonal humidity swings?

    White oak and hard maple handle Chicago’s humidity well because they are dense and stable. For painted cabinets, a catalyzed conversion varnish over MDF panels resists cracking from seasonal movement. Stained finishes work best on quarter-sawn stock, which expands and contracts less than flat-sawn boards.

    How can I verify a cabinet maker’s workmanship quality and reviews before signing a contract?

    Visit the shop and inspect a project in production. Check drawer-box joinery, finish prep between coats, and how panels are stored. Ask for references from recent clients and check independent reviews for consistency across several projects.

    What is the practical difference between semi-custom and fully custom cabinets for layout constraints and storage features?

    Semi-custom cabinets come in fixed increments and offer a set list of interior options. Fully custom cabinets are built to exact dimensions and can include any interior configuration, door style, or material. If your layout has non-standard openings or you need integrated appliance panels, fully custom avoids visible compromises.

    What should be included in a written estimate, including materials, hardware, labor, and change order terms?

    Your estimate should list wood species, panel construction, finish type, hardware allowance, installation labor, and delivery. It should also state the change-order policy: what triggers a change order, how pricing adjustments are calculated, and the timeline impact of revisions. Avoid vague lump-sum quotes without these details.

  • Custom Built-Ins in Chicago: What Makes Them Worth It?

    Custom Built-Ins in Chicago: What Makes Them Worth It?

    When you start pricing custom built-ins in Chicago, the gap between a stock bookcase and a bespoke wall unit can feel significant. You find yourself weighing whether site-specific millwork is worth the premium over something you could order online and assemble in an afternoon.

    That tension between budget and quality is real. It deserves a clear answer grounded in how these pieces are actually designed, built, and installed.

    The answer comes down to how these pieces are made. A shop with an in-house fabrication arm handles the full arc from initial space planning through final installation, keeping design intent and construction execution aligned rather than split between separate firms.

    That kind of integrated process exists specifically to close the gap between what you envision and what ends up in your home.

    Keep reading to learn what separates custom built-ins from off-the-shelf alternatives, which types add the most value room by room, and how the design-to-fabrication process works from first measurement to final punch list.

    By the end, you will know exactly what to ask a millwork shop, what to look for in a proposal, and how to evaluate whether a custom piece is the right investment for your space.

    Why Off-the-Shelf Storage Falls Short in Chicago Homes

    Mass-produced bookcases, media walls, and entertainment centers are built to fit the most common room dimensions. Chicago rooms are rarely common. Between century-old greystone parlors and narrow vintage condos, the city’s residential architecture pushes back against standard sizing at almost every turn.

    Where Standard Sizing Breaks Down

    A typical freestanding bookcase ships at 72 or 84 inches tall. Your ceiling might sit at 96 inches, or 104, or somewhere awkward in between. That leaves a visible gap at the top that collects dust and wastes vertical storage.

    The depth is equally rigid; most stock pieces run 10 to 12 inches deep, which works for paperbacks but not for oversized art books, vinyl collections, or the A/V components behind a media wall.

    Width is the same story. An alcove in a Lincoln Park brownstone might measure 53 inches across. No big-box retailer makes a unit for that dimension. You are left shimming, leaving gaps, or choosing a piece that is too small for the wall. None of those outcomes feel intentional. None of them look it either.

    Why Historic Details Change the Equation

    Older Chicago homes often feature plaster walls that bow, baseboards with non-standard profiles, and crown molding that varies from room to room.

    In a restored Lincoln Park row house, one designer found that previous renovations had stripped original mantels and trim, requiring custom millwork just to bring period details back into the space. Dropping a flat-backed cabinet against a wall with a three-quarter-inch bow creates a visible rock and an uneven shadow line along the top.

    Crown molding adds another layer of complexity. When you want a built-in to look like it belongs in the room, its top trim needs to match or complement the existing crown profile. Stock furniture ignores this entirely. 

    Custom built-ins can be scribed to irregular walls and capped with molding that reads as part of the original architecture.

    What Homeowners Gain From Site-Specific Millwork

    When a piece is built for the exact footprint of your room, every inch of wall space becomes usable. You gain storage capacity, a cleaner visual line, and a result that feels permanent rather than placed. That shift from “furniture in a room” to “architecture of the room” is what separates custom work from catalog alternatives.

    What Custom Built-Ins Are Designed to Solve

    Custom built-ins exist to resolve three problems at once: storage that matches how you actually use a room, architectural continuity that makes the piece feel original to the space, and a balance of open display, closed concealment, and easy access that no single piece of custom furniture can achieve on its own.

    Storage That Matches Daily Use

    A well-designed built-in starts with questions about your habits, not your Pinterest board. How many books do you own, and are they standard or oversized?

    Do you need a media center with cord management for five components, or a clean shelf for a single soundbar? Where do the kids drop backpacks? The answers shape shelf spacing, drawer depth, and cabinet count before anyone selects a wood species.

    Consider a window seat with storage below. The seat height needs to align with the sill, the depth needs to be comfortable for sitting, and the storage compartments below need to accommodate whatever you are actually hiding: board games, blankets, or seasonal items. 

    When those dimensions are driven by your life rather than a factory template, the piece works harder every day.

    Architectural Integration, Not Added Furniture

    Custom built-ins become part of the wall plane. They share the room’s trim language, align with adjacent door casings, and sit flush against surfaces that may be far from plumb. This integration is the fundamental difference between a built-in and a piece of furniture pushed against a wall. The piece reads as architecture, not decoration.

    Entertainment centers are a strong example. A custom media wall can house the screen, conceal wiring, integrate speakers, and wrap the fireplace surround in a single composition. Nothing about it looks bolted on.

    Balancing Display, Concealment, and Access

    The best built-ins mix open shelves, glass-front cabinets, closed doors, and drawers in proportions that reflect your priorities. You might want books visible, board games hidden, and barware behind glass. That mix requires intentional zone planning during the design phase, well before fabrication begins.

    Zone Visibility Typical Use
    Open shelving Fully visible Books, art, curated objects
    Glass-front cabinets Visible, protected Barware, ceramics, collections
    Closed cabinets Concealed Media components, games, files
    Drawers Concealed, quick access Remote controls, small items, linens


    Understanding what you want each zone to do helps you evaluate whether a proposal accounts for your daily needs or just fills a wall with boxes.

    Built-In Types That Add the Most Value

    Not every built-in delivers the same return. The types that add the most value, both in daily function and at resale, tend to be the ones that solve a room-specific storage problem while elevating the space architecturally.

    Living Rooms, Libraries, and Media Areas

    Floor-to-ceiling bookcases flanking a fireplace remain one of the highest-impact built-in investments in a Chicago home.

    Media walls that integrate a recessed screen, adjustable shelving, and concealed component storage turn an entertainment center into a visual anchor. Media centers with ventilated back panels and wire-management channels keep technology tidy without sacrificing access.

    Bedrooms, Dressing Areas, and Custom Closets

    Custom closet systems built into a bedroom wall or a dedicated dressing area maximize storage per square foot. Unlike wire-rack systems, millwork closets can include divided drawers, pull-out valet rods, and shoe shelves sized to your collection.

    The closets and home storage industry continues to grow because homeowners recognize that organized, purpose-built storage does what a freestanding wardrobe cannot.

    Custom closets also hold resale appeal. Buyers consistently rank closet quality among the features that influence their decision, particularly in Chicago condos where square footage is limited.

    Kitchens, Baths, and Utility Spaces

    Kitchen cabinets and bathroom vanities are, by definition, built-ins. The distinction is between stock cabinets dropped into place and custom cabinetry engineered for your layout. 

    In kitchens, that might mean a pantry wall with pull-out spice racks, tray dividers, and appliance garages. In bathrooms, it could be a floating vanity with an integrated laundry hamper.

    Utility spaces like mudrooms, laundry rooms, and home offices round out the list. A well-planned mudroom bench with cubbies, hooks, and shoe storage below can change how your family enters and exits the house every day.

    Materials, Hardware, and Cabinet Construction Details

    The materials and hardware inside your built-ins determine how long the piece lasts and how it feels to use every day. Surface-level aesthetics matter, but construction quality is what separates a piece that performs for decades from one that sags, sticks, or chips within a few years.

    Why Material Selection Affects Longevity

    Kiln-dried hardwood is the benchmark for face frames, doors, and exposed shelving in high-quality built-ins. It resists warping and holds fasteners better than particleboard or medium-density fiberboard (MDF). MDF still has a role in painted panels and concealed components, but load-bearing shelves and drawer boxes benefit from solid wood or high-grade plywood.

    For shelving that will hold heavy books or equipment, three-quarter-inch hardwood plywood with a hardwood edge band is a practical choice.

    It stays flat under weight and takes paint or stain evenly. When you see a proposal that specifies half-inch melamine for all shelves, ask how the piece will hold up after five years of daily use.

    Hardware Choices That Improve Daily Performance

    Blum soft-close hinges and drawer runners are an industry standard for good reason. They prevent slamming, reduce wear on the cabinet box, and maintain alignment over thousands of cycles. Adjustable shelves on brass or steel shelf pins let you reconfigure a unit as your collection changes.

    • Blum hardware for soft-close hinges and drawer slides
    • Concealed European hinges for a clean face-frame look
    • Adjustable shelf pins in steel or brass for flexibility
    • Full-extension drawer runners so the entire drawer is accessible
    • Touch-latch mechanisms for handleless cabinet fronts

    These components add cost at the hardware level but reduce frustration and maintenance over the life of the piece.

    Finish and Fit Details That Separate Custom Work

    Shiplap backing, hand-applied lacquer, and site-scribed fillers are details you will find in custom cabinets but rarely in stock alternatives. The finish on a painted built-in should be sprayed in a controlled environment, sanded between coats, and inspected for uniformity before delivery.

    At the custom millwork level, this is where the design-to-fabrication handoff matters most. When the same team that drew the elevations also builds and finishes the piece in their own shop, there is no translation gap between what the designer specified and what the fabricator produces.

    That continuity shows up in tight reveals, flush surfaces, and molding profiles that match the room.

    From Measurement to Installation: How the Process Works

    A custom built-in moves through three distinct phases. Understanding each one helps you evaluate timelines, costs, and the quality of communication you should expect from any shop or studio.

    Design and Planning Deliverables

    The process starts with a site visit and detailed field measurements. Your designer documents wall dimensions, ceiling height, floor level, and existing trim profiles.

    From there, you receive space plans and elevations that show the built-in in context with the room’s architecture. An itemized budget and material selections follow so you can approve scope and cost before anything is ordered.

    This phase is where listening matters most. A good designer asks about your daily routines, your storage pain points, and the visual weight you want the piece to carry in the room.

    Procurement, Coordination, and Shop Drawings

    Once the design is approved, the project moves into procurement and coordination. Your designer orders materials, confirms hardware lead times, and produces shop drawings that translate design elevations into fabrication-ready instructions. 

    Shop drawings specify joinery details, hinge placement, shelf-pin layouts, and finish schedules.

    This is also when coordination with any other trades happens. If your built-in needs electrical for integrated lighting or data for a media center, those rough-ins are scheduled before the piece arrives.

    Fabrication, Installation, and Final Fit

    Off-site fabrication in a climate-controlled shop is the standard for quality custom built-ins. Components are built, assembled, finished, and inspected before they leave the workshop. On installation day, the team fits each section to the wall, scribes fillers to irregular surfaces, and installs trim, hardware, and adjustable shelves.

    A final walkthrough confirms fit, finish, and function. Doors should close evenly, drawers should glide without resistance, and every surface should be free of defects. Any punch-list items are addressed before the project is complete.

    Planning the Right Investment for Your Space

    The difference between a successful built-in project and a frustrating one usually comes down to the questions you ask before signing a contract and the red flags you catch in a proposal.

    Questions to Ask Before You Commit

    Start with the basics: What materials will be used for the cabinet box, the shelves, and the face frame? What brand of hardware is specified? 

    Will the piece be finished on-site or in a shop? Ask to see examples of completed work in homes with similar architecture. Request a detailed, line-item proposal rather than a lump sum.

    Also ask about timeline. A realistic schedule for a moderately complex built-in, from first meeting to installation, is typically eight to fourteen weeks. If a shop promises four weeks, ask what is being cut.

    Red Flags in Proposals and Allowances

    Watch for vague material descriptions like “wood” or “premium finish” without species or product names. Allowances that lump hardware, material, and labor into a single number make it difficult to compare proposals. A trustworthy fabricator breaks costs into categories so you can see where your money goes.

    Be cautious if the proposal includes no shop drawings or if the shop does not offer a site visit before quoting. Pieces built from catalog dimensions rather than field measurements rarely fit the way they should, especially in older Chicago homes.

    When to Bring in an Integrated Design-and-Fabrication Team

    If you are weighing a residential interior project that includes built-in storage, media walls, closet systems, or kitchen cabinetry, a conversation with Threshold Design Lab is a practical next step.

    Through TDL Custom, design and fabrication happen under one roof, which means fewer handoff errors, tighter tolerances, and a single point of accountability from first sketch to final punch list.

    Every project at Threshold Design Lab begins with a conversation. Tell us about your space, and we will take it from there.

    Frequently Asked Questions

    How Much Do Custom Built-Ins Typically Cost for a Chicago Condo or Single-Family Home?

    Costs vary widely based on size, materials, and complexity. A single wall of built-in bookcases in painted MDF and poplar might start around $4,000 to $6,000. A full-room library or media wall in stained hardwood with integrated lighting can reach $15,000 to $25,000 or more. Always request an itemized quote so you can compare line by line.

    What Factors Most Affect the Price of a Bespoke Built-In: Materials, Finish, or Installation Complexity?

    All three contribute, but material selection and finish complexity tend to drive the biggest cost differences. Solid hardwood and hand-applied lacquer finishes cost more than MDF with shop-sprayed paint. Installation in older buildings with out-of-plumb walls also adds labor time for scribing and fitting.

    How Long Does the Design, Fabrication, and Installation Process Usually Take From First Meeting to Final Punch List?

    Plan for eight to fourteen weeks for a moderately complex project. The design phase typically takes two to three weeks. Procurement and shop drawing production add another two to four weeks. Fabrication plus installation account for the remainder. Lead times on specialty hardware or uncommon wood species can extend the schedule.

    What Questions Should Be Asked When Comparing Millwork Shops and Cabinetmakers, Including Reviews and Warranties?

    Ask about box construction materials, hardware brands, and whether the shop handles finishing in-house. Request references from projects similar in scope to yours and ask about warranty coverage on materials, hardware, and installation. Check client reviews for consistency in communication and follow-through.

    Which Built-In Styles and Layouts Work Best for Small Chicago Apartments, Especially for Storage and Media Walls?

    Floor-to-ceiling designs maximize vertical space, and recessed or flush-mounted units keep walkways clear. A media wall with closed lower cabinets and open upper shelves combines display and concealment without overwhelming a small room. Window seats with storage beneath are another strong option for tight layouts.

    Are Built-Ins Still in Style in 2026, and What Design Details Feel Most Timeless for Chicago Interiors?

    Built-ins remain a strong investment in 2026 because they solve practical problems that never go out of style. Timeless details include flat-panel or shaker-style doors, concealed hinges, a restrained color palette, and proportions that relate to the room’s existing trim and ceiling height. Avoid overly trendy finishes and focus on craftsmanship that ages well.

  • Condo Renovation in Chicago: What Actually Shapes a Smooth Project?

    Condo Renovation in Chicago: What Actually Shapes a Smooth Project?

    If you own a condo in River North, Lincoln Park, or the Gold Coast, you already know that renovating your unit is not the same as remodeling a single-family house. Shared walls, HOA restrictions, elevator access, and limited square footage all shape what you can do, when you can do it, and how much it will cost.

    A condo renovation in Chicago demands more coordination, earlier planning, and tighter execution than most homeowners expect when they first start sketching ideas on a napkin.

    The right process matters more here than in almost any other kind of project. A vertically integrated approach, one that connects space planning and material selection directly to in-house millwork, is built to close the gap between what a condo owner envisions and what the finished unit delivers.

    That integration matters most in tight footprints, where every cabinet, countertop, and finish detail has to work harder.

    Keep reading to learn how building logistics, permit sequencing, kitchen and bathroom material choices, and the design-to-fabrication handoff shape a successful Chicago condo remodel. By the end, you will know what to ask a design team before signing a contract and how to evaluate whether a proposal accounts for the realities of multi-unit construction.

    What Makes Condo Work Different From a House Remodel

    A high-rise condo remodel introduces constraints you will never face in a detached home: shared mechanical systems, restricted work hours, mandatory debris removal protocols, and neighbors separated from your project by a few inches of concrete. 

    These factors do not just add inconvenience; they reshape scope, cost, and scheduling from day one.

    Shared Building Systems and Limited Access

    In a condo, your plumbing risers, HVAC chases, and electrical panels often belong to the building’s common infrastructure. Moving a kitchen sink or relocating a bathroom drain line may require engineering review by the building’s management company, not just a permit from the city.

    You also share walls and floor assemblies with adjacent units, which means sound isolation and vibration control become real design concerns during demolition and construction.

    Material deliveries and debris removal are governed by building rules, not your contractor’s preference. Most high-rise buildings restrict freight elevator use to specific windows, sometimes as narrow as two hours per day.

    Large items like cabinetry panels or countertop slabs must be measured against elevator cab dimensions before they are ordered, not after.

    Why High-Rise Logistics Affect Scope, Cost, and Timing

    Every logistical constraint adds cost. Freight elevator fees, floor protection in corridors, after-hours security escorts, and mandatory dumpster scheduling all appear on your budget. A Chicago general contractor experienced in high-rise condo remodeling will price these line items upfront; an inexperienced one will discover them mid-project.

    Timing is equally affected. A kitchen renovation that might take six weeks in a house can stretch to ten or twelve in a high-rise because trades cannot overlap as freely. 

    Noise ordinances, restricted delivery windows, and shared elevator access force a more sequential schedule. Planning for these realities early prevents frustration later.

    The Role of a Chicago General Contractor in Multi-Unit Buildings

    Your contractor serves as the liaison between your project team and the building’s property management. That means submitting insurance certificates, scheduling elevator reservations, coordinating neighbor notifications, and ensuring debris removal meets building standards.

    In practice, the contractor’s relationship with building staff often determines whether your project moves smoothly or stalls over administrative holdups.

    A contractor who has managed multiple Chicago condo projects will already know the documentation sequence most buildings require. That experience translates directly into fewer delays, which is why vetting your contractor’s condo-specific track record matters as much as reviewing their portfolio.

    Approvals, Permits, and Building Coordination

    Before a single tile is removed, you will need sign-off from at least two authorities: your condo association and the City of Chicago. Missing either one can halt your project after it has started, which is far more expensive than getting the paperwork right upfront.

    Condo Board Approvals and HOA Coordination

    Most Chicago condo associations require a formal renovation application that includes architectural drawings, a scope of work description, contractor credentials, and proof of insurance.

    HOA coordination often involves a board review meeting, and approval timelines vary from two weeks to two months depending on the building’s process. Some associations impose renovation seasons or blackout periods around holidays.

    Your association’s rules may also dictate working hours (commonly 8 a.m. to 5 p.m. on weekdays), noise limitations, and approved routes for material transport through common areas. Review these rules before finalizing your project schedule, not after your contractor has committed subcontractors to specific dates.

    Chicago Department of Buildings and Standard Plan Review

    Any structural modification, electrical rework, or plumbing relocation in your condo triggers a permit from the Chicago Department of Buildings. Most condo renovations that include architectural plans go through the standard plan review permit program, which covers alterations, rehabilitation, and repairs across all building types.

    Plan review timelines fluctuate, but budgeting four to eight weeks for permit approval is realistic. Your design team should submit permit drawings as early as possible so the review period overlaps with the procurement phase rather than delaying construction start.

    Insurance Certificates, Security Deposit, and Neighbor Notification

    Buildings typically require your contractor to carry general liability insurance of $1 million to $2 million, plus workers’ compensation coverage. A renovation security deposit, often $1,000 to $5,000, protects common areas from damage. Some associations also require a refundable elevator deposit.

    Neighbor notification is usually mandatory. Most buildings require written notice to adjacent, above, and below units at least one to two weeks before work begins. Skipping this step risks complaints that can trigger a board-imposed work stoppage.

    Elevator Scheduling and Permit Management

    Freight elevator reservations must be made well in advance, sometimes weeks ahead for large deliveries. 

    Coordinating elevator access with permit inspection schedules is a detail that separates experienced condo renovation teams from those learning on the job. A disciplined project manager tracks all of these moving parts in a single schedule.

    Planning a Smaller Footprint for Maximum Impact

    The biggest returns in a Chicago condo remodel come from treating the entire unit as one connected system rather than a collection of separate rooms. Strategic space planning lets a 900-square-foot condo feel deliberate and generous instead of cramped.

    Space Plans, Elevations, and Early Budget Alignment

    The planning phase produces the documents that guide every dollar you spend. Space plans establish furniture placement, circulation paths, and functional zones. Elevations show exactly what each wall will look like, from cabinet heights to tile layouts. 

    An itemized budget tied to these drawings lets you make trade-offs before procurement begins, not during installation.

    Early budget alignment is especially important in condos. With less square footage, individual material choices have a proportionally larger impact on total cost. 

    Choosing a $90-per-square-foot countertop material versus a $50 option may shift your budget by only $2,000 in a condo kitchen, but that $2,000 might fund heated bathroom floors.

    When a Full Condo Renovation Makes More Sense Than Room-by-Room Updates

    A full condo renovation often costs less per square foot than tackling rooms individually because trades mobilize once instead of repeatedly. Flooring, for example, reads as continuous and intentional when installed throughout the unit in a single phase. 

    Breaking it into two or three phases means transition strips, color-match risks, and duplicate delivery fees.

    A connected renovation also lets you coordinate mechanical upgrades. Running new electrical circuits for a kitchen while walls are already open in an adjacent hallway is far cheaper than opening finished walls later. 

    For homeowners weighing the question of scope, a full renovation typically delivers a more cohesive result at a lower per-unit cost.

    Design-Build Remodeling and the Value of One Coordinated Team

    Design-build remodeling consolidates design, residential interior design, and construction under one contract. In a condo, this structure eliminates the gap where miscommunication usually lives: between the designer who specifies a detail and the builder who interprets it.

    When your design partner also manages fabrication and installation, field questions get resolved the same day they arise.

    This model is especially effective for custom cabinetry and millwork, where a drawing must translate precisely into a physical piece built to condo-specific dimensions.

    Kitchen Decisions That Matter Most in a Condo

    Your kitchen is likely the most material-intensive room in your condo, and the one where design choices have the greatest functional impact. Layout, cabinetry, and surface materials all need to work within constraints that a house kitchen rarely imposes.

    Condo Kitchen Remodel Layouts That Respect Existing Constraints

    In most Chicago condos, the plumbing stack and electrical panel limit where you can place the sink and major appliances.

    A condo kitchen remodel usually works within the existing wet wall rather than relocating it, which keeps costs manageable and avoids engineering complications with the building’s shared systems. Galley, L-shaped, and single-wall layouts are the most common starting points.

    Even within those configurations, small shifts make a measurable difference. Moving the refrigerator 18 inches to create a landing zone beside the range is the kind of decision that a strong kitchen renovation designer addresses in the elevation phase. 

    Adding a 12-inch cabinet filler that houses pull-out spice storage is another example.

    Custom Cabinetry for Tight Dimensions and Clean Storage

    Storage is consistently the top demand in kitchen renovations, and a condo makes it harder to deliver. Stock cabinets rarely fit without filler strips, dead corners, or wasted vertical space. Custom cabinetry built to your kitchen’s exact measurements eliminates those compromises.

    Key features to specify in a condo kitchen include:

    • Full-extension, soft-close drawer slides rated for at least 75 pounds
    • Interior cabinet organizers (pull-out trays, vertical dividers, drawer peg systems)
    • Panels sized to reach the ceiling, eliminating dust-collecting soffits
    • Integrated appliance panels that keep the visual line clean
    • Toe-kick drawers that reclaim otherwise dead space

    This is where the design-to-fabrication handoff matters most. When your custom millwork studio builds from the same elevations your designer drew, the finished cabinets fit the first time, without field modifications.

    Quartz Countertops, Flooring Installation, and Material Durability

    Quartz countertops remain a practical choice for condo kitchens because they resist staining, require no sealing, and tolerate the daily wear of a compact workspace. Slab selection should happen early; in a condo kitchen with limited counter area, a single slab often covers the entire run. This makes vein continuity a visible priority.

    For flooring installation, engineered hardwood or large-format porcelain tile are the two most durable options in a condo kitchen. Both tolerate the subfloor conditions common in Chicago high-rises and can be installed with methods that minimize sound transmission to the unit below.

    Bathroom Upgrades With Technical Payoff

    A condo bathroom renovation delivers its value through technical precision, not square footage. Waterproofing, plumbing access, and material durability determine whether your upgrades last five years or twenty-five.

    Condo Bathroom Remodeling Around Plumbing and Waterproofing Limits

    In condo bathroom remodeling, the drain location is typically fixed by the building’s shared waste stack. 

    Shower pans, tub drains, and toilet flanges all need to connect to that stack, which limits how dramatically you can reconfigure the layout. A well-designed plan works within these constraints while still improving flow and function.

    Waterproofing is non-negotiable. A failure here does not just damage your unit; it damages the unit below. Sheet-membrane or liquid-applied waterproofing systems should cover the full shower enclosure, extending at least six inches beyond the showerhead wall.

    According to bathroom renovation experts, plumbing upgrades and water damage are among the most common reasons remodel costs exceed expectations.

    Walk-In Showers, Heated Floors, and Smart Comfort Upgrades

    Walk-in showers with curbless or low-threshold entries make a condo bathroom feel larger and more accessible. A linear drain set flush with the tile allows for a continuous floor plane. Heated floors, using electric mat systems installed beneath tile, add comfort with minimal floor height buildup, typically under a quarter inch.

    Upgrade Typical Condo Cost Range Key Consideration
    Walk-in shower conversion $4,000 to $8,500 Drain location and waterproofing
    Electric radiant floor heating $800 to $1,500 Thermostat placement and circuit capacity
    Frameless glass enclosure $1,200 to $3,000 Freight elevator fit for glass panels
    Recessed medicine cabinet $300 to $900 Wall depth and stud spacing


    Tile Work, Vanities, and Durable Finish Selections

    Tile work in a condo bathroom should prioritize durability and moisture resistance. Porcelain tile with a water absorption rate below 0.5% is the standard for wet areas. Large-format tiles reduce grout lines, which simplifies long-term maintenance. 

    For vanities, wall-mounted options create visual space in a small bathroom and make floor cleaning easier. Custom vanities built to the exact width of your bathroom wall eliminate the awkward gaps that standard-size vanities leave.

    From Design Intent to Finished Installation

    The distance between a beautiful rendering and a beautiful room is filled with procurement schedules, vendor coordination, and fabrication precision. This phase determines whether your condo renovation delivers on the vision established in planning.

    Procurement, Scheduling, and Vendor Coordination

    Once designs are approved, procurement begins. Ordering tile, fixtures, appliances, and custom pieces must follow a sequence aligned with the construction schedule. Lead times for custom cabinetry can run eight to twelve weeks. 

    Stone countertops typically need templating after cabinets are installed, adding another two to three weeks.

    Vendor coordination in a condo project also means confirming that every delivery fits within the building’s freight elevator and scheduling windows. A missed delivery slot can push installation back by a week or more, creating a cascade of subcontractor rescheduling.

    How Custom Millwork Reduces the Translation Gap

    The “translation gap” is the space where design intent gets lost between a drawing and the finished product.

    When a designer specifies a cabinet detail and a separate fabricator interprets it, small discrepancies accumulate: a panel profile that reads differently, a finish sheen that does not match, hardware spacing that feels off. These are not catastrophic errors, but they erode the precision that makes a space feel considered.

    In-house fabrication through TDL Custom addresses this directly. When the same team that draws the elevation also builds the piece, the finished millwork matches the original intent without field compromises. 

    This is particularly valuable in a condo, where every inch is visible, and there is no room to hide a misaligned panel behind a decorative object.

    Choosing a Process That Keeps the Project Collaborative

    A collaborative process means you see and approve material samples, review full-service interior design deliverables at each milestone, and have a single point of contact who knows your building’s rules. The best condo renovation experiences feel like partnerships, not transactions.

    Frequently Asked Questions

    How Much Does a Full Condo Remodel Typically Cost in Chicago, Including Permits and Labor?

    A full Chicago condo renovation typically ranges from $150 to $350 per square foot, depending on material selections and scope. For a 1,000-square-foot unit, that translates to roughly $150,000 to $350,000, including permits, labor, and finishes.

    Permit fees themselves are relatively modest, usually a few hundred to a few thousand dollars, but the professional fees for architectural drawings and engineering review add to the total.

    What Rules and Approvals Does a Chicago Condo Association Require Before Starting a Renovation?

    Most Chicago condo associations require a formal renovation application, contractor insurance certificates, a security deposit, and neighbor notification before approving any work.

    Many also restrict work hours, designate approved entry routes for materials, and require floor and wall protection in common areas. Review your building’s alteration agreement thoroughly, as some associations impose additional rules around noise, dust containment, and weekend work.

    How Long Does a Typical Kitchen Renovation Take in a Chicago Condo, From Design Through Completion?

    A condo kitchen remodeling project typically takes four to six months from initial design through completion. The design and planning phase runs four to six weeks. Procurement and lead times add another eight to twelve weeks.

    Construction and installation require four to eight weeks on site. Building-specific constraints like elevator scheduling and restricted work hours often extend the construction timeline compared to a house.

    What Is the 30 Percent Rule in Remodeling, and How Should It Guide a Condo Renovation Budget?

    The 30 percent rule suggests spending no more than 30 percent of your condo’s current market value on a renovation. For a $500,000 Chicago condo, that cap would be $150,000. This guideline helps you avoid over-improving relative to comparable units in your building, which protects your investment if you sell. Use it as a ceiling, not a target.

    How Much Does It Cost to Renovate a 1,000 Square Foot Condo, and Which Upgrades Move the Budget Most?

    Renovating a 1,000-square-foot condo typically costs $150,000 to $350,000 in Chicago. The largest budget drivers are custom cabinetry, countertop material, plumbing fixture relocation, and flooring.

    Kitchen and bathroom renovations together usually account for 50 to 60 percent of the total project cost. According to renovation ROI research, kitchen and bathroom remodels consistently deliver the strongest return on investment.

    What Are the Best Ways to Reduce Noise, Protect Common Areas, and Manage Logistics in an Occupied High Rise During Renovation?

    Use sound-dampening construction methods such as isolating demolition to permitted hours and laying protective floor coverings in all common corridors between your unit and the freight elevator.

    Schedule the loudest work, like tile removal, for midweek mornings when building traffic is lowest. Maintain open communication with your building manager and adjacent neighbors throughout the project to address concerns before they become complaints.

    Your Next Step Toward a Condo That Works as Well as It Looks

    A successful condo renovation in Chicago starts long before demolition day. It starts with a clear plan that accounts for your building’s rules, your unit’s constraints, and the material and fabrication decisions that turn a concept into a space you actually want to live in.

    The difference between a frustrating remodel and a collaborative one usually comes down to how well your design team anticipates the realities of multi-unit construction.

    Every project at Threshold Design Lab begins with a conversation. If you are ready to move from inspiration to a detailed plan for your condo, reach out to our team and tell us about your space. We will listen first, then build a path from where your unit is now to where you want it to be.

  • Classic Kitchen Ideas: What Actually Makes Them Timeless?

    Classic Kitchen Ideas: What Actually Makes Them Timeless?

    You are about to spend a significant amount on a kitchen remodel, and you want it to look just as good in fifteen years as the day it is finished. That tension between investing in something current and choosing finishes that will age gracefully sits at the center of every classic kitchen conversation. 

    It is the difference between a room that gains character over time and one that feels dated before the final invoice is paid.

    Getting there depends less on inspiration than on process. A vertically integrated approach connects design decisions directly to fabrication and custom millwork. It treats every material selection and cabinet profile as both an aesthetic choice and a construction specification, which is what produces a classic kitchen grounded in craft, not decoration alone.

    Keep reading to learn which design elements genuinely hold their value, which ones date a kitchen prematurely, and how to move from inspiration photos to a buildable plan. By the end, you will know what to evaluate in a project proposal and which questions to ask before a single cabinet is ordered.

    Classic Kitchen Ideas That Give a Kitchen Lasting Appeal

    A kitchen earns lasting appeal when every surface, profile, and proportion reinforces a single coherent idea rather than chasing several trends at once. The rooms that still look right after two decades share a consistent set of traits: restrained color, balanced scale, and materials selected for how they weather, not just how they photograph.

    Classic vs. Traditional: The Difference in Detail

    People use “classic” and “traditional” interchangeably, but they describe different design vocabularies. A traditional kitchen leans into ornamentation: raised-panel doors, corbels, crown molding, and decorative legs on islands.

    A classic kitchen strips back the ornament and relies on proportion, quality materials, and clean profiles to carry the room. Think of traditional details as the fuller expression. Classic is the edited version.

    Both approaches share a respect for symmetry and craft, but they diverge on density. Traditional kitchen design often pairs a classic range with a beamed ceiling, herringbone flooring, and ornate hardware. 

    A classic kitchen might use the same range and flooring but let them stand without additional decoration. Understanding where you fall on that spectrum determines how many decorative layers your project needs, and where restraint will serve you better.

    Why Proportion, Symmetry, and Restraint Matter

    Proportion is what makes a nine-foot ceiling feel commanding instead of cavernous and a galley layout feel efficient instead of cramped. When upper cabinets stop at an awkward height or an island is six inches too narrow for comfortable seating, the eye registers that something is off, even if you cannot name the problem.

    Symmetry in window placement, cabinet runs, and light fixture spacing creates the visual calm that defines a classic kitchen.

    Restraint works alongside proportion. Choosing two or three materials and deploying them consistently produces a room that reads as intentional. Every time you add a fourth stone, a contrasting metal, or a patterned accent wall, you dilute that coherence.

    Where Trend-Led Choices Usually Date a Kitchen

    Open-concept kitchen layouts themselves are not a problem. Certain trend-driven moves within them age quickly. Ultra-specific cabinet colors tied to a single year’s palette, oversized waterfall islands in a bold vein pattern, and novelty tile shapes tend to look fixed in time.

    According to a recent 2026 kitchen trends report, designers are moving toward warmer neutrals and natural materials. The previous cycle of high-contrast, cool-toned kitchens started to feel dated within five years.

    If you genuinely love a trend, contain it to elements that are inexpensive and easy to swap: a light fixture, a set of barstools, or a runner rug. Your cabinetry, countertops, and flooring should be the stable foundation everything else rests on.

    Cabinetry and Millwork That Set the Foundation

    Your cabinets occupy more visual real estate than any other element, which means they set the tone for everything else in the room. Getting the door profile, construction method, and finish right is the single most consequential decision in a classic kitchen.

    Shaker and Traditional Door Profiles

    Shaker cabinets remain the most popular profile in American kitchen design because they are geometrically simple and pair with nearly any hardware or countertop. A five-piece shaker door with a flat center panel reads as both modern and traditional depending on the finish and surrounding details.

    If you want more depth, a beaded shaker or a modified raised panel adds visual weight without tipping into full ornamental territory.

    Traditional cabinetry with a true raised panel and applied molding fits homes with existing period detailing, such as deep crown molding and paneled wainscoting in adjoining rooms. The key is matching the level of detail in the kitchen to the rest of the house so the room feels integrated, not imported.

    Inset, Overlay, and Furniture-Style Construction

    The construction method affects both how the cabinet looks and how it performs over years of daily use.

    Construction Type Visual Character Precision Requirement Best Fit
    Full overlay Clean, slab-like appearance; doors cover the face frame Moderate Contemporary-leaning classic kitchens
    Inset Doors sit flush within the frame; reveals a thin shadow line High; requires tight tolerances Period homes, furniture-grade kitchens
    Furniture-style Cabinets rest on legs or a decorative toe kick Highest; each piece is freestanding Kitchens designed to look collected


    Inset construction demands precision at every stage. Doors must be sized to within 1/16 of an inch, and the face frame must be dead flat. This is where custom fabrication separates itself from stock or semi-custom options, especially in older homes where walls and floors are rarely plumb.

    Glass Storage, Trim, and Appliance Integration

    Glass-front cabinets and glass cabinet doors introduce a layer of display without requiring open shelving. 

    Seeded glass, clear glass, or reeded glass each produce a different level of transparency, and the choice depends on whether you want full visibility or a softer reveal. Pair them with interior cabinet lighting to create depth in the upper run.

    Trim details tie the cabinetry to the architecture. Light rails under upper cabinets, crown molding that meets the ceiling, and matching panels for refrigerators and dishwashers all contribute to a single, resolved composition.

    Countertops, Backsplashes, and Sink Choices

    The right countertop and backsplash pairing reinforces the material story your cabinetry started. Get this wrong, and even beautifully built cabinets will feel unfinished or disconnected.

    When Marble, Quartz, and Stone Make Sense

    Marble countertops carry the strongest association with a timeless kitchen, but they require a willingness to accept patina. Honed Carrara and Calacatta develop etch marks and soft staining over time. If that patina appeals to you, marble is hard to beat.

    If it does not, quartz countertops engineered to resemble natural stone offer stain resistance and consistent veining at a comparable price point. As noted in a guide on kitchen countertop options, natural stone slabs are one-of-a-kind, while engineered alternatives are more predictable.

    Butcher block countertops work best on islands or dedicated prep zones, not as a full perimeter surface in a high-use kitchen. They add warm wood tones that break up an all-stone palette and give the room a furnished, lived-in quality.

    Backsplash Patterns With Staying Power

    A subway tile backsplash in a 3×6 brick pattern has endured for over a century because it is proportionally balanced and neutral. White subway tiles laid in a standard offset are the safest long-term choice, but a vertical stack or herringbone layout adds character without dating the room.

    A marble backsplash in slab form creates a quieter, more refined look than tile and eliminates grout lines. A stone backsplash pairs naturally with stone countertops for a continuous material flow. The pattern you choose should play a supporting role. It should not compete with the countertop or the cabinet finish.

    Sink Specifications That Support the Style

    A farmhouse sink, also called an apron-front sink, anchors a classic or cottage kitchen with a single strong visual statement. Fireclay models in white hold up well to daily abuse and patina gracefully. 

    Stainless steel undermount sinks are less visible and let the countertop take center stage, which suits kitchens where you want the stone to be the dominant surface.

    Specify your sink before your countertop is templated. The cutout, the reveal edge, and the faucet-hole placement all need to be coordinated with the stone fabricator. Otherwise, you risk misalignment that cannot be corrected after installation.

    Hardware, Lighting, and Finishing Details

    Hardware and lighting are the elements visitors notice first and remember longest, even though they represent a small fraction of your budget. Choose them for how they age, not just how they look on day one.

    Choosing Metal Finishes That Age Well

    Brass hardware and brass fixtures develop a living patina that softens over time, which suits a traditional kitchen style well. Unlacquered brass requires periodic polishing if you want to maintain its original brightness. 

    Lacquered brass keeps its finish but may eventually show wear at high-touch points. Brushed nickel hardware offers a quieter alternative that resists fingerprints and pairs with both warm and cool palettes.

    Stick to one or two metal families across hardware, faucets, and light fixtures. Cup pulls on drawers and simple knobs on doors are a combination that has worked for generations. Mixing three or more metals can work in theory. It demands careful calibration that most rooms cannot support.

    Layering Task and Ambient Light

    Pendant lights over an island or sink provide task illumination and a visual anchor. Choose fixtures with a profile that reflects the room’s style: a lantern shape for traditional kitchen design, a simple dome or cone for a cleaner classic look. 

    Pendant lighting should hang 30 to 36 inches above the countertop, depending on ceiling height and fixture scale.

    Ambient lighting from recessed cans or cove lighting fills in the shadows that pendants and under-cabinet strips miss. A layered lighting plan with separate switches or dimmers lets you adjust the mood from bright task lighting during cooking to softer ambient light during evening use.

    Small Details That Make the Room Feel Collected

    A well-chosen kitchen rug in a flat-weave wool or cotton, roman shades in a natural linen, and a few copper pots on a hanging rail all contribute to a room that feels inhabited, not staged. These are the lowest-cost elements and the easiest to change, so they are the best place to introduce seasonal color or personality.

    Copper accents in particular work well against white cabinetry and stone surfaces because they introduce warmth without competing with the architecture. The goal is a room that looks like it was assembled over time, not purchased in a single afternoon.

    Layout Choices That Support Daily Use

    A classic kitchen works only if the layout supports the way you cook, clean, and gather. The right circulation plan prevents the room from feeling like a showpiece you cannot actually live in.

    Island, Table, and Circulation Planning

    A kitchen island serves as the gravitational center of most remodels, but its dimensions matter more than its mere presence. A wood island with a butcher block top needs at least 42 inches of clearance on all sides for comfortable movement. 

    If your floor plan cannot support that, a farmhouse table placed in an adjacent dining zone may serve the same gathering function without choking the work triangle.

    In a cozy kitchen or cottage kitchen, an island can dominate the room rather than enhance it. Measure twice. Pull up painter’s tape on the floor and live with the footprint for a few days before you commit to a size. 

    A smaller island with storage below and a generous overhang for stools often outperforms a massive block that restricts flow.

    Storage Placement for a Calm Visual Field

    A calm visual field comes from hiding daily clutter behind closed doors while keeping frequently used items within arm’s reach. Deep drawers for pots and pans, vertical dividers for baking sheets, and pull-out trash cabinets near the sink all reduce countertop clutter.

    This is where residential interior services become especially valuable. A designer who understands your daily routine will place storage where it reduces steps, not just where it looks balanced on a floor plan.

    Making a Large Room Feel Warm and a Small One Feel Generous

    Large farmhouse kitchens risk feeling cold and institutional if surfaces are all one material and color. Potted herbs on a windowsill, an exposed brick wall left unfinished, and warm wood tones on an island or open shelving break up the scale and invite you in. 

    A smaller kitchen benefits from the opposite strategy: a limited palette, fewer visible objects, and reflective surfaces that bounce light around the room.

    The emotional temperature of the room depends on material variety, not square footage.

    Turning Inspiration Into a Buildable Plan

    The gap between a beautiful mood board and a finished kitchen is closed by documentation, sequencing, and precise fabrication. Not by more inspiration.

    What to Finalize Before Ordering Cabinetry

    Before any cabinet order is placed, you need confirmed dimensions from a field measure, finalized appliance specifications (including rough-in requirements), and a locked material palette. 

    Changing a countertop material after cabinets are in production can cascade into changes in edge profiles, support requirements, and backsplash dimensions.

    • Confirm ceiling height and soffit conditions
    • Lock appliance models and verify cutout dimensions
    • Finalize door style, finish, and interior accessories
    • Approve elevations and section drawings with exact dimensions
    • Establish the hardware bore pattern and pull size

    This checklist is the minimum. Any reputable kitchen renovation designer will walk you through each item before releasing a production order.

    Why Fabrication Precision Matters in a Classic Scheme

    Classic kitchens expose construction quality more than any other style. There are no chunky moldings or distressed finishes to mask a sloppy joint. Inset doors that bind, crown molding with visible nail holes, and face frames that are not flush all stand out in a room designed around restraint and proportion.

    Custom millwork built in a controlled shop environment, rather than assembled on site from stock components, allows tolerances measured in fractions of an inch. That precision is especially critical in older homes where walls bow and floors slope.

    A white kitchen in particular reveals every shadow line and gap. This is why fabrication quality is the single biggest differentiator between a classic kitchen that ages well and one that looks tired after a few years.

    Moving From Selections to Execution

    Once selections are finalized, the project shifts to procurement and scheduling. Lead times for stone slabs, custom cabinetry, and specialty hardware can range from six to sixteen weeks. Coordinating deliveries so that trades are not waiting on materials is where project management earns its value.

    Execution means choreographing demolition, rough-in, cabinet installation, countertop templating, backsplash tiling, and final hardware mounting in a sequence that avoids rework.

    A disciplined process keeps you informed at every stage, with clear milestones and decision points rather than last-minute surprises. That is the difference between a renovation that feels chaotic and one you would willingly repeat.

    Frequently Asked Questions

    What Defines a Timeless Kitchen Style, and How Can It Be Tailored to a Specific Home?

    A timeless kitchen relies on balanced proportions, natural materials, and restrained color to produce a room that does not announce its construction date. You tailor it to your home by matching the kitchen’s level of detail to the architectural character of the surrounding rooms, whether that means deep crown molding in a Victorian or clean flush details in a mid-century ranch.

    Which Cabinet Door Styles and Wood Species Best Suit a Traditional Look?

    Shaker-style cabinets in maple, cherry, or white oak are the most versatile starting points for a traditional kitchen style. Raised-panel doors in cherry or mahogany suit more ornate traditional kitchens, while painted maple shaker doors work for a lighter, more edited classic look.

    How Can a Small Kitchen Feel Traditional Without Looking Crowded or Dated?

    Limit your palette to two or three materials, use glass-front cabinetry on upper cabinets to create visual depth, and choose scaled-down hardware. Avoid heavy corbels or oversized crown molding that eat into the visual space.

    What Countertop and Backsplash Pairings Create a Refined, Classic Finish?

    Honed marble countertops paired with a slab marble backsplash produce the most refined result. A quartz counter with a simple subway tile backsplash in a tonal match is a more durable and budget-friendly alternative that still reads as classic.

    Which Hardware, Lighting, and Plumbing Fixtures Make a Kitchen Feel More Elegant?

    Unlacquered brass or brushed nickel in simple profiles, pendant lights with a clean silhouette, and a bridge-style faucet in a matching metal family all contribute to an elegant, collected feel. Consistency across finishes matters more than the cost of any single fixture.

    What Budget Range Typically Covers a Mid-Range Kitchen Remodel, Including Cabinetry and Installation?

    A mid-range kitchen remodel with custom cabinets, stone countertops, and professional installation typically falls between $75,000 and $150,000. This depends on kitchen size, material selections, and scope of structural work. Semi-custom cabinetry can reduce that range, but at the cost of limited sizing and finish options.

    Your Classic Kitchen Starts With a Conversation

    A classic kitchen is the sum of deliberate, well-coordinated decisions. It takes the right cabinet profile, a countertop that earns its keep, hardware that ages with grace, and a layout that respects how you actually move through the room. None of those decisions happen in isolation, and the best results come when design intent and fabrication capability are connected from the start.

    If you are ready to move from inspiration to a detailed plan, Threshold Design Lab would like to hear about your project. Every engagement begins with listening, not selling. Reach out to start a conversation, and let’s talk about what your kitchen could become.

  • Bathroom Designer in Chicago: What a Full-Service Process Covers

    Bathroom Designer in Chicago: What a Full-Service Process Covers

    Hiring a bathroom designer in Chicago is rarely about picking tile or paint colors first. It starts with a spatial problem: a primary bath that no longer fits how you live, a guest bath carved from a vintage floor plan, or a layout that wastes square footage you cannot afford to lose. 

    The decision you face is not which finishes look nice. It is whether your design partner can translate your daily routines, material preferences, and architectural constraints into a room that performs for decades.

    Threshold Design Lab approaches that challenge through a vertically integrated model that connects design intent to physical construction under one roof. Their residential interior design process moves through three distinct phases: Design and Planning, Procurement and Curation, and Execution and Installation. 

    Because the studio operates its own fabrication arm, TDL Custom, the vanity you approve on paper is the vanity that arrives on site. It is built to spec and finished to match every other element in the room.

    Keep reading to learn what each phase of a full-service bathroom design engagement covers and how to evaluate a Chicago studio’s depth before signing. You will also see what documents to prepare for a productive first conversation. 

    By the end, you will understand how custom vanity fabrication connects to the broader design timeline. That single detail often determines whether a luxury bathroom remodel delivers on its promise.

    What Discerning Homeowners Should Expect Before Hiring

    A luxury bathroom renovation typically involves eight to twelve distinct trade categories working in a strict sequence. The quality of your result depends on how those trades are coordinated before demolition day. Understanding what separates a serious engagement from a surface-level refresh helps you ask better questions and avoid costly misalignment.

    How a Luxury Scope Differs from Basic Bathroom Remodeling

    A basic bathroom remodel usually replaces surfaces: new tile, a stock vanity, updated fixtures. The footprint stays the same. Plumbing and electrical rough-ins remain where they are. A luxury scope, by contrast, often repositions plumbing walls, relocates drains, upgrades subfloor systems, and introduces heated flooring or custom shower enclosures.

    The material palette also changes. You move from ceramic and laminate into natural stone, solid-surface slabs, and hand-finished metals. Each of those materials demands specific substrate preparation, sealing schedules, and installation sequences. Skipping those details leads to cracking, staining, or premature wear.

    That difference in scope is why a full-service interior design engagement exists. It wraps every decision, from the first layout sketch through the last caulk line, into one accountable process.

    What a Listening Session Should Clarify Early

    Your first meeting with a bathroom designer should not be a product pitch. It should clarify how you use the room, who uses it, and what frustrates you about the current layout. A skilled designer asks about morning routines, storage habits, mobility concerns, and whether the bath serves one person or two.

    That conversation also establishes budget parameters. You should leave the listening session knowing the realistic range for your scope. That means not an exact number but a credible band reflecting your finish expectations and any structural work the project may require.

    Equally important, the session should identify constraints early: condo association rules, landmark district restrictions, or shared plumbing stacks in multi-unit buildings. Those factors shape every decision that follows.

    When Full-Service Planning Matters Most

    Full-service planning matters most when your project touches structure, when the room’s footprint is changing, or when you want custom elements that do not exist in any catalog. If you are simply swapping fixtures, a general contractor can likely handle the scope.

    But some scopes demand a designer who manages the entire chain: moving a wet wall, integrating a freestanding tub with floor-mounted plumbing, or building a vanity to non-standard dimensions. The gap between design intent and build execution is where most luxury projects lose their way.

    Design and Planning: Defining the Room Before Selections Begin

    Every functional bathroom starts with a floor plan that respects clearance codes, drain locations, and the path you walk at 6 a.m. with your eyes half open. Design begins with spatial logic, not finish samples.

    Space Planning Around Layout, Flow, and Daily Routines

    Your designer should map the room around movement patterns first. Where do you step out of the shower? Where do you stand to apply makeup? Where does the door swing, and does it conflict with a drawer pull or a toilet clearance?

    The National Kitchen & Bath Association recommends a minimum of 30 inches of clear floor space in front of each fixture. In a primary bath, you may want 36 inches or more. These dimensions drive every other choice, from vanity width to shower entry type.

    A double-vanity layout, for example, requires at least 72 inches of wall length to feel comfortable. If your Chicago bathroom design involves a narrower wall, a single vanity with dedicated grooming storage may perform better. The plan must account for real life, not just symmetry.

    Architectural Constraints in Chicago Homes

    Chicago’s housing stock presents specific challenges. Greystones, two-flats, and vintage six-flats often have plaster-over-lath walls, cast-iron drain stacks, and floor joists that sit at irregular spacing. These conditions affect where you can and cannot relocate plumbing.

    In a pre-war building, moving a toilet even 18 inches can require routing a new drain line through the floor system. That is possible, but it adds structural engineering review and, in some cases, a permit from the City of Chicago’s Department of Buildings.

    Condo buildings add another layer. Your association may restrict work hours, require insurance certificates, and mandate that a licensed plumber handle all connections to shared risers. A designer who works regularly in Chicago understands these requirements before they become surprises.

    How Storage, Lighting, and Wet-Zone Decisions Shape Performance

    Storage planning is often treated as an afterthought, but it determines whether your bathroom feels organized or cluttered six months after completion. Recessed medicine cabinets, vanity drawer inserts, and niche shelving within the shower should all be part of the design phase, not added during construction.

    Lighting layers matter just as much. You need task lighting at the vanity, ambient lighting for evening use, and wet-rated fixtures inside the shower enclosure. A single overhead fixture cannot serve all three purposes.

    Wet-zone decisions, including the shower threshold type, glass enclosure configuration, and waterproofing membrane system, must be resolved at the planning stage. They dictate tile layout, drain placement, and structural load. These choices cannot be deferred to the tile installer without risking costly rework.

    Procurement and Curation: Materials, Fixtures, and Custom Vanity Work

    A single slab of Calacatta marble can take 14 weeks to arrive from Italy. This means your material selections need to be locked months before your plumber shows up. Procurement is the phase where timelines are either protected or broken.

    Selecting Stone, Tile, Plumbing Fixtures, and Finishes

    Stone selection involves more than color. You need to evaluate porosity, vein direction, slab thickness, and sealing requirements. A honed marble floor in a wet zone behaves very differently from a polished granite countertop. Your designer should present options that match both your aesthetic preferences and the performance demands of each surface.

    Plumbing fixtures require similar care. Thermostatic valve systems, wall-mounted faucets, and floor-mounted tub fillers each have specific rough-in dimensions that your plumber needs before framing begins. Fixture selections made after rough-in often force compromises or change orders.

    Finish coordination ties everything together. If your faucet is brushed nickel, your towel bars, shower trim, and cabinet hardware should follow a consistent metallic tone. Mixing metal finishes can work, but it must be intentional and planned, not accidental.

    Why Custom Vanities Need Early Coordination

    A custom bathroom vanity is not a piece of furniture you order and drop in. It requires coordination with plumbing rough-in heights, countertop material thickness, undermount sink cutout dimensions, and wall blocking for mirror or sconce placement above.

    Lead times for custom vanity fabrication typically run six to ten weeks, depending on material sourcing and finish complexity. That window must be built into the project schedule from the start. If you wait until demolition to specify your vanity, you create a gap in the construction sequence that idles your tile setter and plumber.

    Early coordination also lets your designer confirm that the vanity depth, height, and drawer configuration work within the spatial plan established in the prior phase. This is where the connection between custom millwork and bathroom design becomes most visible.

    How In-House Fabrication Protects Design Intent

    When a design studio outsources vanity fabrication to a third-party shop, details can shift. A drawer front profile gets simplified. A paint match drifts. A scribe detail at the wall gets skipped because the shop did not receive the field dimensions.

    TDL Custom, Threshold Design Lab’s in-house fabrication arm, closes that gap. The same team that designs the vanity builds it. Field measurements feed directly into shop drawings. Finish samples are reviewed against the actual stone and tile selections before production begins.

    Custom Vanity Element Why It Matters
    Drawer box construction Dovetail joinery lasts longer than stapled MDF
    Finish application Sprayed lacquer in a controlled booth ensures even coverage
    Scribe fitting Site-specific templating eliminates visible gaps at walls
    Hardware placement Pre-drilled from shop drawings, not guessed on site
    Countertop integration Undermount sinks require precise cutout and support framing

    That level of control over fabrication is what allows the design concept from your planning phase to survive contact with real-world construction.

    Execution and Installation: Turning Drawings into a Finished Bath

    The first trade on site is usually demolition. The last is often the painter touching up a wall behind a towel bar. Between those two moments, a luxury bathroom remodel follows a precise sequence that cannot be improvised.

    Sequencing Trades, Lead Times, and Site Preparation

    Trade sequencing in a bathroom renovation typically follows this order:

    • Demolition and debris removal
    • Structural modifications (if walls or floors are changing)
    • Rough plumbing and electrical
    • Inspection by the City of Chicago
    • Waterproofing membrane installation
    • Tile substrate preparation and tile setting
    • Vanity and millwork installation
    • Countertop templating and installation
    • Finish plumbing and electrical trim
    • Glass enclosure installation
    • Paint and final detailing

    Each trade depends on the one before it. If your rough plumbing fails inspection, tile cannot begin. If your vanity arrives late, your countertop fabricator cannot template. The project manager’s job is to keep this chain unbroken.

    Site preparation also includes protecting adjacent rooms. Dust containment barriers, floor protection, and HVAC register covers prevent construction debris from migrating through your home.

    Quality Control During Installation

    Quality control is not a single walkthrough at the end. It happens at multiple checkpoints. After waterproofing, your project manager should verify membrane overlap seams and drain integration before any tile is set over them.

    During tile installation, lippage (the height difference between adjacent tiles) should be checked with a straightedge. For large-format tiles, acceptable lippage is typically 1/32 of an inch or less. Grout joints should be consistent in width and depth.

    When the custom vanity arrives from the shop, it should be inspected for finish quality, hardware alignment, and fit against the wall before countertop templating begins. Catching a flaw at this stage costs minutes. Catching it after the stone is cut costs thousands.

    What Final Punch and Handover Should Include

    A punch list is a written record of every incomplete or imperfect item identified during a final walkthrough. You and your designer walk the room together, noting anything from a paint drip on a baseboard to a towel bar that is not level.

    Your handover package should include product warranty cards, paint color formulas, grout and sealant product names, and maintenance instructions for every installed surface. If your stone requires periodic resealing, that schedule should be documented.

    A completed bathroom renovation is a finished product, not just a collection of installed parts. The care taken during execution reflects the rigor of the studio behind it.

    How to Evaluate a Bathroom Designer in Chicago

    The strongest signal of a qualified bathroom designer is not a single beautiful photo. It is a portfolio that shows the same project at multiple stages, from plan drawing through construction through completion. Process visibility separates a design practice from a decorating service.

    Portfolio Signals That Show Process Depth

    When reviewing a studio’s completed projects, look for evidence of spatial problem-solving. Did they reconfigure a difficult layout? Did they integrate custom storage into a small footprint? Do the images show details like mitered stone edges, flush-set niches, or site-built shower benches?

    A portfolio that only shows styled “after” photos tells you nothing about the build quality underneath. Ask to see construction-phase images. Studios confident in their process will share them willingly.

    Also pay attention to range. A firm that has handled both a compact guest bath in a Lincoln Park condo and a primary suite in a single-family home in Bucktown demonstrates adaptability across Chicago’s varied housing types. 

    That range signals the kind of modern luxury interior design thinking that adapts to context, not just taste.

    Questions to Ask About Fabrication, Project Management, and Communication

    Before signing, ask these specific questions:

    • Do you fabricate custom vanities in-house or outsource them?
    • Who manages the project day to day, and how often will I receive updates?
    • How do you handle change orders, and what triggers one?
    • What is your typical lead time from design approval to construction start?
    • Do you carry general liability insurance and workers’ compensation coverage?

    The answers reveal whether you are hiring a coordinator or a true builder. A studio that fabricates millwork in-house, like those offering custom cabinetry in Chicago, controls variables that outsourced shops cannot.

    Communication cadence matters too. Weekly written updates with photos keep you informed without requiring daily site visits. Confirm this expectation before the project begins.

    Red Flags in Vague Proposals or Incomplete Scopes

    A proposal that lists “tile installation” without specifying square footage, substrate preparation method, or waterproofing system is not a real proposal. It is a placeholder that invites disagreement later.

    Watch for line items labeled “allowances” without defined product categories. A $5,000 tile allowance means nothing if it does not specify the price per square foot that number supports. You need to know whether that allowance covers porcelain at $8 per square foot or marble at $35 per square foot.

    Also be cautious of firms that skip the listening session and jump straight to a quote. A number without a defined scope is a guess, not a commitment. The preparation you bring to your first conversation directly affects the clarity of the proposals you receive.

    Planning the Right Conversation for Your Project

    The most productive initial meeting happens when you arrive with a folder, not just a vision board. Concrete documentation lets your designer move from general discussion to specific recommendations in a single session.

    Documents, Measurements, and Inspiration to Prepare

    Before your first call, gather the following:

    • A rough floor plan with overall room dimensions (length, width, ceiling height)
    • Photos of the existing bathroom from multiple angles
    • Any condo association rules or building restrictions
    • A list of what frustrates you about the current layout
    • Three to five inspiration images that reflect your aesthetic direction
    • A candid budget range, even if approximate

    If your home was recently purchased, your property survey or condo declaration may contain useful mechanical information. Bring whatever you have. More context means fewer assumptions.

    Inspiration images are most useful when you annotate what specifically appeals to you. Is it the vanity proportion? The tile pattern? The hardware finish? A designer can interpret a curated set of images far more efficiently than a sprawling Pinterest board with no commentary.

    How to Compare Proposals Without Losing Scope Clarity

    When you receive two or three proposals, resist the impulse to compare bottom-line numbers first. Instead, compare scope definitions line by line. Use a table like this to organize your review:

    Scope Element Firm A Firm B Firm C
    Design fee structure Flat fee Hourly Included in build
    Waterproofing method specified Yes No Yes
    Vanity fabrication In-house Outsourced Not specified
    Tile installation prep included Yes Allowance only Yes
    Permit management included Yes Homeowner responsibility Yes
    Weekly update commitment Written + photos Verbal only Written


    The cheapest proposal often omits items the others include. A lower number is not a better deal if it forces you to manage permits, source your own materials, or hire a separate waterproofing contractor.

    Frequently Asked Questions

    How much does a bathroom remodel typically cost in Chicago, including design fees?

    A mid-range bathroom remodel in Chicago generally falls between $25,000 and $50,000. A luxury primary bathroom renovation with custom millwork, natural stone, and structural changes can range from $60,000 to $120,000 or more. Design fees are sometimes a flat rate and sometimes a percentage of the construction budget.

    What is included in a bathroom design service package versus a full remodel project?

    A design-only package typically delivers floor plans, elevations, material specifications, and fixture schedules. A full remodel project adds procurement, construction management, trade coordination, and installation to that scope. The distinction matters because a design package alone does not guarantee build quality.

    How do I evaluate a designer’s portfolio and reviews for small bathroom layouts?

    Look for projects that demonstrate problem-solving in tight spaces, such as recessed storage, compact fixture selections, or creative tile layouts that make a room feel larger. Client reviews that mention communication, timeliness, and scope accuracy are more telling than generic praise about aesthetics.

    What is a realistic scope and finish level for a $10,000 bathroom remodel budget?

    At $10,000, you can typically refresh surfaces. New tile flooring, a stock or semi-custom vanity, updated fixtures, and fresh paint are possible. Plumbing relocation, custom fabrication, or natural stone are generally outside this range. This budget works best for a secondary or guest bathroom where the layout stays unchanged.

    How long does the design and permitting process usually take for a Chicago bathroom renovation?

    Design development typically takes four to eight weeks, depending on the complexity of the scope and the number of revision rounds. Permitting through the City of Chicago can add another three to six weeks. Planning for a combined timeline of two to three months before construction begins is realistic.

    What questions should I ask during the first consultation to avoid change orders and cost overruns?

    Ask how the firm defines scope in its contract, what triggers a change order, and whether material allowances are realistic for the finish level you want. Confirm whether permits, waterproofing, and millwork fabrication are included or billed separately. These specifics prevent the most common sources of budget surprises.

    Starting Your Bathroom Project the Right Way

    A bathroom remodel at this level is a sequence of coordinated decisions, not a single purchase. Every phase, from the listening session through custom vanity fabrication and final punch, depends on the clarity and rigor of the one before it. When that chain holds, the finished room reflects exactly what you envisioned.

    If you are planning a bathroom renovation in Chicago, you want a partner who connects design, fabrication, and installation under one accountable process. Threshold Design Lab is a studio worth talking to. Their team works through a structured conversation that starts with your goals, not a product catalog.

    You can schedule an introductory call to discuss your project scope, timeline, and budget range. That first conversation is the foundation for everything that follows.

  • Classic Kitchen Design: What Makes It Feel Enduring?

    Classic Kitchen Design: What Makes It Feel Enduring?

    Classic kitchen design sits at a crossroads. Some kitchens chase whatever cabinet profile or color is trending this season. Others are built around proportion, solid materials, and details that still read as right a generation later. 

    If you’re planning a kitchen renovation in Chicago and want the room to feel permanent rather than fashionable, the decisions you make during design will determine that outcome.

    What makes a kitchen actually last comes from seeing enough of them fail. A cabinet rail that’s a quarter-inch too narrow makes an expensive kitchen look cheap. A stone slab that reads beautifully on a sample board can feel cold and disconnected once it’s in the room. 

    When design and fabrication are handled together, you see these outcomes firsthand. That changes every decision that follows.

    In this guide, you’ll find a detailed look at the planning and material decisions that separate a classic kitchen from one that simply borrows the style. You’ll also find the right questions to bring to your first meeting with a designer, and a clear picture of how execution quality ultimately determines whether the design holds.

    What Gives a Classic Kitchen Design Its Lasting Character

    The classic kitchen design inspiration that holds up after decades shares one quality: every element fits the room’s logic first. Style follows from that, not the other way around.

    Why Proportion Matters More Than Ornament

    The ratio of cabinet height to ceiling, the depth of a cornice, the reveal around a door: these measurements determine whether a kitchen feels balanced or slightly off. 

    You can add fluted pilasters, furniture feet, and carved details, but if the proportions are wrong, ornament makes it worse. It draws attention to the problem instead of solving it.

    That’s why designers working in the classic tradition start with precise elevations before any material is chosen. The elevation drawing tells you whether a cabinet stack at eight feet reads as monumental or cramped, and whether the island’s height plays against the upper cabinets or with them. These decisions don’t happen at a showroom. They happen at a drafting table.

    How Symmetry Shapes a More Settled Room

    Symmetry in a kitchen isn’t about making every wall match. It’s about giving the room a clear logic that reads as intentional. A centered range with matching cabinets on each side, a hood that anchors the wall, a window placed purposefully within the tile field. These choices make the space feel grounded rather than assembled.

    Getting symmetry right takes coordination across every document. The architect’s plan, the designer’s elevations, and the fabricator’s shop drawings all have to agree. When they don’t, small discrepancies compound. Suddenly the room feels a bit off, even to someone who can’t explain why. That’s usually where kitchen renovations start to drift from the original vision.

    Where Classic Style Meets Real Kitchen Use

    Traditional kitchens work best when the layout serves cooking and movement as well as it serves the eye. A beautiful kitchen that’s awkward to use gets old fast, and that frustration shows up in how people talk about a renovation that otherwise looked right on paper.

    Work zones, drawer organization, and the relationship between fridge, sink, and range all need to be resolved during design. You can have a classic aesthetic and an efficient layout. The condition is planning them together early enough that the millwork, plumbing, and appliances are coordinated from the start, not reconciled after the fact.

    The Core Elements That Define the Room

    Classic kitchens rely on specific elements. Each one shapes both how the space looks and how it functions every day.

    Cabinet Profiles That Hold Their Appeal

    Traditional cabinetry holds its appeal through door profiles and frame construction, not surface decoration. Shaker cabinets persist because their recessed panel design reads well at any scale. Inset construction, where doors sit flush within the frame, takes more precision to build but delivers a furniture-like result that doesn’t date.

    White inset shaker cabinets appear in kitchen after kitchen that hold up over decades. The profile is clean, the finish bounces light without competing with anything, and the construction signals quality through fit rather than flash. Glass-front cabinets add variation and help lighten longer cabinet runs, used selectively as accents, not as a default across every wall.

    Countertop and Backsplash Pairings That Age Well

    Countertop Material Best Backsplash Pairing Long-Term Consideration
    Marble Marble slab or subway tile Needs sealing; develops patina
    Quartz Subway tile or plain plaster Even appearance; low maintenance
    Natural stone (honed) Hand-painted or field tile Unique look; seal once a year
    Butcher block Painted brick or tile Warmth; needs oiling periodically


    Stone countertops (marble and honed limestone especially) bring natural variation and material depth that engineered surfaces approximate but don’t quite match. A three-by-six subway tile backsplash in a classic brick pattern recedes into the background and lets the cabinet profiles and stone do the work. When you want a focal point, a full marble slab behind the range earns its cost in presence.

    The strongest pairings aren’t just visual. They account for how each surface is maintained, how the materials age alongside each other, and how natural light shifts throughout the day.

    Hardware, Fixtures, and Lighting With Staying Power

    Hardware is where a lot of otherwise careful kitchens lose their credibility. Unlacquered or brushed brass cup pulls develop a natural patina that feels like part of the kitchen’s story rather than ordinary wear. 

    Polished nickel reads cooler and pairs well with white cabinets and marble without the warmth brass brings. Chrome is durable but can come across as clinical in a kitchen that’s meant to feel considered.

    Lighting deserves the same level of deliberation. Pendants over an island should be scaled to the island’s length (roughly a third to half the run) and hung low enough to light the surface without blocking eye contact across the counter. Recessed lighting alone flattens the room. 

    Layering in task lighting under cabinets, pendants over the island, and a central fixture creates a kitchen that shifts convincingly from a working space to a comfortable one.

    Layouts and Features That Support Daily Use

    A kitchen layout should make cooking and living easier, not harder. In classic design, the spatial decisions need to feel as deliberate as the material choices.

    Designing Around the Kitchen Island

    A kitchen island should solve one of three things clearly: prep space, additional storage, or seating. Trying to compress all three into a small footprint creates traffic jams in the work zone rather than resolving them. 

    Established kitchen layout clearance guidelines call for 42 inches on working sides, 36 on non-working sides, and 48 for two-cook kitchens. These are minimums, not targets.

    In classic kitchens, the island often reads as a piece of furniture with its own character: a contrasting paint color, turned or tapered legs, a butcher block or stone top that differs from the perimeter counters. That distinction reinforces the room’s logic without competing with it.

    Choosing Sinks and Appliances Without Breaking the Style

    An apron-front sink does two things at once: it functions well, and it looks deliberate. The exposed front integrates naturally with traditional cabinetry and anchors the sink wall without trying too hard. Fireclay and cast iron hold up well and age gracefully, though each has its care requirements.

    Panel-ready refrigerators and dishwashers let cabinetry read continuously across the room, maintaining symmetry without interruption. 

    Appliance specifications (panel depth, hinge swing, clearances) need to be locked in during the design phase, not sourced after the cabinets are drawn. The drawings have to account for them from the start, or corrections come at a cost.

    Balancing Storage, Display, and Circulation

    Storage in a classic kitchen works when the things used most stay accessible without disrupting the visual order. Deep base drawers for pots and pans, pull-out trays near the range for spices, glass-front cabinets reserved for display: each has a specific role and a specific place.

    When you bring in custom millwork during the design phase, the fabricator builds storage to fit the room exactly rather than adapting stock dimensions to almost work. That precision changes how the kitchen functions day to day, not just how it photographs.

    Material Choices That Reward the Decision Over Time

    Classic kitchen design isn’t defined by a single palette. It’s a set of principles that hold across different material traditions, each with its own logic.

    The Case for White and Warm-White Kitchens

    White kitchens last because they act as a neutral backdrop that lets construction quality show. Millwork profiles, stone variation, and hardware finish all read more clearly against white than they do in a busier palette. 

    The same clarity that makes white kitchens feel open works against you if the build quality isn’t there. A poorly fitted door, an inconsistent reveal, a rail that’s slightly off. White surfaces put all of it on display.

    Warm whites (soft creams or off-whites with a yellow undertone) tend to work better with natural stone and brass hardware than stark whites do. The difference is subtle in a photograph but obvious in the room, especially as natural light shifts across the surfaces through the day.

    When Pattern and Texture Add Depth

    Used selectively, pattern and texture can anchor a classic kitchen without overwhelming it. The principle is one strong feature per room.

    • Checkerboard tile in black and white grounds the floor visually and carries a long history in both farmhouse and formal traditional spaces.
    • Exposed original brick, where it exists, adds a texture that can’t be replicated and gives the kitchen a sense of place that new construction rarely achieves.
    • Hand-painted tiles behind the range or as a backsplash border bring a level of craft detail that sets a kitchen apart without covering every surface in pattern.
    • Unlacquered brass fixtures develop a patina that reads as intentional rather than worn, a material decision that improves with time.

    When you pick one of these as the room’s texture anchor and keep the rest quiet, the feature earns its place. When you use several at once, they compete, and the room loses its clarity.

    Why Execution Determines Whether a Classic Kitchen Holds Up

    Even the best kitchen plan falls flat if the execution doesn’t stay true to the original intent. This is where things most often go sideways, in the distance between concept and finished result.

    From Drawings to Built-In Precision

    Design drawings for a classic kitchen are more than a floor plan. They include elevations for every wall, section details for molding profiles, and joinery details for corners and transitions. These documents are the blueprint the fabricator works from, and their precision determines whether the finished kitchen matches the design or approximates it.

    When design and fabrication teams work separately, those details get compressed in translation. A profile gets simplified. A drawing gets misread. The kitchen might look right at first glance, but over time the small departures accumulate, and the room loses the character it was designed to have.

    How Custom Millwork Protects Intended Proportions

    Custom cabinetry built to the room’s exact measurements lets the designer control rail widths, stile proportions, and cornice depth from the start. These aren’t decorative preferences. They define how the kitchen reads. 

    A cornice that’s undersized by two inches looks like an afterthought. A door stile that runs too wide makes the whole cabinet feel heavy. Getting these right means the fabricator works from the same intent as the original drawing, not an interpretation of it.

    When design and fabrication happen together, the designer can walk the shop floor and confirm a profile against the drawing before it’s cut for the full run. That’s how proportions stay intact from the sketch through the installation. This is where residential interior design at the full-service level actually earns its scope.

    What to Look For in a Full-Service Renovation Partner

    If you’re evaluating firms for a classic kitchen renovation, these are the questions worth asking:

    • Do they produce detailed elevations and section drawings, or just a floor plan?
    • Who actually builds the cabinetry, and how is design intent communicated to them?
    • Can they show you finished kitchens where the molding profiles and joinery match the original drawings?
    • How are materials, appliances, and lead times coordinated within a single schedule?
    • What’s their process when something unexpected comes up during the build?

    A team that handles design, procurement, and fabrication together can answer these specifically. When multiple outside vendors are involved, the answers tend to get vague, and you’ll often see that in the finished space.

    From Vision to a Real Kitchen Project

    Getting from a strong design idea to an actual project means resolving the key variables before anyone orders materials or breaks ground.

    Decisions That Need to Be Settled Before Design Locks In

    The design phase is where the project’s major variables get resolved. Moving a plumbing line after construction starts is expensive. Raising a ceiling or removing a wall after framing costs more still. The time to make those decisions is during design, while the drawings can still absorb them.

    Before the design locks in, be clear on:

    • Does the current layout work, or does the flow need to change?
    • Is the ceiling height right for the cabinets you want, or does it need to be raised?
    • Which appliances are staying and which are new? Their dimensions affect everything in the cabinet drawings.
    • How does natural light shift across the room, and how does that shape the palette?
    • What’s the actual budget for cabinetry, stone, appliances, and labor, and how is it distributed?

    Resolving these before signing a design contract prevents the mid-project changes that compress the design and add cost.

    When Custom Fabrication Changes the Result

    Stock and semi-custom cabinets can approximate a classic aesthetic for less upfront, but the limits show in the details. Rail widths, stile proportions, and finish options are constrained by what’s available, not what the design calls for. If the proportions are what you care about, those constraints matter.

    Custom fabrication built directly from the design drawings lets cabinets fit the room exactly, get the profiles right, and integrate storage that actually serves how you use the kitchen. The difference in quality is visible. A kitchen built to its own intent keeps its character for decades. It doesn’t settle into looking like a compromise.

    The Right First Step for Chicago Homeowners

    If you’re thinking about a classic kitchen renovation in Chicago, the best place to start is with the design conversation, before selecting materials, appliances, or finishes. All of those decisions need to live inside a coherent design framework to produce a kitchen that holds together.

    Threshold Design Lab brings three decades of experience in design, remodeling, and in-house fabrication to projects like these. 

    Their full-service process connects design intent to fabrication precision: the combination that gives a kitchen its proportions and keeps them through installation. Ready to talk about your kitchen? Start the conversation with Threshold Design Lab.

    Frequently Asked Questions

    How Do You Turn a Client’s Vision Into a Timeless Kitchen Plan With Precise Elevations and Joinery Details?

    It starts with a deep listening phase, really understanding the space, the look you want, and what you need day to day. From there, space plans, detailed elevations, and section drawings lay out every detail before anything gets built.

    Which Cabinet Door Profiles, Moldings, and Hardware Feel Traditional but Not Heavy?

    Inset shaker doors with three-quarter-inch rails and stiles, a simple cove cornice scaled to the ceiling, and cup or bin pulls in unlacquered brass or brushed nickel keep things classic without feeling overdone. The key is matching each element’s scale to the room, not selecting profiles in isolation.

    What Countertop, Backsplash, and Floor Materials Hold Up Well and Still Look Great Over Time?

    Honed marble or natural stone countertops, a three-by-six subway tile backsplash with sanded grout, and either stone or hardwood floors are time-tested combinations for classic kitchens. They age with care and develop a patina that synthetic materials can’t replicate.

    How Do You Balance Modern Appliances With a Period-Aware Layout and Panels?

    Panel-ready appliances let cabinetry flow across the fridge and dishwasher, keeping the room’s symmetry intact. Appliance specs get sorted during design, so all the rough-ins, panel depths, and clearances are set in the cabinet drawings before anything is built.

    What Lighting Plan Supports Both Tasks and a Classic Atmosphere, Day and Night?

    Layered lighting works best: recessed task lights over work zones, under-cabinet strips on the counters, pendants over the island, and a central fixture for overall glow. Dimmers on every circuit let you shift the room from practical and bright to relaxed and warm.

    What’s the Process and Typical Timeline From Site Survey to Custom Millwork Installation?

    The project moves through design and planning, then procurement, then build and installation. A measured site survey starts the design, and those drawings set the fabrication schedule. From contract to install, expect four to six months for a full kitchen with custom cabinetry, depending on lead times and complexity.

    WordsCharactersReading time
  • Commercial Millwork Chicago: What Prevents Costly Build-Out Gaps?

    Commercial Millwork Chicago: What Prevents Costly Build-Out Gaps?

    Here’s what most build-out guides don’t mention: the most expensive mistakes in commercial millwork don’t happen in the shop. They happen in the handoff. The moment design intent leaves one team and enters another is where most costly delays originate, and in Chicago commercial projects, that moment is more common than it should be.

    Maybe the reception desk looked perfect on paper but arrived too small. A panel system didn’t fit because no one accounted for a structural column. A retail fixture fit the floor plan but completely missed the electrical rough-in. These problems aren’t rare. The root cause is almost always the same: a breakdown in communication between the designer, fabricator, and installer.

    Commercial millwork sits at the center of these problems. It covers nearly every visible surface in a business, from conference room walls to back-of-house storage, and precision matters at every step. This guide covers what commercial millwork in Chicago actually includes, why bespoke fabrication changes the outcome, and what a disciplined process looks like from first meeting to final fit.

    What Commercial Millwork Covers in Real Chicago Build-Outs

    Commercial millwork is more than cabinetry. Understanding its actual scope is the first step to a realistic project plan.

    Reception Desks, Feature Walls, and Built-In Brand Elements

    These pieces are the first things clients and guests see, and they signal your brand before anyone says a word. A reception desk isn’t just furniture; it’s a millwork system that needs to integrate electrical, lighting, and signage while meeting ADA requirements and daily operational demands.

    Feature walls in River North or West Loop spaces often combine painted MDF, natural veneers, and LED lighting. Each material responds differently to Chicago’s winter heating cycles, so a skilled fabricator plans for wood movement, panel expansion, and finish adhesion under real conditions.

    Custom Cabinetry, Custom Casework, and Back-of-House Storage

    Cabinetry in commercial spaces faces demands that residential work doesn’t. Healthcare waiting rooms, law firm libraries, and hotel service corridors need casework built to load ratings, durability standards, and accessibility requirements.

    Back-of-house storage is where poor planning stings most. When casework is templated from standard dimensions rather than actual field measurements, you get gaps at walls, corners, and around mechanical chases that only expensive site carpentry can resolve. Accurate site documentation is not optional.

    Retail Fixtures, Workstations, and Hospitality Installations

    Retail spaces in Wicker Park or the Gold Coast rely on custom fixtures to display product, guide traffic, and reinforce brand identity. Off-the-shelf systems rarely accommodate the ceiling heights, floor finishes, or column layouts typical in Chicago’s older buildings.

    Open-plan office workstations need to handle acoustics, cable management, and sustained use. Hospitality bar millwork must resist moisture and daily cleaning. Each category demands fabrication decisions made during design, not solved on site.

    Millwork Category Key Functional Demands Common Chicago Contexts
    Reception Desks ADA compliance, electrical integration Law firms, medical offices, hotels
    Feature Walls Material stability, finish durability Corporate lobbies, hospitality venues
    Custom Casework Load ratings, dimensional precision Healthcare, retail, back-of-house
    Retail Fixtures Brand alignment, spatial flow Wicker Park, Gold Coast storefronts
    Workstations Cable management, acoustics Open-plan Loop offices
    Hospitality Bars Moisture resistance, finish longevity River North restaurants and bars


    That level of specificity is exactly why the choice of fabrication partner matters as much as the choice of designer.

    Why Bespoke Fabrication Matters More Than Off-the-Shelf Solutions

    Bespoke fabrication isn’t a premium add-on for commercial build-outs. In many Chicago projects, it’s the only path to something that truly fits the space, performs under daily use, and still looks right after years of wear.

    Brand Identity, Spatial Fit, and Functional Performance

    Off-the-shelf millwork is built to fit as many spaces as possible, which means it rarely fits any particular one perfectly. 

    In commercial settings, those small imperfections accumulate. A gap at a wall becomes a visible shadow line. A standard cabinet in a narrow corridor creates a clearance problem. A prefab reception desk on a sloped floor requires shims that everyone notices.

    Bespoke fabrication begins with your actual field conditions: your ceiling height, your floor, your brand standards. The result feels considered because it was built for your space, not adapted from a product catalog.

    Architectural Millwork as a Structural and Operational Asset

    Architectural millwork does more than look good. In many commercial interiors, it serves as a load-bearing or organizing element that shapes how the space functions. Built-in shelves anchored to structural walls eliminate freestanding furniture that migrates and creates clutter.

    Conference room millwork that integrates AV panels, power, and acoustic treatment into one system performs better than products sourced from separate vendors. 

    Industry standards established by organizations like the Architectural Woodwork Institute govern how panels get anchored, how joints get reinforced, and how assemblies handle material movement over time. Those standards matter if you want millwork that holds up under commercial use.

    Where Woodwork and Custom Furniture Add Long-Term Value

    Solid woodwork and custom furniture in commercial spaces retain their value far longer than prefabricated alternatives. A well-built white oak conference table or a veneer-paneled wall system can outlast several cycles of commercial furniture rentals because it was designed for the space, not for a price point.

    Material choices made during design determine long-term performance. Quartersawn veneers stay more dimensionally stable than flatsawn in environments with significant humidity swings. 

    Catalyzed lacquer finishes on high-touch surfaces resist wear better than waterborne alternatives over time. These decisions need to happen before fabrication starts, which is why design and fabrication can’t be treated as separate, sequential steps.

    The Biggest Risk: Losing Design Intent Between Teams

    The real risk in any commercial millwork project isn’t budget or schedule alone. It’s losing the original design intent as the work moves from one team to another.

    How Gaps Form Between Designers, Fabricators, and Installers

    A designer creates a concept with specific proportions and finishes. A fabricator interprets those drawings using their shop’s standard practices and available materials. The piece arrives on site, and the installer has to adapt it to field conditions that no one communicated upstream. At every handoff, something gets lost.

    Sometimes those losses are minor. But they’re always visible. A clean reveal becomes a butt joint because the shop doesn’t run that profile. 

    A finish color shifts because the original product was back-ordered and someone made a substitution without design review. A panel height gets adjusted to clear a beam, but the drawing never gets updated, so the next piece is built to the wrong spec.

    Why Shop Drawings and Field Coordination Protect the Outcome

    Shop drawings bridge the gap between design intent and fabrication reality. They show how each piece gets built: every joint, thickness, hardware position, and finish specification. When designers review and approve these drawings before fabrication starts, most surprises get caught early.

    Precise shop drawing coordination is increasingly recognized as the step most likely to prevent costly field conflicts in commercial millwork. Field coordination keeps that process alive through installation. 

    When an installer encounters something unexpected, they need a direct line to the designer and fabricator to resolve it on the spot, not days later over email.

    Working Smoothly With Architects and General Contractors

    Commercial millwork fabricators work as part of a larger team that typically includes an architect, a general contractor, and several trade subcontractors. Millwork intersects with electrical, drywall, flooring, and sometimes plumbing. 

    When these trades don’t coordinate, field conflicts follow. A fabricator experienced in this environment knows how to submit shop drawings on the GC’s schedule. 

    They also plan fabrication to align with construction sequencing and communicate clearly about where their scope begins and ends. That coordination is as much about relationships and process as it is about technical skill.

    What a Disciplined Millwork Process Looks Like

    A solid millwork process follows a clear sequence. Every phase has specific deliverables that prevent the communication gaps that derail projects.

    Listening, Scope Definition, and Early Planning Deliverables

    A good commercial millwork project starts with listening: not just to what the space should look like, but how it will be used, who will use it, and what standards it needs to meet. A hospitality bar and a corporate reception desk have different functional demands, and scope definition should reflect that.

    Early planning includes space plans, elevations, and a detailed budget. Elevations matter because they show each millwork piece in proportion to the room, which is where scale issues and coordination conflicts become visible before fabrication starts. A detailed budget lets you make informed material and complexity decisions before anyone is committed to production.

    Procurement, Scheduling, and Material Coordination

    Once design is approved, procurement begins. This means ordering custom materials, confirming hardware vendors, and establishing a fabrication schedule that aligns with the broader construction timeline. 

    Lead times for custom casework and panels typically run six to twelve weeks, depending on materials and shop workload. Material coordination is where projects quietly lose time. 

    If the veneer specified has a twelve-week lead time but the GC’s schedule allows eight, catching that during procurement avoids weeks of delay. A disciplined procurement phase maps every material’s lead time against the construction schedule and identifies conflicts before they become emergencies.

    Execution, Site Oversight, and Final Fit

    Fabrication quality matters, but site oversight is what preserves that quality through installation. Someone needs to be on site when millwork arrives, verifying that every piece matches the approved shop drawings and that field conditions are as expected before installation begins.

    The custom millwork fabrication process works on this principle: when the same team designs and fabricates the millwork, the person overseeing installation understands every decision behind each piece. Final fit involves scribing panels to uneven walls, adjusting hardware, and working through punch list items before handing over the space.

    How to Evaluate a Chicago Partner for Complex Commercial Work

    Finding the right fabrication partner for a Chicago build-out means asking about process, not just reviewing a portfolio.

    What to Look for in a Portfolio

    A strong commercial millwork portfolio shows a range of project types and challenges, not just beauty shots from ideal conditions. 

    Look for projects completed in occupied buildings, which require more careful planning than new construction. Pay attention to close-up photos of joinery, finish quality, and reveals. That’s where real fabrication quality shows.

    Ask whether the same team handled design and fabrication, or whether fabrication was outsourced. The answer reveals how much accountability runs through the whole project.

    Questions About Fabrication Control, Timelines, and Accountability

    • Does the firm produce shop drawings internally or outsource that step?
    • Who reviews and approves shop drawings before fabrication starts?
    • What’s the current lead time for your project type, and what factors could affect it?
    • How do they handle field measurement discrepancies when something doesn’t match the drawings?
    • Who is your single point of contact through both fabrication and installation?
    • What quality checks happen before anything leaves the shop?

    When an Integrated Design-and-Build Model Makes Sense

    An integrated design-and-build model is most valuable when your millwork needs to coordinate across several trades, when the design intent is specific enough that substitutions would be visible, or when the schedule doesn’t allow for drawn-out back-and-forth between separate teams.

    For commercial projects in older Chicago buildings with irregular dimensions, column layouts, or historic finishes, an integrated model isn’t a luxury. It’s often the only way to hold design intent through a complex build. The full-service commercial interior design approach at firms with in-house fabrication keeps design and fabrication decisions in the same conversation, so nothing gets interpreted away.

    From Concept to Installed Finish

    An integrated approach reduces risk at every phase because fewer handoffs mean fewer chances for intent to get lost.

    Why Integrated Design, Fabrication, and Installation Reduce Risk

    When the designer, fabricator, and installation crew share the same project context, decisions made during design make it to the shop floor and onto the site. If a detail needs to change during fabrication, the designer knows immediately. Material substitutions go through design review before they reach the finished piece, not after.

    This structure also clarifies accountability. When one firm manages design, fabrication, and installation, there is no question about who is responsible when a field conflict arises. That clarity keeps projects moving and removes the disputes that stall multi-vendor jobs.

    • Fewer handoffs mean fewer chances for misinterpretation
    • Shared project context prevents unauthorized substitutions
    • Unified accountability stops disputes between teams
    • Real-time decision-making during installation prevents costly rework
    • Consistent standards apply from shop to site

    A Practical Next Step for Chicago Offices, Retail, and Hospitality Projects

    If you’re looking for a fabrication partner for a Loop office, a Wicker Park retail space, or a River North hospitality project, the questions that matter most are about process: who produces shop drawings, who is on site at installation, and who is accountable when something doesn’t fit.

    Threshold Design Lab brings design, fabrication through TDL Custom, and installation oversight together under one process. From the first conversation through punch list, each phase produces specific deliverables that keep design intent intact and your schedule on track.

    Frequently Asked Questions

    How Does the Process Move From an Initial Site Walk-Through to Shop Drawings and Final Installation?

    A site walk-through documents field conditions: dimensions, structural elements, and trade rough-ins that affect fabrication. That information shapes the design drawings, which become shop drawings showing how each piece will be built. Shop drawings are reviewed and approved before fabrication starts. Installation is scheduled to align with the broader construction sequence.

    What Details Should Be Included in an Architectural Millwork Bid Package to Ensure Precision and Clean Coordination?

    A solid bid package includes dimensioned floor plans and elevations, material and finish specifications, hardware schedules, shop drawing requirements, and a clear scope boundary between millwork and adjacent trades. The more specific the package, the more accurate and comparable the bids you receive.

    Which Material and Finish Options Hold Up Best in High-Traffic Commercial Interiors While Staying Visually Resonant?

    Quartersawn hardwood veneers, solid wood edge banding, and catalyzed lacquer or conversion varnish finishes handle commercial use well. On high-touch surfaces like reception desks and workstation tops, high-pressure laminate over a solid substrate offers durability and design flexibility. Consider the specific humidity and temperature patterns of the Chicago building when selecting materials.

    What Lead Times Are Typical for Bespoke Casework, Reception Desks, and Built-Ins, and What Drives Schedule Risk?

    Lead times for custom commercial millwork typically run six to twelve weeks from approved shop drawings to delivery. The primary schedule risks are material backorders, delayed shop drawing approvals, and field conditions that differ from what was assumed during fabrication. Identifying these risks during procurement rather than at installation is what keeps projects on track.

    How Are Tolerances, Field Measurements, and Trade Coordination Managed to Deliver a Precise Fit on Site?

    Teams take precise field measurements, ideally with laser tools, before fabrication starts and verify them against the design drawings. Fabricators build scribing tolerances into dimensions for panels that need to fit against uneven walls or floors. Coordination with other trades means confirming that electrical, mechanical, and framing rough-ins are complete and match the millwork drawings before delivery.

    What Certifications, Insurance, and Quality-Control Deliverables Should Be Expected From a Commercial Millwork Fabricator?

    You should receive proof of general liability insurance, workers’ compensation coverage, and a certificate of insurance naming your project as an additional insured. Quality-control deliverables typically include shop drawing approval records, material certifications for fire-rated or low-VOC products when required, and a punch list process at installation. The Architectural Woodwork Institute publishes industry quality benchmarks that reputable fabricators use as a standard for commercial work.