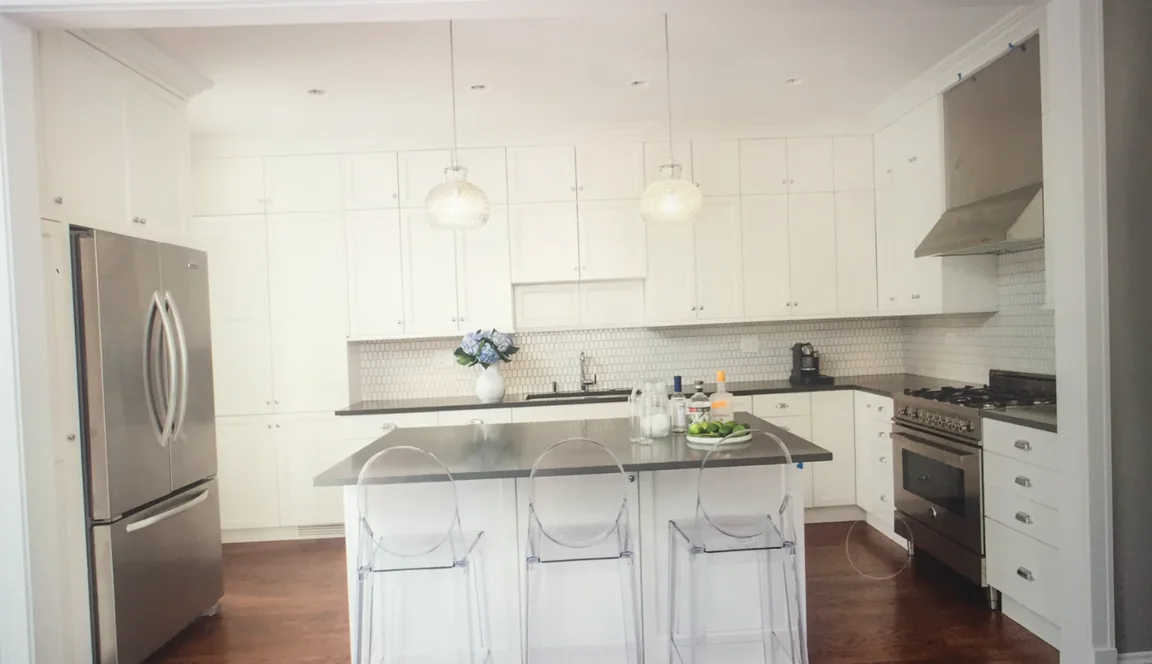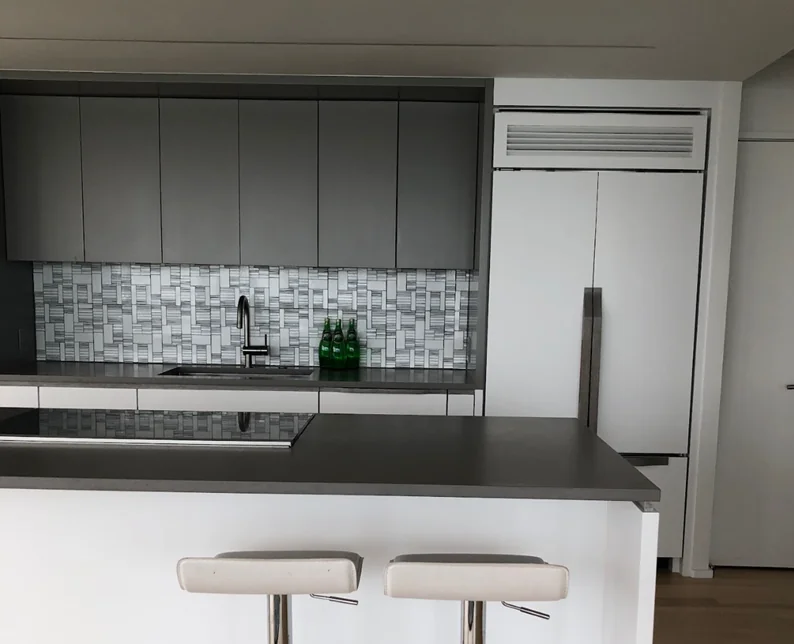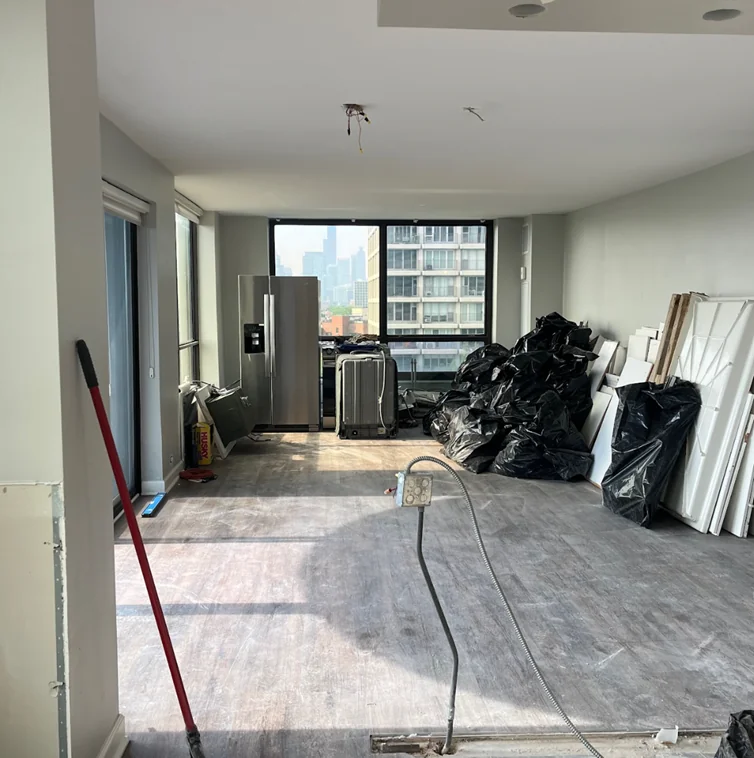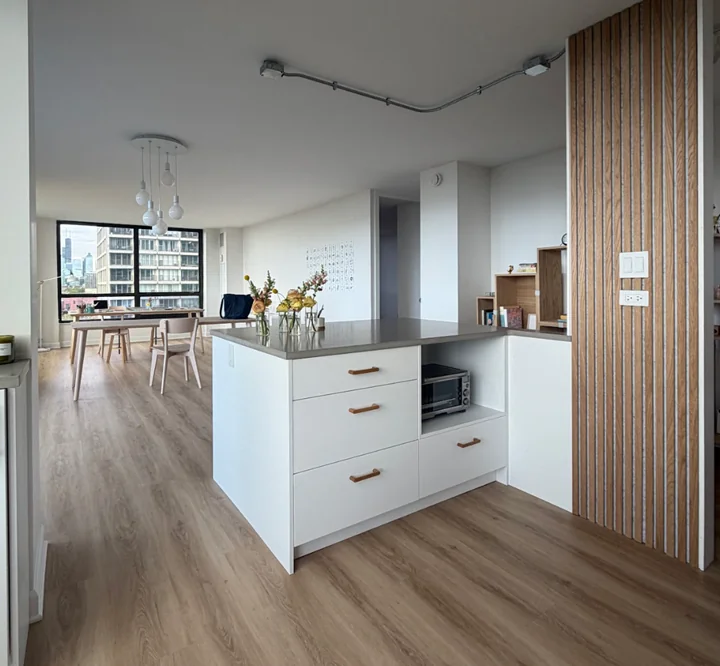
Author: Paul Schulman

  • Design and Build Interior Design Firm: Closing the Translation Gap

    Design and Build Interior Design Firm: Closing the Translation Gap

    You have a drawing set you like, a cabinet shop that quoted the work, and a contractor who says the layout will need a few adjustments once demolition starts. That is the moment most renovations start to drift. The design says one thing, the shop reads it another way, and the field solves the difference on its own schedule.

    Threshold Design Lab has worked that seam between drawing and built result in Chicago for thirty years, keeping design, project management and fabrication inside one company. A design and build interior design firm carries the intent all the way to installation, which means nobody downstream has to guess what a drawing meant.

    Whether that structure is worth paying for depends almost entirely on how complex your project is, so the sections below follow a renovation through its real decision points: space plans and elevations, then procurement, then the install. Read them, and you will know which drawings to ask a firm for, and which single question tends to reveal whether a team can build what it draws.

    What an Integrated Project Model Changes

    An integrated model changes who is responsible when a detail does not work. One team owns the drawing, the shop ticket, and the installation, so there is no seam to argue across.

    The American Institute of Architects (AIA) describes integrated project delivery as a process that unites people, systems, and practices to reduce waste through all phases of design, fabrication, and construction. That description maps closely to how a design-build studio works on interiors.

    What the Firm Actually Takes Responsibility For

    The firm handles design and execution as one contract. Interior designers develop the layout and material palette, then the same organization manages procurement, subcontractors, and the build.

    Scope usually spans single-room updates through ground-up construction support, including architectural design coordination, itemized budgeting, and project management from blueprint to final accessories. Residential and commercial work follow the same spine, with different code and schedule pressures layered on top.

    Where Separate Design and Fabrication Teams Create Risk

    Risk shows up in the handoff. A designer draws a 36-inch base run with an integrated appliance panel; the fabricator quotes a standard 36-inch box; the appliance needs 36 1/8 inches with its hinge clearance. Nobody is wrong, and the counter still does not fit.

    Separate teams also price separately, which means changes get absorbed by whoever discovers them last. That is often the installer, on site, with the slab already templated.

    Why a Listening-First Brief Sets the Right Scope

    Scope gets set correctly when the brief captures how you use the room, not only how you want it to look. Ask how often two people cook at once, where mail lands, whether the island doubles as homework space.

    That intake produces the constraints the drawings have to satisfy. Those constraints then have to survive translation into buildable documents, which is where deliverables matter.

    From Design Intent to Buildable Details

    Design intent becomes buildable through three deliverables: space plans, elevations, and material selections. Each one resolves a different class of problem before anyone orders anything.

    Using Space Plans to Resolve Flow and Function

    Space plans settle circulation and clearances. They confirm aisle widths, appliance door swings, seating depth at an island, and whether a 42-inch walkway survives once the refrigerator panel is added.

    For residential interior design, the plan is also where storage gets assigned by function: sheet pans near the ovens, everyday dishes within one step of the dishwasher.

    How Elevations Protect Proportion and Alignment

    Elevations control what you see at eye level. They fix upper cabinet heights against window trim, align the hood centerline with the range and the light above it, and set reveal dimensions where cabinetry meets wall.

    They also expose conflicts early. A soffit that reads as harmless in plan becomes an obvious problem in elevation, three weeks before framing.

    Material Selections That Account for Real-World Performance

    Selections carry performance data, not just color. A short list worth documenting:

    • Slab thickness, edge profile, and seam locations
    • Cabinet box material and door construction method
    • Finish durability for high-traffic surfaces
    • Hardware weight ratings for heavy drawers
    • Lead time and any minimum order quantity

    Those specifications feed straight into shop drawings, which is where fabrication either honors the design or rewrites it without telling anyone.

    How Integrated Fabrication Reduces Coordination Risk

    Keeping fabrication inside the firm removes the interpretation step entirely. Shop drawings come from the same team that drew the elevations, so intent and tolerance travel together.

    Custom Millwork as a Test of Design-to-Build Precision

    Millwork is the strictest test of a design-build process because it has almost no tolerance for error. A run of built-ins in a plaster-walled vintage Chicago condo may face walls that are out of plumb by half an inch top to bottom.

    Scribe strips, filler dimensions, and reveal decisions have to be made deliberately in the drawing, then verified against field measurements taken after demolition.

    How TDL Custom Connects Drawings, Shop Work, and Installation

    TDL Custom is the fabrication arm, producing bespoke kitchen systems and full office build-outs. Because the shop reads the design team’s own custom millwork documents, questions get answered in a phone call, not a request for information.

    That continuity matters for commercial millwork in Chicago too, where a reception desk has to land on a date the lease already fixed.

    Managing Changes Before They Reach the Job Site

    Changes cost the least in the shop. When a client wants deeper drawers after cut lists are issued, an in-house team can price and reschedule the change before material is milled.

    Once a change reaches installation, it touches the schedule for every trade that follows, which is why procurement sequencing carries so much weight.

    Coordinating Procurement, Construction, and Installation

    Procurement and construction have to be scheduled against each other, not managed in parallel. The schedule is built backward from installation dates.

    Building a Procurement Schedule Around Lead Times

    Lead times drive the order of decisions. Anything long-lead gets specified first, even when its aesthetic role feels minor.

    Typical order of commitment:

    • Appliances and plumbing fixtures (rough-in dimensions govern framing)
    • Custom cabinetry and millwork
    • Stone and tile
    • Lighting fixtures requiring specific junction box locations
    • Furnishings and accessories

    Aligning Vendors, Subcontractors, and Site Conditions

    Site conditions decide when material can land. A high-rise install needs elevator reservations and loading dock windows; a courtyard building may need a stair carry that limits panel size.

    Field verification after demolition confirms whether the drawn dimensions still hold. On commercial projects, that verification runs alongside inspections and occupancy sign-offs, which compresses the window it can happen in.

    Keeping Furnishings, Lighting, and Finishes Cohesive

    Cohesion comes from specifying furnishings, lighting, and finishes as one package with shared color temperature and metal finish standards. A 2700K lamp and a 3500K lamp in the same room will make matched woods look mismatched.

    Getting that alignment consistently depends on who you hire, which brings the evaluation criteria into focus.

    How to Evaluate the Right Partner for a Complex Project

    Evaluate a firm by the documents it produces and the accountability it accepts. Both are visible before you sign anything.

    Questions to Ask About Drawings, Budgets, and Accountability

    Ask to see a full deliverable set from a completed project: space plans, elevations, an itemized budget, and a material schedule. Ask who signs the shop drawings and who pays when a dimension is wrong.

    Ask whether the full-service interior design fee includes construction administration, or whether site visits are billed separately.

    When Full-Service Interior Design Is Worth the Added Coordination

    Full service earns its cost on projects with many dependent trades: a gut kitchen, a whole-floor remodel, a build-out with a lease-driven opening date. It also earns it when interior styling and art curation need to arrive with the same rigor as the cabinetry.

    Smaller single-room refreshes rarely need that machinery, and paying for it anyway is a waste. When the structure stays put, and the materials are stock, a tightly scoped engagement is the better buy.

    What Chicago Renovations and Build-Outs Require From the Team

    Chicago work brings specific constraints: shared risers in high-rise condos, plaster and knob-and-tube conditions in vintage two-flats, permit timelines, and association rules on work hours. A team that has run custom cabinets in Chicago through those buildings already knows which questions to ask the property manager.

    That local fluency is what turns a good drawing set into a finished room.

    A More Certain Path From Vision to Finished Space

    The practical takeaway is straightforward: the fewer handoffs between design intent and installed work, the fewer surprises you absorb. Space plans, elevations, itemized budgets, and shop drawings produced by one accountable team leave less room for interpretation, and interpretation is where budgets move.

    If you are weighing whether integrated delivery fits your project, the deciding factor is complexity. Dependent trades, custom fabrication, and a fixed completion date all favor a single team carrying the work through. Absent those, it is honestly overkill.

    If your project does sit on the complex side, the conversation worth having is about the drawings, the budget, and the date, in that order. That is where Threshold Design Lab starts. Call (773) 433-0042, email paul@thresholddesignlab.com, or start a project conversation.

    Frequently Asked Questions

    What Does a Design and Build Interior Design Firm Do?

    It handles design and construction under one contract, from space planning and material selection through procurement, project management, and installation. The same team that draws the details is accountable for building them.

    How Much Does a Design-Build Firm Cost?

    Fees vary by scope and are usually quoted per project, so published flat rates are rare and rarely comparable. Expect an itemized budget during the design phase that separates design fees, construction costs, millwork, and furnishings.

    Is a Design-Build Firm Better Than Hiring an Interior Designer and Contractor Separately?

    For complex renovations with custom fabrication, integrated delivery removes the handoff where drawings get reinterpreted. Separate hires work well on simpler projects with stock materials and no structural changes.

    Can a Design-Build Firm Handle Custom Millwork and Furnishings?

    Firms with in-house fabrication produce cabinetry, built-ins, and casework directly from their own drawings. Custom fabrication in Chicago also covers furnishings procurement, lighting, and accessories as part of the same package.

    How Does a Design-Build Team Keep a Renovation on Schedule?

    Project management builds the schedule backward from installation, ordering long-lead items first and field-verifying dimensions after demolition. Changes get priced in the shop before they reach the job site.

    What Should I Bring to an Initial Design-Build Consultation?

    Bring floor plans or a survey if you have one, photos of the existing space, your budget range, and notes on how you use the room daily. Building rules and association restrictions help too.

  • Elements of Kitchen Design: Decisions to Make Before You Order

    Elements of Kitchen Design: Decisions to Make Before You Order

    Should the island seat four or hold a prep sink? Do you order the range before the cabinets, or does that sequence create a costly mistake? These are the questions a showroom is not built to answer, and they shape a kitchen remodel long before demolition starts. They are also far easier to get right on paper than in drywall.

    Professional designers work through the elements of kitchen design in a deliberate order: layout first, then cabinetry, then surfaces, then lighting and utilities. That sequence exists because each choice constrains the next. A refrigerator moved eighteen inches changes the counter run, which changes the cabinet sizes, which changes the outlet plan. Working out of order is how homeowners end up with a beautiful kitchen space that feels wrong to cook in.

    What follows is that sequence, in the order a designer actually works it, so you can hold your own kitchen to the same discipline. The point is to reach your first design meeting able to read a space plan, question an elevation, and ask about clearances, appliance specifications, and material selections without taking anyone’s word for it.

    Start With Layout, Workflow, and Circulation

    Layout comes first because everything else attaches to it. Until the positions of the stove, refrigerator, kitchen sink, and dishwasher are settled, no cabinet, countertop, or light fixture can be specified with any confidence.

    A space plan is the deliverable that locks this down. It shows walls, door swings, window openings, appliance footprints, and clearances at scale. Good practice keeps the plan honest about what the room can hold, including the mechanical realities of Chicago’s older two-flats and greystones where soil stacks and chimney chases refuse to move.

    Which Elements of Kitchen Design Should Be Planned First?

    Plumbing and gas locations, structural walls, and window positions come first because they are the most expensive to change. Then appliance placement, then circulation paths, then counter space.

    Once those fixed points are mapped, you can test three or four layout options against the same footprint. Each one gets measured for walkway width, counter runs, and door conflicts before any of them earns a material palette.

    Build Practical Zones Around Daily Tasks

    Zones organize a kitchen around what happens in it. Four of them cover most of what the room has to do:

    • Cooking zone: range or cooktop, landing space on both sides, spice and oil storage within arm’s reach
    • Preparation zone: the longest uninterrupted counter run, ideally between sink and cooktop
    • Cleaning zone: sink, dishwasher, trash pull-out, and drying space grouped tightly
    • Storage and staging: refrigerator, pantry, and the counter that receives groceries

    Counter space allocations follow the zones. The NKBA planning guidelines call for a landing area of at least 24 inches on one side of the primary sink and 18 on the other, with 12 inches on one side of the cooking surface and 15 on the other.

    Use the Work Triangle Without Forcing It

    The kitchen work triangle connects sink, refrigerator, and cooking surface. The NKBA guideline is that the three legs of that triangle total no more than 26 feet, with no traffic path cutting through the middle.

    Treat the work triangle as a diagnostic rather than a rule. In a long open-plan kitchen with two cooks, zone-based planning often outperforms it. The triangle still catches obvious errors, like a refrigerator stranded across a walkway from every prep surface.

    Choose a Layout That Protects Traffic Flow

    An L-shaped kitchen with an island can work well in many Chicago floor plans, because it keeps two work walls intact and pushes household traffic to the perimeter. Galley layouts work in narrow footprints when both ends stay open.

    Allow 36 inches of clearance on all sides of a kitchen island, and 42 to 48 inches where two people pass regularly. If the island carries a breakfast bar at standard 36-inch counter height, plan a 12-inch overhang for knees. With circulation settled, the cabinet plan can be built to fill it.

    Design Cabinetry and Storage Around Real Use

    Cabinetry gets designed from the inside out. You count what the kitchen has to hold, then build the boxes around that inventory, and the elevations follow.

    This is the step homeowners skip most often. Ordering kitchen cabinets from a catalog before inventorying contents produces a kitchen that looks resolved and functions poorly, with a pantry that cannot fit cereal boxes upright.

    Inventory the Parts of a Kitchen Before Designing Storage

    Walk your current kitchen and list what lives in it: stockpots, sheet pans, small appliances, recycling, table linens, dog food. Note what sits on the counter because it has no home. Those items become storage requirements on the plan.

    Kitchen components each need a dimension, not a category. A stand mixer needs 17 inches of clear height in a deep drawer or a lift shelf. Sheet pans need vertical dividers at roughly 2-inch spacing. Those numbers drive cabinet widths and interior fittings.

    Choose Cabinet Configurations That Improve Reach and Access

    Deep drawers outperform base cabinet doors for almost everything heavy. A 24-inch-deep drawer brings the back contents to you; a door and fixed shelf make you kneel and reach.

    Configurations worth specifying by name on your drawings:

    • Deep drawers in 30-inch and 36-inch widths for cookware and dishes
    • Lazy Susan or corner pull-out to recover blind corner volume
    • Tray dividers above the wall oven or beside the cooktop
    • Toe-kick drawers for flat items in small kitchens
    • Open shelving limited to one wall, for items used daily

    Interior inserts belong in the drawing set, not the punch list. Deciding them late means retrofitting hardware into boxes that were not bored for it.

    Coordinate Cabinetry With Appliance and Island Dimensions

    Integrated appliances require the cabinet plan and the appliance spec sheet to agree to the sixteenth of an inch. Panel-ready refrigerators publish exact panel sizes, hinge clearances, and reveal requirements, and those numbers belong on your elevations before fabrication begins.

    This is where in-house millwork changes the outcome. When the same team draws the elevations and builds the boxes, a shop drawing question about a 3/8-inch reveal gets answered in a day rather than passing through three parties and returning as a change order. That matters most on islands, banquettes, and full-height runs, where a small discrepancy repeats across every unit. Custom millwork fabrication is where those details either hold or drift.

    With boxes and appliances coordinated, the surfaces that cover them can be selected against known dimensions.

    Select Surfaces, Finishes, and Details That Belong Together

    Surfaces are chosen as a system, not one at a time. Countertops, backsplashes, and flooring share a room and read together under the same light, so they are specified as a single material selection package.

    Bring physical samples into the actual kitchen space and view them at different hours. A quartz that looks warm under showroom halogen can turn gray under north light in a Chicago winter.

    Compare Countertop Materials for Wear, Maintenance, and Visual Weight

    Quartz resists staining and needs no sealing, which suits families who cook daily. Natural stone like marble etches with lemon and wine but develops a patina many clients prefer. Butcher block invites knife work and requires oiling.

    Visual weight is the second criterion. A 3-centimeter slab with a mitered edge reads heavy and architectural; a 2-centimeter eased edge reads light. The NKBA guidelines put total countertop frontage at 158 inches, 24 inches deep, which is worth knowing before you fall for a slab: it sets both the cost and how much of the room a busy veining pattern is going to occupy.

    Make the Backsplash and Flooring Work as a Material System

    Pick the countertop first, then the backsplash, then the flooring. Ceramic tile in a simple field keeps a heavily veined stone from competing with itself. Luxury vinyl plank and luxury vinyl tile hold up to spills and dropped cast iron, and they tolerate Chicago basements and slab conditions where hardwood struggles.

    Grout color is a design decision, not a jobsite one. Matching grout makes a tile field read as one plane; contrasting grout emphasizes line and pattern. Specify it on the material schedule.

    Use Color, Line, Form, and Texture With Intent

    Limit the palette to two cabinet colors and one metal finish, then let texture do the rest. Bold colors work on an island or a pantry wall where they have a boundary. Symmetry around the range or window gives the eye a place to rest.

    Texture carries a modern kitchen when the color range is narrow: rift-sawn oak against honed stone, matte paint against polished nickel. These pairings get documented on elevations so nothing is decided during installation. Once the surfaces are set, lighting and utilities determine whether they perform.

    Plan Lighting, Appliances, and Utilities Before Procurement

    Lighting and electrical planning must be resolved before cabinets are ordered, because circuits, junction boxes, and can locations depend on cabinet positions. Rough-in happens behind finished walls, and revisiting it later means cutting.

    The procurement phase is where these decisions turn into orders, schedules, and lead times. A model number changed after the plan is approved can ripple through cabinet widths, hood sizing, and the electrical schedule.

    Layer Kitchen Lighting for Work, Mood, and Visual Focus

    Layered lighting uses three sources with separate switches. Ambient lighting from recessed cans or a central fixture covers the room. Task lighting, mostly under-cabinet LED, puts light on the counter where your body would cast a shadow. Accent lighting picks out glass cabinets or a stone backsplash.

    Pendant lights over an island are placed by cabinet dimension, not guesswork: center them on the island, roughly 30 to 36 inches above the counter. Skylights help in interior kitchens with one exterior wall.

    Coordinate Appliance Specifications With the Cabinet Plan

    Order appliance spec sheets before finalizing cabinetry. Induction cooktops need specific cutout dimensions and a dedicated 240-volt circuit. Energy-efficient appliances vary in depth by two or three inches between models, which changes counter overhang.

    Range hood sizing follows the cooktop: the hood should be at least as wide as the cooking surface, with 21 to 30 inches of overhead clearance. Ducted venting to the exterior needs a run planned around joists.

    Resolve Electrical Planning, Ventilation, and Outlet Placement Early

    Outlet placement gets drawn on elevations, not decided by an electrician on site. Common items to mark: island outlets, appliance garage power, under-cabinet transformer locations, and dedicated circuits.

    Ventilation, plumbing, and electrical all appear on a mechanical plan alongside the cabinet drawings, and comparing the two catches conflicts before framing closes. Working through full-service interior design coordination keeps these trades aligned to one drawing set. That coordination is what carries a plan into construction.

    Turn Your Kitchen Vision Into a Buildable Plan

    A dream kitchen becomes buildable when every element has been decided, dimensioned, and documented before ordering begins. Layout drives cabinetry, cabinetry drives surfaces, and lighting and utilities follow the cabinet plan. Working that sequence produces space plans, elevations, an itemized budget, and material selections you can hold a contractor to.

    That documentation is also what protects your budget. Change orders come from decisions deferred, not from ambitious design. When you can point to an elevation and a spec sheet, the conversation on site is about execution.

    Threshold Design Lab has worked this sequence on Chicago kitchens for thirty years, with TDL Custom building the millwork in-house. If you are somewhere in the middle of it, with a folder of images and no space plan yet, that is the useful moment to talk: a kitchen renovation designer is most valuable before the ordering starts, not after. Start a project conversation, call (773) 433-0042, or email paul@thresholddesignlab.com.

    Frequently Asked Questions

    What Are the Essential Elements of a Kitchen Design?

    The essential elements are layout and circulation, cabinetry and storage, countertops and surfaces, lighting layers, appliances and utilities, and hardware and fixtures. Each one constrains the next, which is why designers settle them in that order. Material cohesion ties them together across all six.

    What Should Be Decided Before Ordering Kitchen Cabinets and Appliances?

    Appliance model numbers, plumbing and gas locations, and the finished space plan should all be locked before cabinets are ordered. Appliance spec sheets set cutout sizes and clearances that determine cabinet widths. Ordering out of that sequence usually means filler strips or a change order.

    How Do I Choose the Right Kitchen Layout for My Home?

    Start with what cannot move: structural walls, windows, and stacks. Then test layouts against clearance requirements, allowing 36 inches around an island and 42 inches in shared walkways. In older Chicago homes, an L-shape with an island preserves two work walls while keeping traffic on the perimeter.

    What Lighting Layers Does a Functional Kitchen Need?

    A functional kitchen needs ambient, task, and accent lighting on separate switches. Under-cabinet task lighting matters most because overhead fixtures put your shadow on the counter. Pendants over an island sit 30 to 36 inches above the surface.

    How Can I Make Kitchen Materials and Finishes Feel Cohesive?

    Select countertops first, then backsplash, then flooring, viewing samples together in the room at different times of day. Hold the palette to two cabinet colors and one metal finish. Document grout color, edge profiles, and hardware on the material schedule so nothing gets decided on site.

  • Home Office Interior Design in Chicago: Built to Work, Designed to Belong

    Home Office Interior Design in Chicago: Built to Work, Designed to Belong

    The room has to hold two monitors, a printer, files, and a camera-ready background for client calls. It also sits eight feet from a living room you spent a year getting right. Most of the advice available pushes you toward one side of that or the other: a productive room that looks like a rented cubicle, or a handsome room you cannot work in for six hours straight.

    You can have both, but home office interior design in Chicago only delivers it when space planning, layered lighting, sound control, and built-in millwork are designed together rather than bought separately. Those decisions are made early, on paper, before a single cabinet is ordered, and they are difficult to retrofit afterward.

    Each of those layers is specified differently, from desk clearances and lamp placement through to concealed power and window treatments, and what follows walks through them in the order they get decided. The practical result is knowing what to ask for in a proposal: which drawings you should be shown, what belongs on a material selection list, and how installation is supervised so the finished room matches the plan you approved.

    Plan a Home Office That Performs Like a Workplace

    A home office earns its square footage when it supports the same tasks a leased office would: focused work, recorded calls, secure file storage, and the occasional guest. That standard, set at the start, drives every later decision about layout, finish, and cabinetry.

    What Home Office Interior Design in Chicago Needs to Solve

    Good home office interior design in Chicago solves four problems at once: too little natural light in winter, street and stair noise in dense neighborhoods, older wiring that was never planned for six devices, and a shortage of closed storage. Vintage two-flats, high-rise condos, and North Shore new builds each fail differently, so the survey comes first.

    Take measurements of ceiling height, window sill height, radiator or vent locations, and existing outlet positions before choosing anything. Those numbers determine whether a full-height built-in is possible or whether a desk with an upper shelf is the smarter answer.

    Defining Focus, Collaboration, Privacy, and Client-Facing Needs

    Write down how many hours a week the room hosts each activity. A CPA taking twenty client video calls needs a controlled backdrop and a door; a writer needs a quiet corner and wall space for books.

    • Focus work: an uninterrupted desk run of at least 60 inches, back to a solid wall
    • Video calls: a camera sightline that shows shelving or paneling, never a bathroom door
    • Two-person meetings: clearance for a second chair without moving the desk
    • Records storage: locking file drawers sized for legal or letter, decided now

    Full-service interior design services turn that list into a program document, which is what a designer prices against. Sharing it honestly is where trust in the process starts.

    Establishing a Budget and Scope Before Selecting Finishes

    Set the budget before anyone shows you a wood sample. An itemized budget separates construction (electrical, drywall, paint), millwork, furniture, lighting, and window treatments, so you can see where money moves when priorities shift.

    Scope creep in an office happens through hidden work: adding circuits, patching plaster, or relocating a return vent. Naming those line items early keeps the finish selections from getting squeezed later, which matters once you start placing the desk in the room.

    Start With Space Planning and Daily Workflow

    Space planning fixes the room’s performance before any material is chosen. The desk position, door swing, and window wall together decide whether the office feels calm or cramped.

    Choosing the Right Room, Orientation, and Level of Separation

    Pick the room by acoustic separation first, then by light. A bedroom off a hallway beats a loft over a stairwell, even when the loft has better views.

    Face the desk toward the entry when clients or family come and go, so you see who arrives. A north-facing window gives steady, even light with almost no glare, which suits screen work in Lincoln Park condos and Winnetka additions alike.

    Creating Zones for Deep Work, Video Calls, Meetings, and Storage

    Divide the floor plan into zones with real dimensions. Award-winning workplace zoning uses the same logic at commercial scale, separating focus space, phone pods, video-conference rooms, and lounge areas into distinct settings rather than trusting one room to do all four jobs.

    At home, scale that down to three or four defined areas: a primary desk, a reference or printing counter, a seating spot, and closed storage. Residential interior design in Chicago works best when the zones share one continuous cabinetry line so the room still reads as one space.

    Making Compact Chicago Rooms Feel Ordered Rather Than Overfilled

    In a 9-by-11 room, depth control does the work. A 24-inch desk surface with a 12-inch upper shelf frees more floor than a 30-inch desk with a rolling cabinet.

    Run cabinetry to the ceiling, keep the lower 30 inches open for legs and a chair, and hold one wall clear. That discipline gives you room to solve comfort, sound, and light next.

    Balance Ergonomics, Acoustics, Lighting, and Technology

    These four systems are specified together because each one changes the others. A brighter lamp fixes glare only when the desk already sits at the right height and angle.

    Specify a Desk and Seating Setup for Comfortable, Sustained Work

    Set the work surface at 28 to 30 inches for a fixed desk, and confirm knee clearance of at least 24 inches deep. A sit-stand mechanism needs clearance behind the cabinetry so the top can travel, and the amount depends on the mechanism, so get it from the specification sheet before the millwork is drawn.

    Choose the chair before the desk, then match the surface height to it. Test the reach with your arms: keyboard, mouse, and phone should all fall inside the arc you can sweep without leaning forward.

    Use Layered Lighting for Screen Work, Reading, and Video Meetings

    Use three layers: ambient ceiling light on a dimmer, a task lamp beside the monitor, and a soft front light for calls. Never place a fixture directly behind the screen or directly behind your head on camera.

    For color, 3000K to 3500K lamps keep skin tones natural on video without going cold. Add dimmers on every circuit so the room works at 8 a.m. and 6 p.m.

    Control Noise and Privacy Without Making the Room Feel Institutional

    Sound control comes from mass and soft surfaces. A solid-core door with a sweep, a wool rug with pad, lined drapery, and books on open shelving cut echo noticeably.

    Inside walls, mineral wool batts and a second layer of drywall handle voices from adjacent rooms. None of that shows in the finished room.

    Integrate Power, Charging, Screens, and Cables Before Installation

    Power planning happens during design, not after. Mark every device on the elevation, then locate outlets inside cabinets and behind the monitor wall.

    • Dedicated circuit for computer equipment and a surge outlet
    • Grommets in the desktop, sized and placed on the shop drawing
    • A wire chase behind the desk panel from floor to shelf
    • Data drop plus a cabinet vent for a router or network gear

    Getting those details into the drawings is exactly what lets the office disappear into the rest of the house.

    Make the Office Feel Native to the Rest of the Home

    The office belongs when it repeats the finishes already in the home: the same paint sheen, the same door hardware, the same wood tone as the nearby stair or kitchen. Attention to detail at this level is what keeps a working room from feeling bolted on.

    Carry the Home’s Material Palette Into Built-Ins and Furniture

    Pull three references from the adjacent rooms: cabinet color, metal finish, and floor tone. Match stile and rail widths to existing doors so the profiles line up down the hall.

    Rift-sawn white oak, painted poplar with a satin finish, and brushed brass pulls all cross easily between a kitchen and an office. Consistency here costs nothing extra when it is decided during selections.

    Use Bespoke Millwork to Conceal Storage and Technology

    Built-ins hide the parts of work that break the room’s calm. A hinged panel covers the printer, a vented drawer holds network gear, and a lift-top box takes charging cords off the desk.

    This is where the design-to-fabrication handoff pays off. Elevations dimensioned to the wall, then built by the same team through in-house custom millwork, remove the guesswork that shows up as uneven reveals and doors that bind. TDL Custom builds those pieces from the approved drawings, so what is drawn is what gets installed.

    Select Window Treatments That Manage Glare and Preserve Privacy

    Pair a solar shade with a drapery panel. A 3 to 5 percent openness shade cuts glare while keeping the view; the drapery adds softness and absorbs sound.

    Mount the shade inside the jamb and the drapery rod near the ceiling to make the window read taller. Top-down bottom-up shades give street-level privacy in Old Town and Park Ridge without blocking daylight.

    Adapt Luxury Interior Design Ideas to Modern Farmhouse and Urban Homes

    In a modern farmhouse, shaker doors, a painted island-style desk, and iron hardware fit naturally. In a River North or Gold Coast unit, flat-panel oak, integrated pulls, and a stone desk return read cleaner.

    The same luxury interior design ideas apply either way: continuous grain, hidden fasteners, and integrated lighting. Turning those ideas into a built room takes documentation.

    Turn a Clear Vision Into a Buildable Office

    The drawings and schedules decide whether the finished office matches what you approved. Documentation, procurement, and installation oversight are the three places projects gain or lose accuracy.

    What Space Plans, Elevations, and Material Selections Should Show

    A space plan should show furniture at true size, clearances, door swings, and outlet locations. Elevations should show cabinet heights, drawer sizes, shelf spacing, and where every appliance or device lands.

    Material selections belong in a written list with product names, finishes, and quantities. Ask for that package before construction; comparing it to the itemized budget is how you verify scope.

    Coordinate Procurement, Lead Times, and Trades Before Work Begins

    Order long-lead items first. Custom seating and drapery hardware can arrive well after cabinetry, so the schedule sequences deliveries against trade dates.

    Electricians rough in before drywall, painters finish before millwork installs, and flooring protects last. That sequencing is ordinary project management, and it prevents the most expensive kind of rework.

    Why Installation Oversight Protects the Design Intent

    Site conditions rarely match the plan exactly. Walls run out of plumb, floors slope, and a scribe strip solves what a drawing cannot.

    Having a designer on site during install means those calls get made against the original intent by someone who knows which dimension was load-bearing for the design and which one was not.

    A Home Office Worth Returning to Each Day

    A home office works when the plan, the lighting, the sound control, and the cabinetry were designed as one set of decisions. Zones sized to real tasks, three lighting layers on dimmers, concealed power, and built-ins that repeat the home’s palette produce a room that supports long workdays and still belongs to the house.

    Moving from inspiration to a committed project starts with a conversation about how you use the room now and what is not working about it. Threshold Design Lab has been designing and building this kind of room in Chicago for thirty years, with fabrication handled in-house so the drawings and the finished piece agree.

    The most useful thing you can bring is not a mood board. It is an honest account of the six hours you spend in there. Start the conversation, call (773) 433-0042, or email paul@thresholddesignlab.com.

    Frequently Asked Questions

    What Should Be Included in a Professionally Designed Home Office?

    A complete home office includes a space plan, elevations, a lighting plan with dimmers, a power and data layout, storage sized to your files, and window treatments. Material selections should be listed by product and finish so nothing is chosen on site.

    How Much Space Do I Need for a Functional Home Office?

    There is no minimum that holds everywhere, but a single-person office tends to work from roughly 80 to 100 square feet, with a 60-inch desk run and about 36 inches of clear floor behind the chair. Add a guest chair or a second workstation and that grows. What matters more than the total is the shape: a narrow room with one good wall often outperforms a wider one with none.

    How Can I Make a Home Office Look Cohesive With the Rest of My Home?

    Repeat three existing elements: the trim profile, the cabinet color or wood tone, and the metal finish on hardware. Matching paint sheen and door style to adjacent rooms does more for cohesion than adding new decorative details.

    What Lighting Is Best for a Home Office With Video Calls?

    Use a soft, front-facing light source at eye level, ambient ceiling light on a dimmer, and a task lamp beside the monitor. Lamps in the 3000K to 3500K range keep skin tones natural and avoid the blue cast that reads harsh on camera.

    Should I Use Custom Built-Ins in a Home Office?

    Custom millwork is worth it when the room is small, has odd angles, or needs to hide a printer, router, and cords. Built-ins use full wall height and depth that stock furniture cannot, which frees floor space and keeps sightlines clean.

    When Should I Hire an Interior Designer for a Home Office Renovation?

    Hire a designer before electrical or demolition work begins, since outlet locations, lighting circuits, and cabinet dimensions are all set at that stage. Bringing office interior design in at the drawing phase costs far less than correcting rough-in later.

  • Semi-Custom Cabinets in Chicago: When Bespoke Is Worth It

    Semi-Custom Cabinets in Chicago: When Bespoke Is Worth It

    You have already walked past the big-box displays. Now the choice narrows to two: semi-custom cabinets in Chicago, ordered as a designer-line program through a showroom, or a bespoke set drawn and built for your room alone. 

    That decision usually surfaces during the budget conversation, when the cabinetry line item turns out to carry a third or more of the entire kitchen number, and every dollar has to earn its place.

    Chicago housing stock complicates the math. Greystones, vintage courtyard buildings, and converted two-flats rarely offer square corners, plumb walls, or the tidy 3-inch increments that catalog programs are built around. A cabinet run that fits perfectly on paper can arrive with a 2-inch gap at the range wall, and the fix is a filler strip nobody wanted.

    So the comparison worth making is not really about price. It is about fit, lead time, finish control, and what happens to a drawing once it leaves your designer’s hands, which is where semi-custom cabinets in Chicago either hold up or start costing you inches. 

    Three questions decide it, and they are the ones this guide ends on: who performs the field measure, whether you see shop drawings, and who pays when a cabinet arrives wrong.

    How Semi-Custom Cabinetry Works

    Semi-custom cabinetry is a catalog program with modifications. You order from a manufacturer’s standard box list, then pay for changes: depth reductions, height increases, custom finishes, and interior fittings. The boxes themselves are still built on a production line, in set increments.

    Construction standards differ across the three tiers, and the differences sit in joinery, drawer build, and finish tolerance rather than in anything visible on a showroom door sample. The kitchen planning guidelines published by the National Kitchen and Bath Association (NKBA) govern the clearances the cabinetry has to satisfy; how the boxes themselves are built is a separate question, and one you have to ask each manufacturer directly.

    What Is Included in a Designer-Line Cabinet Program?

    A designer line gives you real choice inside a fixed system. You select door style, wood species, paint or stain color from a published palette, drawer box construction, and a menu of interior accessories. Kitchen cabinets and bathroom vanities usually share the same program, so finishes stay consistent across rooms.

    Common modification options include:

    • Depth changes in set increments, commonly 3 inches (a 24-inch base reduced to 21 inches)
    • Height increases for wall cabinets to meet an 8-foot or 9-foot ceiling
    • Toe kick and reveal adjustments within a set range
    • Upgraded plywood boxes in place of particleboard
    • Custom paint matching, usually at an added cost where a program offers it at all

    Where Semi-Custom Flexibility Has Limits

    The limits show up in fractions. Programs commonly modify width in 3-inch steps, though the increment varies by line, so a 41-inch opening becomes a 39-inch cabinet plus a 2-inch filler. Angled walls, curved runs, and integrated appliance panels beyond the manufacturer’s list usually fall outside the program entirely.

    Finish is the second constraint. A published palette typically runs to a few dozen colors, and a true custom match adds cost and lead time where it is offered. Interior hardware often comes from one preferred supplier, which narrows drawer organizer and pull-out options. All of this varies by manufacturer, so read the program’s own specification rather than assuming.

    Which Projects Benefit Most From This Middle Ground?

    Semi-custom fits rooms with regular geometry and a moderate budget. Newer condos, gut-renovated units with new framing, secondary baths, and laundry rooms all work well because the walls are square and the openings land near catalog dimensions.

    The value case weakens as the room gets stranger. Once your plan carries three or more modifications per cabinet, the price gap against a fully built-to-order approach starts to close, which makes a side-by-side cost comparison worth running before you commit.

    Stock, Semi-Custom, or Fully Custom: Which Offers the Right Value?

    Value depends on how much of your wall the cabinetry has to solve. Stock covers standard rooms cheaply, semi-custom covers standard rooms with taste, and custom covers rooms that refuse to cooperate.

    Each tier changes the design process, not just the price. Stock is selected, semi-custom is configured, and custom is drawn.

    Fixed Sizes and Fast Turnaround With Stock Cabinets

    Stock cabinets ship from inventory in fixed widths, commonly from 9 to 42 inches in 3-inch jumps depending on the line. Turnaround can run from same-day pickup to a few weeks, which is why flippers and rental rehabs rely on them.

    Construction is where the compromise sits. Many stock lines use 1/2-inch particleboard boxes with stapled corners and roll-out drawer glides rated for lighter loads. Filler strips do the fitting work that cabinet dimensions cannot.

    Expanded Choices With Semi-Custom Cabinets

    Semi-custom buys you design language: inset doors, furniture bases, mullion glass, and matched finishes across kitchen and bath. Box quality improves too, with plywood carcasses and dovetailed drawers common at this tier.

    Lead time moves accordingly. Quoted windows commonly land somewhere around 6 to 12 weeks from released order, though they vary by manufacturer and by how busy the plant is, and a custom color or specialty door can push that further. You are trading speed for control over how the room reads.

    Exact Fit and Complete Control With Custom Cabinets

    Custom cabinetry starts with field measurements of your actual walls, then gets drawn to those numbers. Widths land at 41 1/8 inches when that is what the opening measures. Scribe edges absorb wall irregularity instead of exposing it.

    Control extends past dimensions:

    • Any species, including rift-sawn white oak, walnut, or paint-grade poplar
    • Any finish, matched to a physical sample rather than a chip card
    • Non-standard depths, such as a 15-inch base under a peninsula seat
    • Integrated elements: banquettes, panel-clad columns, appliance surrounds

    The question that follows is whether your specific Chicago floor plan needs that precision or performs fine without it.

    Fitting Chicago Kitchens Beyond Standard Cabinet Sizes

    Older Chicago kitchens rarely give you a clean rectangle to work with. Walls bow, floors slope, and the room you measure at the baseboard is a different room at the countertop line.

    That variance decides the cabinet tier more reliably than budget does. A room out of square by 3/4 inch across a 12-foot run will show that error at the crown, the countertop seam, and every door reveal.

    Working Around Greystone Walls, Radiators, and Uneven Conditions

    Masonry party walls in greystones and vintage six-flats often carry plaster over furring strips, so the wall plane shifts by a half inch or more. Cast-iron radiators sit under windows in the exact spot a base run wants to occupy. Steam risers pass through corners where a lazy Susan was planned.

    Custom cabinetry absorbs these conditions with deeper scribe stiles, notched backs, and reduced-depth boxes at the pinch points. Semi-custom programs handle mild variance with fillers, then run out of options once the deviation crosses about an inch.

    Eliminating Filler Panels and Awkward Storage Gaps

    Fillers are the most visible tell of a catalog fit. A 3-inch filler beside the refrigerator reads as dead space, and in a 10-by-12 kitchen that space is real storage lost.

    Built-to-order runs redistribute those inches into usable width: a tray divider, a pull-out spice cabinet, or simply a wider drawer bank. Across a single wall with two or three fillers, custom cabinets in Chicago can recover most of a drawer’s worth of storage that a catalog fit would have surrendered.

    Coordinating Cabinet Proportions With Islands and Ceiling Heights

    Ceiling height drives the upper cabinet decision. A 9-foot ceiling with a 30-inch wall cabinet leaves a 24-inch dust shelf, while a 42-inch cabinet plus stacked glass uppers uses the volume deliberately.

    Island scale follows the same logic. A 96-inch island in a room that measures 13 feet wide leaves 30-inch aisles, below the clearance a working kitchen needs. Drawing elevations before ordering catches that conflict, which is where the fabrication conversation begins.

    Comparing Finishes, Construction, and Everyday Function

    Finish and construction decisions determine whether cabinetry looks correct in year twelve. Door style is visible on day one; joinery, finish system, and drawer capacity are what you notice later.

    Material behavior in a Chicago climate is part of the calculation. Interiors run dry through a heating season and humid through July, a swing wide enough that solid wood doors visibly move with it.

    Choosing Materials and Finishes That Hold Up Over Time

    Paint-grade doors built from poplar or MDF panels resist seasonal joint lines better than solid maple in a five-piece door. Conversion varnish and catalyzed finishes cure harder than standard lacquer, which matters at the sink base and around a range.

    Species behavior guides stain choices too. White oak takes a rift cut cleanly and moves less than red oak; walnut lightens with sun exposure over several years, so a south-facing wall will shift tone.

    Planning Storage Around How the Household Uses the Room

    Storage planning starts with an inventory of what the room holds, then assigns each item a home. Two cooks who bake weekly need a 36-inch drawer bank near the oven, not a symmetrical door cabinet.

    Practical decisions that come out of this step:

    • Drawer banks in place of base doors for pots, lids, and dishes
    • A 15-inch pull-out for oils and staples beside the cooktop
    • Full-height pantry cabinets with adjustable shelves on 32mm spacing
    • Bathroom vanities with U-shaped drawers that clear the plumbing trap

    Integrating Cabinet Lighting, Hardware, and Interior Accessories

    Cabinet lighting has to be specified before boxes are built. Recessed LED channels need a routed groove in the cabinet bottom, and puck lights need a light rail to hide the fixture and driver.

    Hardware backing follows the same rule. Heavy pulls on inset doors want solid stiles behind them, and appliance panels need reinforced rails. These details are drawn once and then handed to the shop, which is where execution takes over.

    When Fabrication Control Justifies a Custom Investment

    Fabrication control earns its cost when the design contains details that survive only if the drawer, the drawing, and the installer share one set of numbers. Complex rooms, integrated appliances, and tight tolerances all fall in that category.

    Ownership of the shop changes accountability. When the designer and the fabricator answer to the same project manager, a field measurement adjustment reaches the CNC program the same week rather than the next quarter.

    Lead Times, Site Verification, and Installation Coordination

    Custom work follows a sequence: rough framing, then field measure, then shop drawings, then release to the shop. Skipping the field measure is a common cause of a cabinet that will not fit.

    Coordination points to schedule:

    • Field measure after drywall, before finish flooring
    • Appliance specs confirmed in writing before boxes are cut
    • Countertop template scheduled once the cabinets are set and level
    • Electrical rough-in aligned with lighting locations in the shop drawings

    What Happens When Drawings Pass to a Third-Party Manufacturer

    A third-party manufacturer builds what the order form says, not what the elevation intended. A 1/8-inch reveal drawn by the designer becomes the factory’s standard 3/32-inch reveal, and nobody catches it until installation day.

    Change orders then move through a dealer, a rep, and a plant scheduler. That chain adds weeks and puts the cost of a misread detail back on the homeowner.

    How Integrated Design and Fabrication Protect the Original Vision

    Threshold Design Lab runs fabrication through TDL Custom, its in-house shop, so elevations and custom millwork drawings go to craftspeople who sat in on the design conversation.

    The practical benefit is narrow and specific: reveals, panel grain direction, and hardware backing get built as drawn. That is the standard worth holding any residential interior design proposal to, whoever is doing the building.

    Choosing Cabinetry That Fits the Home and the Project

    Match the cabinetry tier to the room’s geometry first, then to budget. Square rooms with catalog-friendly dimensions get full value from semi-custom cabinets; irregular vintage footprints and integrated details justify custom cabinets built to measured conditions.

    Ask any proposal three concrete things: who performs the field measure, whether shop drawings are issued for your approval, and how reveal dimensions are specified. Those answers separate a supplier from a partner, and they cost nothing to ask.

    If you already have measurements and a rough layout, that is enough to have the real conversation about which tier your room actually needs. Call (773) 433-0042, email paul@thresholddesignlab.com, or start a project conversation.

    Frequently Asked Questions

    What Is the Typical Cost of Semi-Custom Kitchen Cabinets in Chicago?

    Semi-custom cabinet pricing is set by each manufacturer’s program and dealer, and published retail figures are uncommon and hard to compare across lines. Cost rises with every modification, so a plan with numerous depth changes and a custom color can approach built-to-order pricing.

    Are Semi-Custom Cabinets Good Quality for a Long-Term Renovation?

    Yes, when the program specifies plywood boxes, dovetailed drawers, and a catalyzed finish. Ask for the construction spec sheet rather than judging from a door sample, since box materials vary widely inside a single brand.

    When Should I Choose Custom Cabinets Instead of Semi-Custom Cabinets?

    Choose custom when walls are out of square, radiators or risers interrupt the run, or the design includes integrated appliance panels and non-standard depths. Custom also makes sense once your modification list grows long enough to erase the price advantage.

    How Long Do Semi-Custom Cabinets Take to Arrive and Install?

    Quoted lead times vary by manufacturer and season, but designer-line programs commonly land somewhere around 6 to 12 weeks from released order, with custom colors and specialty doors extending that window. Installation of a typical kitchen usually runs a few days once cabinets arrive undamaged and complete. Get the current quoted window in writing rather than working from a range.

    Can Semi-Custom Cabinets Fit an Older Chicago Kitchen?

    They can, provided the walls are reasonably plumb, and openings fall near 3-inch increments. Rooms with bowed plaster walls or deviations over an inch usually end up with visible fillers or reduced storage.

    Does Cabinet Lighting Need to Be Planned Before Cabinetry Is Ordered?

    Yes. Recessed LED channels require routed grooves and light rails that must be built into the cabinet, and electrical rough-in has to match those locations before drywall closes.

  • Luxury Living Room Interior Design That Works Every Day

    Luxury Living Room Interior Design That Works Every Day

    The tear sheets are saved: a pale bouclé sectional, a black marble coffee table, a wall of built-in shelving with lighting tucked inside. Then the practical question shows up: will any of it survive Sunday afternoons, homework, a dog, and eight guests at the holidays? That tension, between how a room looks and how much daily life it can absorb, sits at the center of luxury living room interior design.

    The studios that resolve that tension well tend to work the same way. They listen before they specify. They document decisions in space plans, elevations, and itemized material selections. 

    And they fabricate the custom pieces themselves instead of hoping a third party reads the drawing correctly. In Chicago, where housing stock runs from vintage greystones to lakefront high-rises with awkward column placement, that integrated approach matters even more.

    Keep reading to learn how each design decision in a luxury living room connects to a specific deliverable, material property, or field condition. By the end, you should be able to look at a design proposal and ask sharper questions: where are the elevations, how were these fabrics tested, and who is accountable at installation.

    What Luxury Living Room Interior Design Delivers Beyond Appearance

    A luxurious living room earns its label through comfort, craftsmanship, and restraint, not through price tags. The best luxury living rooms feel calm because every element was chosen for a reason you can name.

    Define Luxury Through Comfort, Craftsmanship, and Intentionality

    Craftsmanship shows up in the details you almost miss: a mitered stone edge, a drawer that closes without sound, a shelf reveal that lines up with a window mullion. Those decisions require drawings and shop coordination, not shopping. That is largely what luxury interior design means in practice.

    Start With How the Room Will Be Used

    Before any material is selected, the room needs a job description. Is it for two people reading, or twelve people watching a game? Answers drive seat depth, table height, rug size, and outlet placement. Timeless elegance follows function. It rarely arrives on its own.

    Balance Visual Ambition With Everyday Performance

    High-quality materials should be chosen for wear as much as beauty. Wool holds up better than silk in a family room. Honed limestone hides etching that polished marble broadcasts. Premium materials become opulent living only when they age well in your actual house.

    Plan the Layout Around Movement, Conversation, and Light

    Layout is the single decision that makes or breaks a living room interior. A great space plan protects walking paths, seats people facing each other, and lets natural light reach the middle of the room.

    Use Space Plans to Establish Functional Zones

    Space plans are drawn to scale so you can test the living room layout before you buy anything. In a typical Chicago living room, the plan usually resolves three or four functional zones:

    • A primary conversation group anchored by a sectional sofa or facing couches
    • A secondary zone with accent chairs or armchairs for overflow seating
    • A reading nook near large windows, often with a floor lamp and ottoman
    • Circulation paths of at least 30 to 36 inches through the room

    Make Natural Light and Architectural Features Work Harder

    Floor-to-ceiling windows, high ceilings, and coffered ceilings are assets you should not fight. Keep sightlines to the glass open, use large mirrors on the wall opposite windows, and let architectural details set your ceiling and trim strategy. This is where thoughtful residential interiors protect what the architecture already gives you.

    Create Focal Points Without Sacrificing Circulation

    A fireplace, a media unit, or built-in shelving can all serve as the focal point, but only one should lead. When a television and a fireplace compete, elevations settle it. Cabinetry depth, hidden storage, and equipment ventilation get resolved on paper first.

    Build a Material Palette That Looks Refined and Lives Well

    A refined palette starts with performance data, not mood. You choose the finish that survives your household, then make it beautiful.

    Choose Durable Upholstery and Soft Furnishings

    Velvet, bouclé, linen, and wool all read as luxury, but they behave differently. Performance velvet and tight-weave wool resist pilling and pets. Save cashmere for throws, not seat cushions. Rugs should be specified by fiber and pile. A hand-knotted wool area rug takes traffic far better than viscose.

    Material Best Use in a Living Room What to Expect Daily
    Wool or performance velvet Sofa and chair upholstery Strong wear, easy spot cleaning
    Linen blends Drapery, pillows, slipcovers Softens and relaxes over time
    Honed limestone or travertine Fireplace surround, side tables Warm look, hides light etching
    Marble or black marble Coffee table top, accent slab Beautiful, needs sealing and care
    Walnut or mahogany Millwork, casegoods, shelving Ages well, repairable finish


    Combine Natural Stone, Wood, and Metal With Restraint

    Two natural materials and one metal is usually enough. Pair walnut millwork with granite or travertine, then add brushed brass or champagne gold in small doses. Pulls, lamp bases, a picture rail. Too many metallic accents make natural textures compete instead of support each other.

    Layer Neutral Tones, Texture, and Meaningful Color

    Neutral tones like taupe, beige, and earthy tones give you a long runway. Then jewel tones and wallpaper carry the personality. Designers tracking current living room trends point to texture and tonal layering doing the heavy lifting. Explore more modern luxury design ideas if you lean contemporary.

    Materials set the mood. Furniture, art, and light set the experience.

    Use Furniture, Art, and Lighting to Create a Cohesive Experience

    Cohesion comes from scale and layering. Pieces sized correctly for the room, lit in three separate layers, will always outperform a collection of individually pretty objects.

    Select Seating and Coffee Tables at the Right Scale

    Measure before you fall in love. A coffee table should sit roughly 16 to 18 inches from the sofa and match seat height within an inch or two. Sculptural furniture and a marble coffee table look best when the surrounding pieces stay simple. A console table behind the sofa can absorb lamps and trays.

    Layer Ambient, Task, and Accent Lighting

    One ceiling fixture is never enough. Layered lighting means several sources, each on its own control:

    • Ambient: a statement chandelier, pendant lights, or recessed downlights on dimmers
    • Task: table lamps and floor lamps at reading chairs, roughly at eye level when seated
    • Accent: wall sconces, picture lights, and integrated lighting inside shelving
    • Control: smart lighting scenes for daytime, evening, and entertaining

    Curate Art, Drapery, and Greenery With Purpose

    Large-scale art anchors a wall better than a scattered gallery wall in most living rooms. Hang the center around 57 to 60 inches from the floor. Sheer curtains soften glare while heavier drapery improves acoustic comfort. 

    Indoor trees or simple greenery bring biophilic design in without clutter. Heirlooms belong here too, placed deliberately. None of it holds together unless the drawings survive the build.

    Close the Vision-to-Installation Gap With Detailed Execution

    The gap between a beautiful concept and a finished room is closed by documentation and fabrication control. That is the part most homeowners never see, and the part that determines whether clean lines stay clean.

    Translate Design Decisions Into Elevations and Material Selections

    Elevations show every vertical surface at scale. Shelf spacing, panel widths, reveal dimensions, outlet locations. Paired with an itemized budget and specified material selections, they remove guesswork from the field. Interior designers who skip this step leave decisions to whoever is holding the saw that morning.

    Use Custom Fabrication for Integrated Storage and Millwork

    Custom millwork is how a contemporary living room gets hidden storage, media units, and built-in shelving that look architectural instead of added. When design and fabrication live under one roof, the shop reads the same drawings the designer produced. Nothing gets reinterpreted. That vertical integration is why millwork built in-house usually beats stock cabinetry in a minimalist living room. Every reveal is visible.

    Coordinate Procurement, Lead Times, and Installation

    Procurement is a schedule problem. Upholstery can run 10 to 16 weeks, stone slabs must be selected and templated, and millwork installation has to land after paint but before final accessories. A coordinated full-service process sequences all of it, then supervises install day.

    Which raises the practical question: when is that level of support worth it for your project?

    Move From Inspiration to a Living Room Built for You

    Luxury living room design succeeds when premium materials, functional zones, and timeless elegance are all documented, fabricated, and installed by people who are accountable for the result. Inspiration images are the easy part. Turning them into a room that works on an ordinary Tuesday takes a plan.

    Know When Professional Design Support Adds Value

    Bring in a designer when structure, cabinetry, lighting, or trades are involved, when lead times affect your timeline, or when the room has an odd shape you keep redrawing. Reviewing finished living room projects is a fair way to judge whether a studio’s detailing matches your standards.

    Begin With a No-Pressure Project Consultation

    If you are weighing living room interior design options for a Chicago home, start the conversation with Threshold Design Lab. 

    Tell us about your space, how you use it, and what is not working now, and we will outline how a full-service process would take it from drawings to an installed room. You can request a project consultation whenever you are ready. There is no pressure and no verdict, just listening.

    Frequently Asked Questions

    What Are the Key Elements of a High-End Living Room Design?

    A workable space plan, durable upholstery, layered lighting, and integrated millwork do most of the work. Quality materials and restrained metal accents finish it. Documentation, meaning elevations and itemized selections, is what keeps those elements from drifting during construction.

    How Can I Make a Small Living Room Feel More Luxurious?

    Use fewer, larger pieces, keep circulation paths clear, and build storage into the walls instead of adding furniture. Proven small-space tactics such as vertical shelving and light-reflecting surfaces help a compact room read generously.

    Which Colors Work Best for an Elegant and Sophisticated Living Room?

    Warm neutrals like taupe, beige, and greige give you flexibility for years. Then color arrives through art, drapery, and pillows. Deeper jewel tones and moody paint work beautifully when the room has strong natural light or a well-planned lighting scheme.

    What Furniture Should I Choose for a Refined Living Room Layout?

    Choose seating that matches how many people actually use the room. Then confirm dimensions against your space plan. A sectional sofa suits open plans: facing couches with accent chairs suit conversation. Keep coffee table height within an inch or two of seat height.

    How Can Lighting Enhance the Look and Feel of a Premium Living Space?

    Lighting controls mood more than any finish. Put ambient, task, and accent layers on separate dimmers so one room can host a dinner party or a quiet evening. Integrated fixtures inside shelving make millwork look intentional rather than decorative.

    Where Can I Find Inspiration and Photos for Upscale Living Room Ideas?

    Editorial galleries such as this collection of modern living room ideas are useful for scale and material pairings. Save images with notes about what you like specifically. Then bring that file to your first design meeting.

  • Luxury Bedroom Interior Design Ideas That Feel Built for Daily Life

    Luxury Bedroom Interior Design Ideas That Feel Built for Daily Life

    The tape measure, not the mood board, is where a primary bedroom project gets real. The moment you weigh whether a walk-in closet is worth three feet of sleeping area, luxury bedroom interior design ideas stop being saved images and start becoming framing, wiring, and cabinet decisions. 

    The gap between a beautiful reference photo and a room you can actually live in is usually measured in inches, outlets, and lead times.

    That gap closes fastest when one team handles the drawings, the material selections, and the fabrication. A studio that produces space plans and elevations, then builds the millwork in its own shop, can hold a headboard panel to a real wall dimension instead of hoping a store-bought piece fits. 

    In Chicago’s vintage housing, where walls are rarely square and ceiling heights vary room to room, that control matters more than any single finish.

    Keep reading to learn how layout, bed wall construction, lighting layers, material depth, and bespoke storage combine into a primary suite that works on a Tuesday morning, not just in photographs. By the end, you should be able to ask a designer sharper questions about clearances, rough-in timing, and what a proposal actually includes.

    Start With a Luxury Bedroom Layout That Supports How You Live

    Layout decides more about how a luxury master bedroom feels than any finish you choose later. Before you pick a paint color, you are really deciding where your body moves at 6:00 a.m. and 11:00 p.m.

    Center the Bed Without Sacrificing Circulation

    Center the bed on the strongest wall only if the clearances still work. Good bedroom layout ideas start with measured walk paths, not symmetry for its own sake. Use these minimums when you sketch a master bedroom design:

    • 30 to 36 inches of clear walking space on each side of the bed
    • 36 inches at the foot of the bed for a bench or a passage
    • Full door and drawer swing tested against nightstand and dresser fronts
    • 24 to 30 inches in front of a full-length mirror so you can see head to toe

    If the bed cannot center without pinching a path, shifting it off axis and balancing the wall with asymmetric art is the smarter move.

    Create a Bedroom Lounge Area With a Purpose

    A bedroom lounge area only earns its square footage if you name its job first. A daybed under a window, a reading nook with a swivel chair, or a two-chair coffee corner each require different depths and different light. Place the seating where natural light lands in the hours you would actually use it, then confirm the piece leaves at least a 30-inch path back to the bed.

    Use Zoning to Connect the Sleeping Area, Dressing Room, and Bath

    Zoning turns a big room into a master suite. The cleanest sequence runs sleeping area to dressing room to bath, so morning routines never cross the sleeping zone. 

    A cased opening, a change in ceiling detail, or a shallow millwork partition can separate a walk-in wardrobe without adding a swinging door. Our approach to residential design work treats that circulation loop as a deliverable, not an afterthought.

    With the plan settled, the wall behind your bed becomes the room’s primary visual event.

    Make the Bed Wall a Crafted Focal Point

    The bed wall is the one surface every person entering the room looks at first. Treating it as built architecture rather than decoration is what separates luxury bedrooms from well-furnished ones.

    Choose an Upholstered Headboard or Wall Panel System

    An oversized upholstered headboard reads best when it is built to the wall, not bought to fit it. A panel system of upholstered wall panels, typically 12 to 24 inches wide, can run wider than the mattress and stop at a deliberate reveal line. 

    Velvet holds shadow and depth; a tufted headboard wall adds rhythm but needs precise layout so buttons align with panel seams. This is where bespoke millwork pays off: substrates, French cleat mounting, and fabric railroading are resolved in shop drawings before anything is upholstered.

    Use Wood, Stone, or Plaster for a Material-Led Feature Wall

    A material-led accent wall replaces the headboard entirely in many modern rooms. Reclaimed wood slats mounted on furring strips give texture and hide wall irregularities. A marble accent wall works best when slabs are bookmatched, and the veining is dry-laid and photographed before installation. Lime plaster offers similar depth at lower weight and needs no structural backing.

    Match Bed Scale to Ceiling Height and Room Proportions

    Scale is the quiet failure point. Under 9-foot ceilings, a low platform bed with clean lines keeps the wall above open and the room calm. At 10 feet or higher, a canopy bed, four-poster, or carved wooden bed fills vertical volume that a low upholstered bed would leave empty. Keep headboard height near one third of the wall height so the proportion feels intentional.

    None of that craftsmanship shows at night without deliberate lighting.

    Layer Light for Rest, Reading, and Daily Routines

    A single ceiling fixture cannot serve sleep, reading, and dressing. Layered lighting solves all three by giving each task its own circuit and its own dimmer.

    Combine Ambient, Task, and Accent Lighting

    Layer Job in the Room Typical Fixtures
    Ambient Even, soft lighting for moving through the space Recessed cans, cove LED lighting, a central pendant
    Task Reading and dressing at close range Wall sconces, arc floor lamp, closet strip lighting
    Accent Depth on art, texture, and millwork Picture lights, grazing LED strip lighting


    Mount swing-arm wall sconces roughly 30 to 36 inches above the mattress top so light falls on the page, not your eyes.

    Select Statement Fixtures That Suit the Ceiling and Bed Scale

    A statement chandelier belongs where ceiling height allows at least 7 feet of clearance underneath. A crystal chandelier centered on the bed can overwhelm a 9-foot room; a rattan pendant light or a smaller pair of pendants over nightstands often serves better. If your ceiling has a medallion, size the fixture canopy to it rather than fighting it.

    Plan Smart Controls and Concealed Light Before Construction

    Concealed light is a framing decision. Cove details, drapery pockets, and under-headboard LED strips need blocking and low-voltage wiring roughed in before drywall. 

    Specify 2700K color temperature for warmth, dim-to-warm drivers if budget allows, and keep smart bedroom controls simple: one keypad by the door, one by the bed. Coordinating that rough-in sequence is a core part of full-service design and fabrication.

    Lighting sets the mood. Materials give the room something worth lighting.

    Build Depth With Materials, Color, and Bedding

    Depth comes from layered textures that behave differently under light. A serene bedroom is rarely one flat color; it is several close tones with varied surfaces.

    Layer Natural Fibers and Plush Textures for Tactile Comfort

    Start with natural materials that age well. Washed linen bedding softens with every wash, while Egyptian cotton percale stays crisp and sateen stays smooth. Add one silk or velvet accent, a lumbar pillow or a folded throw, rather than covering the bed in shine. 

    Underfoot, a plush area rug with a wool pile around half an inch deep should extend at least 24 inches past the bed on three sides.

    Use Neutrals, Jewel Tones, or Monochrome With Intention

    A neutral color palette of taupe, warm gray, and off-white works because the values shift slightly, not because everything matches. For a monochrome bedroom, hold the hue steady and change the finish: matte walls, satin trim, a nubby textile. 

    Jewel tones like deep emerald or aubergine read as minimalist luxury when limited to walls or drapery and paired with restrained furniture, an idea explored further in our notes on modern luxury interior design.

    Frame Windows for Privacy, Acoustic Comfort, and Natural Light

    Floor-to-ceiling drapes should hang from a rod mounted near the ceiling and break within half an inch of the floor. Order panels at 2.5 times the window width for proper fullness. Blackout curtains with an interlining also absorb sound, which matters on a busy Chicago street.

    Storage decides whether the room stays this composed.

    Add Bespoke Storage and Curated Details Without Clutter

    Storage is what keeps a finished bedroom looking finished six months later. Built-ins absorb the daily objects that otherwise land on every flat surface.

    Design a Built-In Wardrobe Around Real Storage Needs

    A built-in wardrobe or custom walk-in closet should be drawn from an inventory, not a template. Count what you own, then assign linear feet:

    • Long hang: 66 to 70 inches of vertical clearance for coats and dresses
    • Double hang: two rods at roughly 42 inches each
    • Drawers: shallow for accessories, 10 to 12 inches deep for folded knits
    • Shoes: adjustable shelves pitched 10 to 15 degrees

    Interior details separate good from exceptional. High-end closet design now favors velvet-lined inserts and metal valet bars sized to the client’s actual wardrobe. Shop-built casework, like the custom cabinets we fabricate in Chicago, lets those interiors be scribed to out-of-plumb walls instead of shimmed and caulked on site.

    Use Floating Nightstands and Integrated Charging Strategically

    Floating nightstands need solid blocking in the wall before drywall, sized for the cantilever load. Set the top surface within two inches of the mattress height. Place an outlet inside the drawer or behind the unit so cords never appear, and add a USB-C receptacle while the wall is open.

    Edit Decorative Elements Into a Cohesive Collection

    Luxury bedroom decor works best when edited. Limit metallic finishes to two, such as brass accents with blackened steel, and repeat each at least twice. A gallery wall of gold-framed art should share matting and spacing; gilded mirrors should be placed to reflect a window, not a doorway.

    At this point, the ideas are clear. The next question is how to build them.

    Bring the Vision Into a Buildable Plan With Threshold Design Lab

    Every idea above becomes real through the same sequence: listening, drawings, procurement, and installation. Luxury bedroom design ideas succeed when clearances, rough-ins, and millwork shop drawings are resolved before a single order is placed.

    That is the process Threshold Design Lab has refined over three decades of Chicago residential work: space plans, elevations, an itemized budget, and material selections first, then vendor coordination, then hands-on oversight through final accessories. 

    Because fabrication happens in our own shop, the headboard panel, the wardrobe, and the floating nightstands are built to the room as measured. You can see how that plays out across our recent design work.

    If you are planning a primary suite renovation or a new build, start the conversation about your Chicago project. Tell us about your suite,e and we will lay out the sequence, from space plans and elevations through shop drawings and installation.

    Frequently Asked Questions

    How Can I Make My Bedroom Look More Luxurious?

    Focus on scale and layers before spending on statement pieces. A properly sized rug, floor-to-ceiling drapery, and three lighting layers on dimmers change a room more than expensive furniture does. Then edit the surfaces so nothing sits out that does not belong.

    What Are the Latest Luxury Bedroom Design Trends for 2026?

    Material-led rooms are leading: plaster walls, warm woods, and bookmatched stone instead of heavy pattern. Designers are also building the bed wall as architecture, with integrated panels and concealed lighting. Bold color is returning, but usually on one plane rather than the whole room.

    How Can I Create a Luxury Bedroom Design on a Budget?

    Spend where you touch and where you look: bedding, drapery, and lighting. Keep the layout as-is, skip structural changes, and use one custom element, often the headboard wall, as the focal investment. Paint and hardware upgrades carry the rest.

    What Colors Work Best for a Modern Luxury Master Bedroom?

    Warm neutrals such as taupe, greige, and soft clay hold up longest in a modern luxury bedroom. If you want depth, a single saturated jewel tone on the bed wall or drapery adds weight without darkening the room. Test large samples in both morning and evening light.

    How Do I Design a Luxurious Bedroom in a Small Room?

    Reduce the number of freestanding pieces and build storage into the walls. Floating nightstands, a low platform bed, and a full-height wardrobe free floor area and make the room read larger. Hang drapery at the ceiling to stretch the vertical line.

    What Furniture and Lighting Are Essential for a Luxury Bedroom?

    At minimum: a well-scaled bed with a substantial headboard, two nightstands with concealed power, one seating piece, and closed storage. For lighting, pair a dimmable ambient source with reading sconces or lamps at the bed. Accent lighting on art or millwork is what finishes the scheme.

  • Kitchen Interior Designer: What Makes a Plan Truly Buildable?

    Kitchen Interior Designer: What Makes a Plan Truly Buildable?

    The decision to remodel the kitchen is the easy part. The harder one is who should lead it. One contractor offers design as a free add-on. A decorator sends beautiful mood boards but no dimensions. A kitchen interior designer quotes a fee before a single cabinet is priced. Those three proposals look similar on a phone screen. They are not remotely the same service.

    The difference shows up later, usually during demolition. A wall in a 1908 Chicago greystone turns out to be two inches out of plumb. At that moment, the value of a plan is measured by whether it can actually be built. 

    Full-service studios that pair interior design with construction knowledge and in-house fabrication treat that moment as expected, not exceptional, because the drawings were made with the shop and the site in mind.

    In this guide you’ll discover how to judge a kitchen design partner on the things that hold up under construction: discovery, documentation, material fluency, and accountability. By the end, you should be able to read a proposal and know exactly which questions to ask before you sign it.

    What Full-Service Kitchen Design Actually Covers

    Full-service kitchen design covers the space itself, the products going into it, and the coordination that gets them installed correctly. Finish selection is one small slice of that scope.

    Beyond Finish Selections and Styling

    Real kitchen design begins with the parts you cannot see. Where does the vent hood duct run? Can the sink move six feet without violating slope requirements? Is there panel capacity for an induction range?

    Those answers shape the floor plan before a single tile is chosen. Good kitchen designers document appliance rough-ins, outlet locations, and blocking for wall cabinets, then hand that information to trades in writing.

    How Design, Construction, and Procurement Connect

    Procurement is where many kitchen remodels quietly stall. Custom cabinetry, stone slabs, and imported hardware run on different lead times. A schedule built without them collapses in week three.

    A full-service process orders in sequence, confirms shop drawings, and books the fabricator’s template date around the actual cabinet install. That coordination is the heart of full-service interior design in Chicago. It is not a bonus service.

    When an Interior Designer, Architect, or Kitchen Specialist Leads

    The right lead depends on how far the work reaches beyond the existing room:

    • Architect: additions, structural changes, exterior openings, or zoning-related permits
    • Interior designer: layout, millwork, materials, lighting, and whole-home continuity
    • Kitchen specialist: cabinetry-focused updates within an existing footprint

    Most Chicago kitchen projects sit in the middle category.

    How to Evaluate a Kitchen Interior Designer Before You Hire

    Four things separate a designer who produces buildable work from one who produces pretty pictures: how they listen, what they draw, what they know about materials, and who answers the phone on install day.

    A Listening-First Discovery Process

    Discovery should feel like an interview about your life, not a sales presentation. Expect questions about who cooks, how often you host, where mail lands, and what frustrates you daily.

    Designers who skip this step tend to reuse a house style. The ones worth hiring build the plan around your routines first and their aesthetic instincts second.

    Technical Documentation You Can Review

    Ask what you will receive at the end of the design phase. A serious residential interior design package includes documents you can hand to any trade.

    Deliverable What It Tells You
    Space plans Dimensioned layout, clearances, appliance placement
    Elevations Cabinet heights, door styles, hardware, sightlines
    Material selections Exact species, finish, slab, tile, and grout specs
    3D renderings Scale, proportion, and finish relationships
    Itemized budget Line-by-line costs tied to real products


    If a kitchen planner cannot produce elevations, the cabinetry has not been designed yet.

    Material Knowledge and Fabrication Readiness

    Material fluency is specific, not general. A designer should tell you why rift-sawn white oak moves less than plain-sawn, or why a honed marble island will etch under lemon juice.

    Fabrication readiness goes further. When the studio drawing the kitchen also runs the shop building it, the design-to-fabrication handoff happens internally. Tolerances get resolved before delivery.

    One Point of Accountability Through Installation

    Ask directly who manages the schedule, the subcontractors, and the punch list. Split responsibility is where blame lives.

    A single accountable partner from concept through final installation removes the negotiation you would otherwise run yourself. This frees you to focus on how the room needs to function.

    Planning a Kitchen That Works for Daily Life

    A buildable plan is also a livable one. Layout, storage, and surfaces have to survive fifteen years of weeknight dinners, not one photo shoot.

    Layout, Clearances, and the Work Triangle

    The work triangle connects sink, cooking surface, and refrigeration. Each leg generally runs four to nine feet, with the total under 26 feet. The kitchen and bath planning guidelines from the National Kitchen & Bath Association (NKBA) also call for adequate walkway and work aisle clearances.

    In practice, a one-cook Chicago condo galley and a two-cook Lincoln Square rehab need different geometry. Zones for prep, cleanup, and staging often serve busy households better than a strict triangle.

    Storage Designed Around Real Routines

    Storage should be assigned before it is styled. Counting your actual items prevents the classic mistake of beautiful cabinetry that holds the wrong things.

    • Deep drawers sized to your stockpots, not standard increments
    • A dedicated appliance garage so counters stay clear
    • Pull-out waste and recycling within a step of the sink
    • Vertical tray dividers over the refrigerator
    • Toe-kick or pantry storage for bulk goods in smaller city kitchens

    Lighting, Appliances, and Durable Surface Choices

    Layer three lighting types: ambient ceiling light, task lighting under wall cabinets, and accent light inside glass fronts. Keep color temperature consistent, usually around 2700K to 3000K. Put every layer on a dimmer.

    Surfaces follow use. Quartz resists staining around a busy sink. Quartzite handles heat better. A sealed walnut top softens a coffee station.

    Where Digital Tools Help, and Where They Fall Short

    Digital planners are genuinely useful for early thinking. They are genuinely dangerous when mistaken for drawings. Knowing the boundary saves money.

    Using an Online Kitchen Planner for Early Exploration

    An online kitchen planner is a fast way to test whether an island fits or whether a peninsula reads better. Drag boxes, measure aisles, and learn the vocabulary of your own preferences.

    Treat the output as a conversation starter. Most tools assume square rooms and standard cabinet sizes. This is rarely true in older Chicago housing stock.

    What a 3D Kitchen Planner Can Visualize

    A 3D kitchen planner helps you judge proportion: hood scale, upper cabinet height, island overhang, sightlines from the dining table. That is real value during selections. What it cannot show is substrate, joinery, or how a run of cabinetry meets an uneven plaster wall. Those details live in shop drawings.

    Why AI-Generated Design Is Not Construction Documentation

    An artificial intelligence (AI) kitchen design generator produces images, not specifications. As one look at how generative AI supports interior design work suggests, these tools are best used to explore mood and direction.

    An AI room design cannot verify a 36-inch clearance, size a header, or confirm that a slab yields your island in one piece. Turning those images into something a crew can build requires a human process.

    Turning Your Vision Into a Coordinated Chicago Remodel

    This is where evaluation becomes action: a consultation, a set of questions, and an honest look at how the work will be built.

    Questions to Ask During a Design Consultation

    Bring these to any kitchen design consultation:

    • What exactly is included in your design phase deliverables?
    • Who fabricates the cabinetry, and can I see recent work?
    • How are change orders priced and approved?
    • Who is on site during installation week?
    • How do you handle building rules, elevator reservations, and permits?

    Answers should be specific. Vagueness at this stage predicts vagueness later.

    How Integrated Custom Millwork Reduces the Translation Gap

    Most kitchen problems are translation problems: a drawing says one thing, the shop reads another, the site delivers a third. Threshold Design Lab addresses this through TDL Custom, its in-house fabrication arm. This way, custom millwork and cabinetry is built by the same team that designed it.

    That integration matters most at the edges: scribes against old walls, integrated appliance panels, and a paneled range wall that reads as one piece. You can see the range of that approach across our interior design and millwork projects.

    A Low-Pressure Next Step for Your Project

    You do not need finished decisions to start. A first conversation is mostly listening: your space, your routines, your budget range, your timeline.

    From there, the path to a kitchen remodel in Chicago becomes a defined sequence. It is no longer a series of guesses.

    Frequently Asked Questions

    How Much Does It Cost to Hire a Professional to Design a Kitchen?

    Design fees are typically charged as a flat rate, hourly, or a percentage of project cost. They often land between 8% and 15% of the construction budget. The fee should cover space plans, elevations, material selections, and coordination, not just a shopping list.

    Can an Interior Designer Create a Functional Kitchen Layout?

    Yes, provided they work with construction documentation and code clearances rather than styling alone. Ask to see dimensioned plans and elevations from a completed kitchen before you hire.

    Is $30,000 Enough for a Kitchen Remodel?

    In Chicago, $30,000 can cover a cosmetic refresh: cabinet refacing or stock cabinetry, new counters, lighting, and appliances in the existing layout. Moving plumbing, gutting to studs, or commissioning custom cabinetry generally pushes budgets well past that figure.

    What Is Included in a Kitchen Design Consultation?

    An initial consultation covers how you use the space, existing conditions, rough scope, budget range, and timeline. It should end with a clear description of the design phase deliverables and fees, with no obligation to proceed.

    How Long Does It Take to Design and Remodel a Kitchen?

    Design and documentation usually run six to twelve weeks. Procurement adds eight to sixteen weeks depending on cabinetry and stone lead times. Construction typically takes eight to fourteen weeks. Older buildings and permit review can extend that timeline.

    Can I Get a 3D Rendering of My Kitchen Before Construction Begins?

    Most full-service studios provide 3D renderings during the design phase so you can evaluate proportion and finish combinations. Renderings are a review tool. The elevations and shop drawings remain the documents that govern construction.

    From Inspiration to a Real Plan

    The strongest signal that a kitchen interior designer is right for your project is not the portfolio. It is the specificity of what they promise to deliver, how carefully they listen before proposing anything, and whether the same team stays accountable through installation.

    If you are weighing quotes right now, compare deliverables side by side. A plan with dimensioned drawings, real material specs, and a named point of contact will always outperform a lower number attached to a sketch.

    When you are ready, tell us about your space. A no-pressure project consultation with Threshold Design Lab starts as a conversation about how you live. You can start the conversation whenever the timing suits you.

  • High-End Kitchen Designers: What Chicago Homes Need Beyond Style

    High-End Kitchen Designers: What Chicago Homes Need Beyond Style

    Two proposals describe what looks like the same kitchen, yet one quotes $95,000 and the other lands near $240,000. That gap is where most homeowners stall, and the difference is rarely taste.

    The best high-end kitchen designers earn their fee in the parts of a project nobody photographs. The plumbing rough-in, the panel schedule, the shop drawings for a run of cabinetry. Chicago sharpens this. A 1920s greystone in Lincoln Park hides settled floors and out-of-plumb walls. 

    A lakefront condo comes with building rules and freight elevator windows. A luxury kitchen design that ignores those realities turns into change orders.

    Keep reading to learn how to separate a true design partner from a generalist, what documentation should exist before demolition, and how in-house fabrication changes the finished result. By the end, you will be able to read a proposal and tell whether it describes a real process or a hopeful sketch.

    What Separates a Design Partner From a Generalist

    A generalist sells you a layout. A design partner takes responsibility for how that layout gets built, priced, and installed. Then stays accountable when the site pushes back.

    The clearest test is whether a firm can explain the path from your first conversation to your last punch-list item without hand-waving. Firms working at this level talk about deliverables and sequence. Everyone else talks mostly about style.

    A Listening-First Discovery Process

    Strong discovery starts with questions about your life, not your Pinterest board. How many people cook at once? Where do backpacks land at 4 p.m.? Do you host twelve people twice a year or four people every week?

    Those answers drive real decisions: a 42-inch aisle instead of 36, a second prep sink, drawer storage instead of doors. When a designer skips this and opens with finishes, you are buying a look rather than a full-service design process.

    Kitchen Architects, Designers, and Contractors: Distinct Roles

    These titles overlap in conversation but not in responsibility. Knowing who owns what protects you when something goes wrong.

    Role What They Own When You Need Them
    Kitchen architects Structure, walls, permits, envelope changes Removing bearing walls, additions, new builds
    Kitchen designers Layout, elevations, materials, specifications Nearly every serious remodel
    Contractors Trades, scheduling, code compliance, installation Any construction work
    Design-build studios All three, under one contract Projects where coordination risk is highest


    Questions to Ask High-End Kitchen Designers

    Ask these before you sign anything:

    • Who draws the cabinetry shop drawings, and who builds them?
    • What documents will I own at the end of the design phase?
    • How are lead times tracked, and who orders the appliances?
    • Who is on site the day the counters are templated?
    • What happens to the budget when a wall opens up and surprises us?

    The answers tell you how a firm thinks. The paperwork they produce tells you whether they can deliver it.

    The Documentation That Protects Your Vision

    Documentation is the difference between a kitchen you approved and a kitchen you received. Space plans, elevations, and specifications turn intent into instructions that a fabricator and an electrician read the same way.

    Precision engineering starts on paper. Every ambiguity left in a drawing becomes a decision someone else makes for you. Usually under time pressure, usually on site.

    Space Plans That Solve Workflow Before Construction

    A space plan resolves circulation, clearances, and appliance swings before anyone swings a hammer. It confirms that your refrigerator door clears the island, that two people can pass behind a seated guest, and that the trash pull-out is on the correct side of the sink.

    In older Chicago homes, plans also reconcile radiator locations, chases, and window heights with the cabinetry run. Solving that on paper is cheap. Solving it during Chicago kitchen remodel construction is not.

    Elevations and Specifications That Remove Ambiguity

    Elevations show every kitchen cabinet face at scale: rail widths, reveals, toe-kick heights, crown terminations. Specifications name the door style, wood species, finish system, hinge, drawer slide, and hardware, down to model numbers.

    That level of detail is what makes custom luxury kitchen cabinets repeatable and reviewable. Without it, “custom cabinetry” means whatever the shop happens to build.

    Budgets, Lead Times, and Procurement Accountability

    An itemized budget assigns dollars to line items, not categories. Procurement then tracks each order against a schedule: cabinetry release dates, stone slab holds, appliance ship windows, tile quantities with attic stock.

    Lead times drive everything. A range hood insert with a fourteen-week window dictates when framing closes, and when the kitchen functions again.

    Designing for How a Chicago Household Lives

    Good documentation only matters if the plan behind it fits your household. The most common regret in a finished kitchen is not the color. It is a layout that ignored how the room gets used at 7 a.m.

    Chicago floor plans add constraints: narrow lots, side-by-side rooms, and light that arrives from one direction for most of the day.

    Planning the Island for Cooking, Conversation, and Bar Seating

    An island has to do three jobs at once, and they compete. Prep space wants depth, bar seating wants overhang, and traffic wants clearance. According to NKBA research on kitchen island trends, islands keep growing as gathering places with storage, power, and seating built in.

    Practical numbers help: 15 inches of knee space for counter-height stools, 24 inches of width per seat, and 42 to 48 inches of aisle on the working side.

    Making Natural Light and Layered Illumination Work Together

    Natural light in a Chicago kitchen is seasonal and directional. The electrical plan has to carry the room in January at 4:30 p.m. Layer it: task lighting under upper cabinets, integrated lighting inside glass fronts, and a chandelier or pendant pair over the island as the statement lighting moment.

    Dimming zones matter more than fixture count. Three well-separated circuits beat a dozen cans on one switch.

    Choosing a Style With Lasting Functional Value

    A farmhouse kitchen with open shelving reads warm and demands daily tidiness. A modern kitchen or Italian kitchen with handleless fronts reads calm and demands flawless alignment. Neither is better. They ask different things of you.

    Style choices also carry maintenance and resale weight, which is why they belong in the same conversation as materials and cabinetry construction.

    Cabinetry, Materials, and Appliances as an Integrated System

    Cabinetry, surfaces, and appliances are one system with shared tolerances. Treated separately, they produce the small misfits that make an expensive kitchen feel ordinary.

    Integration is where a modern kitchen design company either proves itself or exposes a gap between drawing and build.

    When In-House Fabrication Changes the Outcome

    When the shop drawing and the design drawing come from the same team, the translation gap disappears. Field measurements go straight to the bench, filler strips shrink or vanish, and a full-height run of walnut cabinetry can be laid out so the grain continues across doors.

    That handoff also absorbs surprises. A wall that is three-quarters of an inch out of plumb becomes a scribe adjustment in the shop instead of a site improvisation. This is the practical argument for custom kitchen cabinets in Chicago built locally rather than ordered from a catalog.

    Selecting Materials for Beauty, Durability, and Maintenance

    Every material trades something. Choose with your habits in mind:

    • White oak and rift-sawn oak cabinetry: stable, forgiving, quiet grain
    • Walnut: rich and dramatic, softer, shows dents
    • Marble countertops: unmatched depth, will etch and patina
    • Quartzite: marble-like, far more stain resistant
    • Brushed metal hardware and fittings: hides fingerprints better than polished

    Coordinating Appliances, Storage, and Lighting Early

    Appliance selection has to happen before cabinetry drawings are released. A Miele column set and a Gaggenau cooktop carry different panel, clearance, and ventilation requirements. Panel-ready models change door sizes entirely. 

    Architectural Digest notes the ongoing pull toward hidden appliance design, where appliances disappear into the millwork.

    Storage follows the same logic: spice pull-outs, appliance garages, and outlet locations are cabinetry decisions, not afterthoughts.

    How to Compare Kitchen Firms Before You Commit

    Compare firms on capability and accountability, not on renderings. Two proposals can show identical images and describe completely different levels of control over the outcome.

    Ask each firm to walk you through a finished project from first meeting to final install, including what went wrong and how they handled it.

    Assessing Fabrication Capability and Installation Coordination

    Find out whether the firm fabricates, subcontracts, or resells. Then ask who supervises installation, how templating is scheduled, and who inspects reveals and door alignment before you see the room. Reviewing recent kitchen projects with these questions in mind is more useful than scrolling a gallery.

    Evaluating Brand Systems Without Letting Labels Lead

    Imported European cabinet systems are engineered beautifully, but they are built to fixed module sizes. A showroom label tells you about a catalog, not about how the system will meet the walls you actually have.

    Modular kitchen systems shine in clean, square rooms. In an older Chicago building with irregular walls, bespoke fabrication often fits better and wastes less space.

    Confirming One Point of Accountability Through Completion

    Ask a blunt question: if the countertop does not fit the cabinets, who fixes it and who pays? A single contract with design, procurement, and installation under one roof removes the finger-pointing that stalls projects.

    Move From Comparison to a Confident Project Plan

    You now have a framework. The next step is turning it into a conversation with a firm that can show its process, not just its portfolio.

    Preparing for a Productive Initial Consultation

    Bring these to your first meeting:

    • Photos of the existing kitchen and adjacent rooms
    • Any floor plans, surveys, or building association rules
    • A realistic budget range and a target timeline
    • Five images you like and one sentence explaining why
    • A short list of daily frustrations with the current space

    A Collaborative Path From Vision to Installation

    Threshold Design Lab works through three phases: design and planning, procurement and curation, then execution and installation, with residential kitchen design and fabrication handled by the same team. Through TDL Custom, bespoke kitchen systems, custom kitchen millwork, and full-scale office build-outs are drawn and built in-house.

    The point of integrated design and fabrication is not speed for its own sake. It is that the person who drew the detail is answerable for how it lands on your wall.

    Bringing Your Chicago Kitchen From Inspiration to Plan

    The firms worth hiring will welcome hard questions about drawings, lead times, and who owns the install. If a proposal cannot show you a space plan, an elevation, and an itemized budget, it is describing a hope rather than a plan.

    Start the conversation about your Chicago kitchen with a studio that listens first. Tell us about your space, and we will walk you through what a full-service process looks like from concept through final installation, including commercial interior work if your project extends beyond the home.

    Ready to move from inspiration to a real plan? Let’s talk about your kitchen and bring your questions. No pressure, no verdict, just a conversation about what your kitchen could be.

    Frequently Asked Questions

    Who Are the Top Luxury Kitchen Designers in My Area?

    Look for Chicago studios with three decades of built work, verifiable references, and in-house or closely managed fabrication. Portfolio depth matters less than whether they can show drawings and budgets from real projects, not just finished photos.

    What Should I Look for When Choosing a Luxury Kitchen Design Professional?

    Prioritize a listening-first discovery process, complete documentation, and one point of accountability through installation. Reviewing how luxury kitchen designers structure their phases tells you more than any rendering will.

    How Much Does a Custom Luxury Kitchen Design Typically Cost?

    In the Chicago market, high-end kitchen projects commonly run from the low six figures upward. This is driven by cabinetry scope, appliance package, and structural work. Design fees are usually charged as a percentage of project cost or a fixed fee tied to deliverables.

    What Are the Best Luxury Kitchen Cabinet and Appliance Brands?

    For appliances, Miele, Gaggenau, and similar premium lines lead on performance and panel-ready integration. For cabinetry, European systems perform beautifully in square rooms. Bespoke fabrication usually fits older Chicago housing stock more precisely.

    Which Designers Are Known for Modern Luxury Kitchen Interiors?

    Firms known for modern luxury work tend to specialize in handleless fronts, integrated lighting, and tight reveals. All of these require exact fabrication tolerances. Ask to see close-up photos of door gaps and corner conditions in completed installations.

    How Long Does It Take to Design and Build a Bespoke Kitchen?

    Plan on six to ten weeks for design and documentation. Eight to sixteen weeks for cabinetry fabrication and appliance lead times. Then six to twelve weeks on site. Permits and structural changes extend that timeline. This is why planning a kitchen renovation starts well before demolition.

  • Custom Woodworking in Chicago: What Precision Really Buys You

    Custom Woodworking in Chicago: What Precision Really Buys You

    Three proposals sit on your kitchen counter. One quotes stock cabinets that arrive in four weeks. One quotes semi-custom boxes with upgraded doors. The third quotes custom woodworking in Chicago at nearly twice the price, with a lead time measured in months. 

    The question underneath all three is the same: what does the extra money actually buy, and will you feel it every day for the next twenty years?

    That question deserves a technical answer, not a sales answer. Threshold Design Lab has spent three decades working across Chicago design, remodeling, and fabrication, and the pattern is consistent. Precision is rarely about ornament. It shows up in how a panel meets an out-of-square wall, how a drawer carries weight in year twelve, and how closely the installed room matches the elevation you approved.

    In this guide, you’ll discover how custom, semi-custom, and off-the-shelf cabinetry differ in materials, tolerances, and process, and how deliverables like space plans and elevations close the gap between intent and finished millwork. 

    By the end, you should be able to read a proposal and ask sharper questions about construction, joinery, and who is accountable when design meets fabrication.

    Custom, Semi-Custom, and Off-the-Shelf: The Differences That Matter

    The three tiers are not just price points. They differ in carcass thickness, joinery, hardware, sizing increments, and how much of your room they can actually accommodate.

    Tier Typical Construction Sizing Lead Time
    Stock 1/2-inch MDF or particleboard, melamine interiors Fixed 3-inch increments 1 to 5 weeks
    Semi-custom 1/2-inch MDF, plywood upgrades available Limited modifications 5 to 6 weeks
    Custom 3/4-inch furniture-grade plywood, solid wood fronts Built to measured conditions 8 weeks to 6 months

    How Stock Cabinetry Limits Fit, Finish, and Function

    Stock boxes are built to a catalog, not to your room. Because they come in fixed widths, the leftover space gets absorbed by filler strips, and those fillers land in the most visible places: next to the range, at the end of a run, beside a window casing.

    Construction follows the same logic. Guidance on kitchen cabinet types and construction notes that stock carcasses commonly use half-inch MDF or particleboard with lightweight glides that do not fully extend. In a busy Chicago kitchen, that hardware is usually the first thing to fail.

    Where Semi-Custom Cabinets Offer Flexibility, and Where They Stop

    Semi-custom cabinets in Chicago give you real choices: better door styles, upgraded plywood boxes, deeper finish options, and some width or depth modifications for a straightforward layout in a newer building; that is often enough.

    The ceiling arrives at geometry. Semi-custom lines still work from a fixed catalog of shapes, so angled walls, radiator bays, chimney chases, and 9-foot-plus ceilings get handled with trim rather than design. You end up adapting your room to the product.

    What Fully Custom Cabinetry Makes Possible

    A fully custom cabinet in Chicago is drawn around your conditions. Interior fittings, drawer depths, appliance panels, and reveal widths are all decisions rather than defaults, which is why the process starts with measurement instead of a catalog. Our overview of custom cabinets in Chicago walks through how those choices get documented.

    That freedom only pays off if the shop can hold tight tolerances in a house that was never built square.

    What Precision Custom Woodworking Looks Like in a Chicago Home

    Precision is measurable. In older Chicago housing stock, it means building to the walls you have, not the walls the plan assumes.

    Measuring Existing Conditions and Working Within Real Tolerances

    A field measure in a Lincoln Park greystone or a Logan Square two-flat routinely finds walls out of plumb by a half inch or more over eight feet, plaster that bows mid-wall, and floors that fall toward the exterior. A woodworker planning custom work records those deviations before drawing a single box.

    The fix is designed in advance. Oversized scribe stiles, adjustable levelers, filler panels concealed at inside corners, and separate toekick assemblies that get leveled before the cabinets land.

    Selecting Materials, Veneers, Hardware, and Finishes for Longevity

    Material choices carry the long-term risk. Chicago swings from humid July afternoons to dry February heat, so wood movement is a design input.

    • Carcass: 3/4-inch furniture-grade plywood for screw retention and weight capacity
    • Drawer boxes: solid maple or birch with bottoms captured in routed grooves
    • Doors: floating center panels that expand and contract without cracking the finish
    • Hardware: full-extension, soft-close glides rated for real loads
    • Finish: catalyzed conversion varnish or a spray-applied paint system, not a brushed topcoat

    Evaluating Joinery, Edge Details, Alignment, and Installation Quality

    Joinery tells you what you paid for. Dovetailed drawers, dadoed shelves, and mortise and tenon face frames hold up under decades of use in ways staples and dowels do not.

    Alignment is the other tell. The architectural woodwork standards for cabinet reveals set a nominal reveal near 1/8 inch with a strict variance across an elevation. This is why quality craftsmanship reads as calm rather than busy.

    Planning Built-Ins and Cabinetry Around How You Live

    Good custom woodworking starts as a use problem, not a style problem. The plan documents what goes where, how you move, and what has to disappear.

    Using Space Plans to Resolve Storage, Circulation, and Daily Use

    A space plan tests clearances before anything is ordered: walkways, appliance door swings, seating pull-back at an island, and the path from range to sink. In a condo with a 42-inch aisle, moving a run of cabinets three inches changes how two people cook together.

    Storage is inventoried at this stage. Sheet pans, stand mixers, recycling, printers, and files all get assigned a location, which is what turns generic boxes into custom furniture that fits your life.

    Translating Design Intent Through Elevations and Material Selections

    Elevations are where intent becomes buildable. Door styles, reveal widths, hardware placement, panel heights, and appliance integration are all drawn to scale and approved before fabrication.

    Material selections travel with those drawings: species, veneer layup, paint sheen, edge profile, and pull finish. That documentation is the backbone of residential interior design in Chicago. It removes guesswork from the shop floor.

    Designing Chicago Custom Built-Ins for Kitchens, Offices, and Living Areas

    Chicago custom built-ins earn their cost in awkward space: a bay window bench, a bookcase wall around a chimney breast, a home office tucked under a stair. Each one is a fabrication problem shaped by an existing condition.

    Commercial work follows the same logic at a larger scale. Commercial interior design work coordinates reception desks and casework with base building tolerances. What decides the outcome is what happens after approval, when drawings move to the shop.

    From Design Drawings to Fabrication and Installation

    This is where most projects gain or lose their precision. The drawings can be excellent, and the room can still miss.

    Why the Design-to-Fabrication Handoff Often Creates Risk

    When a designer hands a set of elevations to an outside shop, someone has to interpret them. Reveal dimensions get rounded, a species substitution gets made for lead time, a scribe allowance disappears, and nobody flags it until installation day.

    That translation gap is rarely malicious. It comes from two teams working with different priorities, different measurements, and no shared accountability for the finished look.

    How In-House Fabrication Supports a More Seamless Result

    Vertical integration removes the handoff. Through TDL Custom, the fabrication arm behind our in-house custom millwork, the same team that drew the elevation builds the piece and installs it.

    Practically, that means shop drawings are checked against the field measure, finish samples are sprayed on the actual substrate, and a mid-fabrication change gets resolved in one conversation instead of three.

    What to Expect During Procurement, Scheduling, and Final Installation

    Once selections are approved, the work becomes logistics. A realistic schedule accounts for the long poles first.

    • Ordering appliances and specialty hardware, then confirming actual cut sheets
    • Sequencing millwork against demolition, rough-in, drywall, and flooring
    • Managing lead times on veneers, stone, and imported fittings
    • Verifying the final field measure before cut lists are released
    • Installing, scribing, adjusting doors and drawers, then touching up finish

    Choosing the Right Scope and Partner for Your Project

    Scope is a decision you make early, and it shapes everything that follows. Not every project needs full custom, and a good partner will tell you so.

    Questions to Ask Before Commissioning Bespoke Woodwork

    Ask questions that reveal process rather than preference:

    • Who performs the final field measure, and when?
    • Is the carcass plywood or MDF, and what thickness?
    • What joinery is used at drawers and face frames?
    • Who installs, and who is responsible for punch list corrections?
    • Can I see comparable completed millwork projects?

    Balancing Budget, Lead Time, and Long-Term Value

    Custom work costs more per linear foot and takes longer, so spend it where it does the most work. Many Chicagoland homeowners, from Bolingbrook and Naperville to Illinois lakefront condos, use custom fabrication for the kitchen and one or two built-ins, then use quality stock elsewhere.

    Value shows up in years, not weeks. A well-built box with solid joinery and rated hardware can be refinished and re-hardwared rather than replaced.

    Starting a Collaborative Conversation About Your Space

    The first conversation should feel like listening, not pitching. At Threshold Design Lab, that means understanding how you cook, work, and store things before anyone proposes a layout, since our kitchen renovation planning process is built around your constraints.

    Frequently Asked Questions

    How Much Does Custom Furniture Cost in Chicago?

    Custom cabinetry generally runs from about $150 to $1,200 per linear foot depending on materials, joinery, and finish complexity. Freestanding custom furniture is priced by the piece, driven by species, hardware, and hand-finishing. A detailed, itemized budget during design keeps those numbers from moving later.

    Where Can I Find Experienced Woodworkers Near Me?

    Look for shops that produce their own shop drawings and handle installation, not just fabrication. Ask to see finished work in homes similar to yours in age and construction. Verifying an active contractor license with the City of Chicago is a reasonable additional step.

    What Types of Custom Wood Furniture Can Be Made for My Home?

    Kitchen systems, islands, vanities, closet interiors, bookcase walls, window seats, media units, wine storage, and full office build-outs are all standard custom woodwork. Freestanding tables, benches, and headboards can be built to match your millwork. Anything constrained by an existing wall, ceiling, or appliance is a strong candidate.

    How Long Does a Custom Woodworking Project Usually Take?

    Design and documentation typically take four to eight weeks. Fabrication and finishing add eight weeks to several months. Complex veneers, specialty finishes, and imported hardware extend that window. Installation itself is usually the shortest phase.

    What Should I Look for When Choosing a Custom Furniture Maker?

    Look for measurable specifics: plywood thickness, joinery type, hardware brand and load rating, and finish system. Ask how field conditions are measured and how scribe allowances are handled. Clear answers to those questions predict the quality of the installed result.

    Where Can Beginners Take Woodworking Classes in Chicago?

    Community woodshops, park district programs, and continuing education courses at local colleges all offer beginner bench classes. They are a useful way to understand joinery and finishing firsthand. That knowledge makes you a sharper reader of professional proposals.

    Precision Is a Process, Not a Price Tag

    The real difference between stock, semi-custom, and fully custom is not the door style. It is how much of your actual room, your actual habits, and your actual walls the finished work accounts for.

    If you have inspiration images and rough dimensions but no plan, the next step is a conversation about scope, budget, and sequencing. Tell us about your space, and we will walk you through what a full-service process looks like from concept through installation.

    Ready to move from inspiration to a real plan? Start a project conversation, and we will listen first.

  • Custom Metal Fabrication in Chicago: Design Intent, Precisely Built

    Custom Metal Fabrication in Chicago: Design Intent, Precisely Built

    You have a stair rail that fights the architecture, or a range hood that looks anonymous next to a serious kitchen. That is usually the moment custom metal fabrication in Chicago enters the conversation. The real question is not whether a shop can build to your drawing. It is whether the piece that arrives on site matches the intent you approved on paper.

    That gap is where good projects lose their edge. A designer specifies a slim blackened steel guard with hairline welds and a specific reveal at the floor. A disconnected shop delivers something close enough. Close enough is what you live with for twenty years. 

    Studios that keep design, fabrication, and installation under one roof close that gap, because the person drawing the detail answers to the person building it.

    Keep reading to learn how bespoke metal is specified, drawn, cut, welded, finished, and installed inside a full-service interior process. By the end, you will know what to ask a designer about tolerances, samples, and coordination before you approve a single fabrication proposal.

    Where Bespoke Metal Makes an Interior More Functional

    Custom metal earns its place when it solves a problem a catalog product cannot. In residential and commercial interiors across Chicagoland, that usually means fitting an odd dimension, carrying a finish story across rooms, or standing up to daily contact without looking worn.

    Stair Rails and Guards That Complement the Architecture

    A stair rail is the most touched piece of metal in a home. Custom fabrication lets you set the exact handrail diameter, the spacing of guards, and how the assembly meets the stringer or the wall. In a Lincoln Park greystone, a thin blackened carbon steel rail keeps sightlines open on a narrow run. 

    In a River North condo, brushed stainless or bronze-toned brass reads calmer against glass.

    Range Hoods, Wall Panels, and Window Frames With Presence

    Hoods and panels are where sheet metal does quiet architectural work. A custom hood can be built to the exact width of the cabinet run, with a seamed edge instead of a bolted trim strip. Copper and aged brass develop a living patina. Stainless and aluminum hold a stable, even tone.

    Metal Common Interior Use What to Expect
    Stainless steel Hoods, counters, panels Durable, consistent, easy to clean
    Carbon steel Rails, guards, frames Takes blackened or waxed finishes
    Aluminum Window frames, light panels Light, corrosion-resistant, powder coats well
    Copper / brass Accents, hoods, hardware Patinas over time unless sealed

    Furniture Bases and Cabinet Hardware Built for Daily Use

    Table bases and cabinet pulls take abuse, so gauge and weld quality matter more than styling. A custom pull can be sized to the drawer face and machined to fit a specific bore, which off-the-shelf hardware rarely does.

    Once you know which elements deserve custom metal work, the next decision is where the process actually starts.

    Start With the Space, Not the Shop Drawing

    Good metalwork begins with the room, not the CAD file. Measuring, proportion, and clearances get resolved before a metal fabricator quotes anything. A drawing built on a guess produces a part that does not fit.

    Aligning Proportion, Finish, and Material With the Interior Vision

    Metal has to agree with everything around it. A heavy 2-inch rail overwhelms a delicate stair. A thin one looks flimsy beside wide-plank oak. Finish direction matters too. Brushed grain running horizontally across a panel reads differently than vertical grain under the same lighting.

    Taking Field Measurements in Chicago’s Older Buildings and High-Rises

    Older Chicago housing stock is rarely square. Floors slope, walls bow, and stair risers vary by a quarter inch or more from top to bottom. Field measurements taken after demolition, not before, prevent the most expensive surprises. High-rise work adds its own limits. Elevator dimensions, freight windows, and building rules that cap on-site welding.

    Resolving Traffic Flow, Clearances, and Code Requirements Early

    Guard height, opening size, and handrail graspability are code items, not preferences. Chicago also enforces permitting and construction and renovation requirements that shape what gets installed and when. 

    Where structural loads are involved, engineers should sign off before fabrication. Quality assurance checks should reference those approved dimensions. With the space understood, the drawings can finally do their job.

    From Design Documentation to Fabrication Details

    This is where intent becomes buildable information. Plans, elevations, and physical samples define scope so the shop is not interpreting. Neither is the installer.

    Using Plans, Elevations, and Samples to Define the Scope

    A complete package shows the piece in context and in isolation: overall dimensions, connection points, material thickness, weld treatment, and finish. Attach a physical sample chip to the specification. Two shops can both deliver “satin brass” and produce visibly different results.

    Selecting Cutting, Forming, and Welding Methods

    Method choice affects both appearance and cost. Typical decisions include:

    • Laser cutting for clean, repeatable profiles and perforated panel patterns
    • Punching for fast, uniform holes in production runs
    • Forming on a press brake to set crisp bend radii on sheet metal
    • TIG welding where the joint will be visible and needs to be ground nearly invisible
    • Certified welders for structural connections that carry real load

    Reviewing Mockups and Finishes Before Full Production

    Approve a mockup before the full run. A single rail section or a 12-inch panel sample tells you what a rendering cannot: how light hits the finish, how the weld reads, how the edge feels. Skilled fabrication is still a hands-on trade, as this look at modern metalworking craftsmanship illustrates. Quality control at this stage costs hours. Catching it at install costs weeks.

    Documentation only holds up if one team owns it from drawing to delivery.

    Why Integrated Coordination Protects the Finished Result

    Metal rarely fails on its own. It fails at the joint between trades. This is why coordination decides the finished result more than any single fabrication step.

    Avoiding the Translation Gap Between Design Intent and Shop Execution

    When a third-party shop receives a drawing without context, it optimizes for its own workflow. Reveals get standardized, welds get simplified, mounting hardware becomes whatever is in stock. Many metal fabrication services are built around contract manufacturing, original equipment manufacturer (OEM) runs, or point-of-purchase displays. All of these reward speed over nuance.

    Coordinating Metal With Millwork, Stone, Lighting, and Installation

    Interiors are assemblies of dissimilar materials meeting at tight lines. A steel toe kick has to align with cabinet scribes. A hood has to clear a stone backsplash by a consistent margin. When metal and custom millwork fabrication happen under the same roof, those junctions are resolved in the shop instead of negotiated on site. 

    The in-house handoff also lets a cabinet be built around the metal part rather than trimmed to accept it.

    Creating a Clear Path From Procurement Through Final Assembly

    Lead times drive the schedule. Finishes, glass, and specialty hardware often arrive later than the metal itself, so procurement and assembly sequencing get planned alongside the interior design project timeline. One schedule, one accountable party, fewer gaps.

    Scope, of course, still depends on the kind of project you are building.

    Choosing the Right Scope for Residential and Commercial Projects

    The right amount of custom metal is the amount that solves real problems. Residential and commercial projects reach that answer differently. Construction sequencing follows.

    Refined Residential Details for Kitchens, Entries, and Living Spaces

    In homes, metal works best as a small number of deliberate moves: a stair guard, a hood, a fireplace surround, a set of matching pulls. Concentrating the budget on two or three visible elements produces a stronger result than spreading it thin. This pairs naturally with residential interior design services where the metal is drawn at the same time as the cabinetry.

    Commercial Interiors That Balance Durability and Brand Expression

    Commercial spaces need finishes that survive traffic and cleaning. Heavier gauges, powder coating, and replaceable components matter more than they do at home. A reception desk face, a display system, or a partition frame carries brand identity while taking daily contact. This is why commercial interior design projects treat metal as both aesthetic and infrastructure.

    Questions to Ask Before Approving a Fabrication Proposal

    Many shops serve heavy industries such as trailers, energy, mining, aerospace, and defense. Those capabilities are real, but they are not the same as interior finish work. Ask:

    • Have you built architectural pieces at this level of finish before?
    • Who takes the field measurements, and when?
    • What mockups or samples do I approve before production?
    • How are welds treated where they will be visible?
    • Who is responsible if the piece does not fit on site?
    • What is the lead time, and what drives it?

    The clearer those answers, the easier it becomes to fold metalwork into the larger design.

    Bring the Metalwork Into the Larger Vision

    Custom metal reaches its potential when it is designed as part of the whole interior. Not ordered separately at the end. That means one team holding the drawings, the shop schedule, and the install.

    Begin With a Collaborative Project Conversation

    Every strong project starts with listening: how you use the space, what the room has to accomplish, and where metal genuinely improves it. 

    Threshold Design Lab has spent three decades on Chicago design, remodeling, and fabrication work. That conversation always comes before any specification. Bring photos, dimensions, and the details that bother you. Past design and build projects are a useful reference point for that discussion.

    Coordinate Design, TDL Custom Fabrication, and Installation

    TDL Custom, the in-house fabrication arm and a boutique Chicago millwork studio, builds the millwork and coordinates the custom metal work so both meet correctly on site. Quality assurance happens at the bench, not during punch list. Whether the scope is a single stair rail or a full kitchen with integrated metal and cabinetry, the sequence stays the same: listen, document, fabricate, install.

    Start the conversation about your Chicago renovation. Tell us about your project, and we will walk you through what the process looks like from concept through installation.

    Frequently Asked Questions

    What Types of Metal Can a Fabrication Shop Work With?

    Most architectural shops work in stainless steel, carbon steel, aluminum, brass, bronze, and copper. Each behaves differently under heat, finishing, and daily use, so material choice should follow the location and the finish you want.

    How Much Does a Custom Metal Fabrication Project Typically Cost?

    Cost depends on material, gauge, complexity of forming, weld finishing, and installation access. A set of custom pulls sits at one end of the range: a full stair guard with structural connections sits far higher. Ask for pricing broken out by material, labor, finish, and install.

    How Long Does It Take to Complete a Custom Metal Fabrication Order?

    Simple pieces often run four to eight weeks after drawings and finishes are approved. Larger assemblies with specialty finishes or engineering review take longer. Field measurement timing usually controls the schedule more than shop capacity.

    Can a Fabricator Create Custom Railings, Stairs, and Architectural Metalwork?

    Yes, provided the shop has architectural experience and certified welders for load-bearing work. Ask to see completed railings and stairs at a comparable finish level, not just industrial or structural examples.

    Do Metal Fabrication Shops Provide Design, Welding, Finishing, and Installation Services?

    Some do all four; many handle only fabrication and hand off install. Confirm early who is responsible for shop drawings, finishing, and on-site fitting. That is where accountability usually breaks down.

    How Can I Choose a Reliable Metal Fabrication Company in Chicago?

    Look for documented drawings, mockups before production, and clear responsibility for measurements and installation. A firm that also handles custom cabinetry in Chicago can coordinate the metal and millwork junctions that otherwise get resolved on site.